Nokia N95 8GB User Guide Issue 3.
DECLARATION OF CONFORMITY Hereby, NOKIA CORPORATION declares that this RM-320 product is in compliance with the essential requirements and other relevant provisions of Directive 1999/5/EC. A copy of the Declaration of Conformity can be found at http://www.nokia.com/ phones/declaration_of_conformity/. © 2008 Nokia. All rights reserved. Nokia, Nokia Connecting People, Nseries, N95, N-Gage, Visual Radio, and Nokia Care are trademarks or registered trademarks of Nokia Corporation.
support, functionality of the applications, or the information in the applications or these materials. Nokia does not provide any warranty for the third-party applications. BY USING THE APPLICATIONS YOU ACKNOWLEDGE THAT THE APPLICATIONS ARE PROVIDED AS IS WITHOUT WARRANTY OF ANY KIND, EXPRESS OR IMPLIED, TO THE MAXIMUM EXTENT PERMITTED BY APPLICABLE LAW.
Contents Contents For your safety .................................................8 About your device.................................................................9 Network services................................................................10 Enhancements, batteries, and chargers...........................10 Get connected.................................................11 Useful information.........................................12 Help..........................................................
Music folder....................................................36 Music player.........................................................................36 Play a song or a podcast episode...................................36 Music menu.......................................................................37 Playlists.............................................................................37 Podcasts............................................................................
Contents Personalise your device.................................68 Themes................................................................................68 Profiles—set tones.............................................................68 Modify the standby mode..................................................69 Modify the main menu.......................................................69 Time management.........................................70 Clock ..................................................
Troubleshooting...........................................103 Battery information.....................................106 Charging and discharging................................................106 Nokia battery authentication guidelines.......................107 Authenticate hologram.................................................107 What if your battery is not authentic?........................107 Care and maintenance.................................108 Disposal........................................
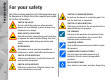
For your safety For your safety Read these simple guidelines. Not following them may be dangerous or illegal. Read the complete user guide for further information. SWITCH ON SAFELY Do not switch the device on when wireless phone use is prohibited or when it may cause interference or danger. ROAD SAFETY COMES FIRST Obey all local laws. Always keep your hands free to operate the vehicle while driving. Your first consideration while driving should be road safety.
Remember to make back-up copies or keep a written record of all important information stored in your device. CONNECTING TO OTHER DEVICES When connecting to any other device, read its user guide for detailed safety instructions. Do not connect incompatible products. EMERGENCY CALLS Ensure the phone function of the device is switched on and in service. Press the end key as many times as needed to clear the display and return to the standby mode. Enter the emergency number, then press the call key.
For your safety Your device may have preinstalled bookmarks and links for third-party internet sites. You may also access other thirdparty sites through your device. Third-party sites are not affiliated with Nokia, and Nokia does not endorse or assume liability for them. If you choose to access such sites, you should take precautions for security or content. This device supports WAP 2.0 protocols (HTTP and SSL) that run on TCP/IP protocols.
Nokia N95 8GB supports the following connectivity methods: ● 2G and 3G networks ● Bluetooth connectivity — to transfer files and connect to compatible enhancements. See "Bluetooth connectivity", p. 28. Get connected Get connected ● Nokia AV connector (3.5 mm) — to connect to compatible headsets, headphones, TVs , or home stereo sets. See "TV-out mode", p. 58. ● Data cable — to connect to compatible devices, such as printers and PCs. See "USB", p. 31.
Useful information Useful information Model number: N95-2 Hereinafter referred to as Nokia N95 8GB. For local services and warranty information, please refer to the separate booklet. Help Your device has context-sensitive help. When an application is open, select Options > Help to access help for the current view. When you are reading the instructions, to switch between help and the application that is open in the background, press and hold .
Settings Your device normally has MMS, GPRS, streaming, and mobile internet settings automatically configured in the device, based upon your network service provider information. You may have settings from your service providers already installed in your device, or you may receive or request the settings from the network service providers as a special message. You can change the general settings in your device, such as language, standby mode, display, and keypad lock settings. See "General settings", p.
Useful information Prolong battery life Many features in your device increase the demand on battery power and reduce the battery life time. To save battery power, note the following: ● Features that use Bluetooth technology, or allowing such features to run in the background while using other features, increase the demand on battery power. To prolong the operating time of your device, turn the Bluetooth technology off when you do not need it.
Pressing C does not close Music player. To close Music player, select it from the list and Options > Exit. Useful information ● Leaving applications running in the background increases the demand on battery power. To close the applications you do not use, press and hold , scroll to an application in the list, and press C.
Your device Your device Welcome When you switch on your device for the first time, the Welcome application is displayed. Select from the following: With the Switch application, you can transfer content, such as contacts, between two compatible Nokia devices using Bluetooth connectivity or infrared. There may also be a demonstration about your device available in the Welcome application. If the other device cannot be powered on without a SIM card, you can insert your SIM card in it.
For some device models, the Switch application is sent to the other device as a message. To install the Switch application on the other device, open the message, and follow the instructions on the display. If you select infrared, connect the two devices. 4. From your device, select the content you want to transfer from the other device. Once the transfer has started, you can cancel it and continue later. Transferring time depends on the amount of data to be transferred.
Your device A packet data connection is active in a part of the network that supports EGPRS (network service). indicates the connection is on hold and that a connection is available. The icons indicate that EGPRS is available in the network, but your device is not necessarily using EGPRS in the data transfer. A UMTS packet data connection is active (network service). indicates the connection is on hold and that a connection is available.
You can select to lock the keypad automatically after a time-out or when the 2-way slide is closed. See "Security settings", p. 95. Offline profile Press , and select Tools > Profiles > Offline. The offline profile lets you use the device without connecting to the wireless network. When you activate the offline profile, the connection to the wireless network is turned off, as indicated by in the signal strength indicator area. All wireless RF signals to and from the device are prevented.
Your device Multimedia menu With the multimedia menu, you can view your most frequently used multimedia content. The selected content is shown in the appropriate application. To open or close the multimedia menu, press the multimedia key. To browse the tiles, scroll left or right. To select items, press the scroll key. To return to the multimedia menu from an open application, press the multimedia key.
To browse the web, you need to have an internet access point configured in your device. For more information on the web browser, see the extended user guide on the product support pages of the Nokia website. Browse the web Press , and select Web. Important: Use only services that you trust and that offer adequate security and protection against harmful software.
Web browser folders. To access the pages you have saved, select Options > Bookmarks > Saved pages. To open a sublist of commands or actions for the page that is open, select Options > Service options (if supported by the web page). To allow or prevent the automatic opening of multiple windows, select Options > Window > Block popups or Allow pop-ups. Shortcuts while browsing ● Press 1 to open your bookmarks. ● Press 2 to search for keywords in the current page.
The Web application automatically detects if a web page contains web feeds. To subscribe to a web feed, select Options > Subscribe. To view the web feeds to which you have subscribed, in the bookmarks view, select Web feeds. To update a web feed, select it and Options > Refresh. To define how the web feeds are updated, select Options > Settings > Web feeds. Widgets The web browser supports widgets (network service).
Web browser commonly found on major news organisation web pages, personal weblogs, online communities that offer the latest headlines, and article summaries. Web feeds use RSS and Atom technologies. Empty the cache The information or services you have accessed are stored in the cache memory of the device. A cache is a memory location that is used to store data temporarily. If you have tried to access or have accessed confidential information requiring passwords, empty the cache after each use.
● ● ● Page settings ● Load content — Select whether you want to load images and other objects while browsing. If you select Text only, to load images or objects later during browsing, select Options > Tools > Load images. ● Screen size — Select between full screen and the normal view with the options list. ● Default encoding — If text characters are not shown correctly, you can select another encoding according to language for the current page.
Connections Connections Your device offers several options to connect to the internet or to another compatible device or PC. For more information on connectivity, see the extended user guide on the product support pages of the Nokia website. Wireless LAN Your device supports wireless local area network (WLAN). With WLAN, you can connect your device to the internet and compatible devices that have WLAN.
When the device is in the offline profile, you can still use WLAN (if available). Remember to comply with any applicable safety requirements when establishing and using a WLAN connection. Tip: To check the unique media access control (MAC) address that identifies your device, enter *#62209526# in the standby mode. WLAN wizard The WLAN wizard helps you to connect to a WLAN and manage your WLAN connections. The WLAN wizard shows the status of your WLAN connections in the active standby mode.
Connections ● Edit access point — Edit the details of an existing IAP. You can also use connection manager to create internet access points. See "Active data connections", p. 28. Connection manager Active data connections Press , and select Tools > Connectivity > Conn. mgr. > Active data connections.
This device is compliant with Bluetooth Specification 2.0 supporting the following profiles: Advanced Audio Distribution Profile, Audio/Video Remote Control Profile, Basic Imaging Profile, Basic Printing Profile, Dial-up Networking Profile, File Transfer Profile, HandsFree Profile, Headset Profile, Human Interface Device Profile, Object Push Profile, SIM Access Profile, and Synchronization Profile.
Connections select Bluetooth > Off or My phone's visibility > Hidden. Do not pair with or accept connection requests from an unknown device. This protects your device from harmful content. Send data using Bluetooth connectivity When the connection is established, Sending data is displayed. Tip: When searching for devices, some devices may show only the unique address (device address). To find the unique address of your device, enter *#2820# in the standby mode.
Paired devices are indicated by in the device search. To set a device as authorised or unauthorised, scroll to the device, and select from the following options: ● Set as authorised — Connections between your device and the authorised device can be made without your knowledge. No separate acceptance or authorisation is needed. Use this status for your own devices, such as your compatible headset or PC or devices that belong to someone you trust. indicates authorised devices in the paired devices view.
Connections 32 With Nokia Nseries PC Suite you can, for example, transfer images between your device and a compatible PC. Always create the connection from the PC to synchronise with your device.
Nokia Video Centre Nokia Video Centre With Nokia Video Centre (network service), you can download and stream video clips over the air from compatible internet video services using packet data or WLAN. You can also transfer video clips from a compatible PC to your device and view them in Video Centre. Video Centre supports the same file formats as RealPlayer. All videos are played in the landscape mode by default. Your device may have predefined services.
Nokia Video Centre 6. When the clip is playing, use the media keys to control the player. To adjust the volume, press the volume key. Downloads continue in the background if you exit the application. The downloaded videos are saved in Video centre > My videos. To connect to the internet to browse available services that you can add to the main view, select Add new services. Internet videos Internet videos are video clips distributed in the internet using RSS-based feeds.
2. Select Data transfer as the connection mode. 3. Select the videos you want to copy from your PC. 4. Transfer the videos to E:\My Videos in the mass memory of your device. The transferred videos appear in the My videos folder in Video Centre. Video files in other folders of your device are not displayed. Settings ● Parental control — Activate the parental lock for video services. ● Preferred memory — Select whether downloaded videos are saved in the device memory or mass memory.
Music folder Music folder Music player Warning: Listen to music at a moderate level. Continuous exposure to high volume may damage your hearing. Do not hold the device near your ear when the loudspeaker is in use, because the volume may be extremely loud. Music player supports files formats such as AAC, AAC+, eAAC+, MP3, and WMA. Music player does not necessarily support all features of a file format or all the variations of file formats. You can also use Music player to listen to podcast episodes.
To go to the next item, press . To return to the beginning of the item, press . To skip to the previous item, press again within 2 seconds after a song or podcast has started. To switch random play ( Shuffle. or switch to another open application, press and hold . To close the player, select Options > Exit. Music menu Press Music. , and select Music > Music player > Music folder To fast forward or rewind, press and hold . The music menu shows the available music.
Music folder 4. If you select Yes, select artists to find the songs you want to include in the playlist. Press the scroll key to add items. To show the song list under an artist title, scroll right. To hide the song list, scroll left. 5. When you have made your selections, select Done. The playlist is saved to the mass memory of your device. To add more songs later, when viewing the playlist, select Options > Add songs.
● To synchronise music with Windows Media Player, connect the compatible USB data cable and select Media player as the connection mode. ● To use Nokia Music Manager in Nokia Nseries PC Suite, connect the compatible USB data cable and select PC Suite as the connection mode. Use Data transfer and Media player modes to transfer files to the mass memory of your device. To change the default USB connection mode, press , and select Tools > Connectivity > USB > USB mode.
Music folder 3. To finalise the setup for automatic synchronisation, click Finish. When the Sync this device automatically check box is checked and you connect your device to the PC, the music library in your device is automatically updated based on the playlists you select for synchronisation in Windows Media Player. If no playlists have been selected, the whole PC music library is selected for synchronisation.
The FM radio depends on an antenna other than the wireless device antenna. A compatible headset or enhancement needs to be attached to the device for the FM radio to function properly. Press , and select Music > Radio. Note that the quality of the radio broadcast depends on the coverage of the radio station in that particular area. You can normally make a call or answer an incoming call while listening to the radio. The radio is muted when there is an active call. To start a station search, select or .
Music folder For more information, see the extended user guide on the product support pages of the Nokia website. Settings Before using Nokia Podcasting, set your connection and download settings. The recommended connection method is WLAN. Check with your service provider for terms and data service fees before using other connections. For example, a flat rate data plan can allow large data transfers for one monthly fee.
To start a download, select the episode title. To download or to continue to download selected or marked episodes, select Options > Download or Continue download. You can download multiple episodes at the same time. Music folder To see individual episode titles (an episode is a particular media file of a podcast), select the podcast title. To play a portion of a podcast during download or after partial downloading, select the podcast and Options > Play preview.
Media folder Media folder For information on Flash Player, Nokia Lifeblog, and Recorder, see the extended user guide on the product support pages of the Nokia website. RealPlayer 2. Scroll to a file, and press the scroll key to play the file. To adjust the volume, use the volume key. With RealPlayer, you can play video clips or stream media files over the air without saving them to the device first.
To view the digital rights activation keys stored in your device, press , and select Applications > Media > Actv. keys. Digital rights management Content owners may use different types of digital rights management (DRM) technologies to protect their intellectual property, including copyrights. This device uses various types of DRM software to access DRM-protected content. With this device you can access content protected with WMDRM 10, OMA DRM 1.0, and OMA DRM 2.0.
Media folder 46 Options > Get new key. Activation keys cannot be updated if web service message reception is disabled. To view detailed information, such as the validity status and ability to send the file, scroll to an activation key, and press the scroll key.
To activate the main camera, press and hold the capture key, or press , and select Applications > Camera. To close the main camera, press Exit. For image capture tips and information on scenes, sequence mode, and self-timer, see the extended user guide on the product support pages of the Nokia website.
Camera Active toolbar The active toolbar provides you with shortcuts to different items and settings before and after taking a picture or recording a video. Scroll to items, and select them by pressing the scroll key. You can also define when the active toolbar is visible on the display. 1 — Capture mode indicator 2 — Active toolbar. The toolbar is not displayed during image capture. See "Active toolbar", p. 48.
to adjust sharpness (images only) to adjust contrast (images only) to adjust light sensitivity (images only) The icons change to reflect the current status of the setting. The available options vary depending on the capture mode and view you are in. See "After taking a picture", p. 50. See "After recording a video", p. 52. The active toolbar in Gallery has different options. See "Active toolbar", p. 57.
Camera Tip: To open Gallery and view the pictures you have taken, press on the side of your device twice. To activate the front camera, select Options > Use secondary camera. To take a picture, press the scroll key. To zoom in or out, scroll up or down. To leave the camera open in the background and use other applications, press . To return to the camera, press and hold the capture key.
To activate the main camera, press and hold the capture key, or press , and select Applications > Camera. Video capture indicators The video viewfinder displays the following: 7 — Total available video recording time. When you are recording, the current video length indicator also shows the elapsed time and time remaining. 8 — The device memory ( ) and mass memory ( ) indicators that show where videos are saved 9 — The video stabilisation is turned on ( "Video settings", p. 54.
Camera 2. To start recording, press the capture key. The red record icon ( ) is shown and a tone sounds, indicating that recording has started. 3. To pause recording at any time, press Pause. Video recording automatically stops if recording is set to pause and there are no keypresses within a minute. Select Continue to resume recording. To zoom in or out of the subject, use the zoom key in your device. 4. To stop recording, select Stop.
To change the main settings, in the image mode, select Options > Settings and from the following: ● Image quality — Select Print 5M - Large (2592x1944 resolution), Print 3M - Medium (2048x1536 resolution), Print 2M - Medium (1600x1200 resolution), E-mail 0.8M - Med. (1024x768 resolution), or MMS 0.3M - Small (640x480 resolution). The better the image quality, the more memory the image consumes. If you want to print the image, select Print 5M - Large, Print 3M - Medium, or Print 2M - Medium.
Camera ● Exposure compensation ( ) (images only) — If you are shooting a dark subject against a very light background, such as snow, adjust the exposure to +1 or +2 to compensate the background brightness. For light subjects against a dark background, use -1 or -2. ● Sharpness ( ) (images only) — Adjust the sharpness of the image. ● Contrast ( ) (images only) — Adjust the difference between the lightest and darkest parts of the image.
Camera ● Add to album — Select whether you want to add the recorded video clip to a certain album in Gallery. Select Yes to open a list of available albums. ● Show captured video — Select whether you want the first frame of the recorded video clip to be displayed after the recording stops. Select Play from the active toolbar (main camera) or Options > Play (secondary camera) to view the video clip. ● Default video name — Define the default name for the captured video clips.
Gallery Gallery To store and organise your images, video clips, sound clips, and streaming links, or share your files with other compatible Universal Plug and Play (UPnP) devices through wireless LAN (WLAN), press , and select Gallery. Tip: If you are in another application, to view the last saved picture in Gallery, press on the side of your device. To enter the Images & videos folder main view, press the review key again.
Active toolbar The images and video clip files in Images & videos are in a loop and ordered by date and time. The number of files is displayed. To browse the files one by one, scroll left or right. To browse files in groups, scroll up or down. In the active toolbar, scroll up or down to different items, and select them by pressing the scroll key. The available options vary depending on the view you are in and whether you have selected an image or a video clip.
Gallery to print the viewed image to start a slide show of your images to delete the selected image or video clip The available options may vary depending on the view you are in. Albums With albums, you can conveniently manage your images and video clips. To view the albums list in Gallery, select Images & videos > Options > Albums > View albums. To create a new album, in the albums list view, select Options > New album.
For all applications other than the Images & videos folder in Gallery and RealPlayer, the TV screen displays what is displayed on the screen of your device. 1. Connect a Nokia Video Connectivity Cable to the video input of a compatible TV. When you open a highlighted video clip, RealPlayer starts playing the video clip on the device display and the TV screen. See "RealPlayer ", p. 44. To watch images and video clips on TV, do the following: 2.
Gallery Before sharing images and videos online, you must subscribe to the service with an online image sharing service provider, and create a new account. You can usually subscribe to the service on the web page of the service provider. Contact your service provider for details on subscribing to the service. To upload a file from Gallery to the online service, press , and select Gallery > Images & videos.
For information on position requests and landmarks, see the extended user guide on the product support pages of the Nokia website. About GPS The Global Positioning System (GPS) is a worldwide radio navigation system that includes 24 satellites and their ground stations that monitor the operation of the satellites. Your device has an internal GPS receiver. A GPS terminal receives low-power radio signals from the satellites and measures the travel time of the signals.
Positioning (GPS) Access point. A wireless LAN access point cannot be used for this service. The packet data internet access point is asked when GPS is used for the first time in your device. To enable or disable different positioning methods, such as Bluetooth GPS, press , and select Tools > Settings > General > Positioning > Positioning methods. GPS receiver The GPS receiver is located in the bottom of the device.
Initially your device must receive signals from at least four satellites to be able to calculate the coordinates of your location. When the initial calculation has been made, it may be possible to continue calculating the coordinates of your location with three satellites. However, the accuracy is generally better when more satellites are found. Maps For more information on Maps, see the extended user guide on the product support pages of the Nokia website. About Maps Press , and select Maps.
Positioning (GPS) network. Contact your service provider for information about data transmission charges. If you want the Maps application to establish an internet connection automatically when you start the application, in Maps, select Options > Tools > Settings > Internet > Go online at start-up > Yes. To receive a note when your device registers to a network outside your home cellular network, select Options > Tools > Settings > Internet > Roaming warning > On (shown only when you are online).
To zoom in or out, press * or #. Use the scale bar to estimate the distance between two points on the map. Adjust the map view To define the metric system used in the maps, select Options > Tools > Settings > Map > System of measurement > Metric or Imperial. To define what kinds of points of interest are shown on the map, select Options > Tools > Settings > Map > Categories and the desired categories.
Positioning (GPS) To use Nokia Map Loader, you must first install it to a compatible PC. You can download the PC software from the internet at www.nokia.com/maps. Follow the instructions on the screen. You must use the Maps application and browse maps at least once before using Nokia Map Loader. Nokia Map Loader uses the Maps history information to check the version of map data to be downloaded. After you have installed the PC software to your PC, to download maps, do the following: 1.
, and select Tools > Connectivity > GPS The coordinates in the GPS are expressed in degrees and decimal degrees format using the international WGS-84 coordinate system. To use GPS data, the GPS receiver of your device must initially receive position information from at least four satellites to calculate the coordinates of your location. When the initial calculation has been made, it may be possible to continue calculating the coordinates of your location with three satellites.
Personalise your device Personalise your device You can personalise your device by changing the standby mode, main menu, tones, themes, or font size. Most of the personalisation options, such as changing the font size, can be accessed through the device settings. See "Personalisation settings", p. 93. Important: Use only services that you trust and that offer adequate security and protection against harmful software.
To create a new profile, select Options > Create new. Modify the standby mode To switch the active standby on or off, press , and select Tools > Settings > General > Personalisation > Standby mode > Active standby. The active standby display shows application shortcuts, and events from applications such as calendar and player. To change the selection key shortcuts or the default shortcut icons in the active standby mode, select Tools > Settings > General > Personalisation > Standby mode.
Time management Time management Clock Alarm clock Press , and select Applications > Clock. To set a new quick alarm, select Options > New quick alarm. Quick alarms are set for the next 24 hours and they cannot be repeated. To view your active and inactive alarms, scroll right to the alarm tab. To set a new alarm, select Options > New alarm. Define the repetition, if needed. When an alarm is active, is shown. To turn off the sounding alarm, select Stop. To stop the alarm for 5 minutes, select Snooze.
Press , and select Applications > Calendar. 1. To add a new calendar entry, scroll to the desired date, and select Options > New entry and one of the following: ● Meeting — to remind you of an appointment that has a specific date and time ● Memo — to write a general entry for a day ● Anniversary — to remind you of birthdays or special dates (entries are repeated annually) ● To-do — to remind you of a task that must be done by a specific date 2. Fill in the fields.
Messaging Messaging Only devices that have compatible features can receive and display multimedia messages. The appearance of a message may vary depending on the receiving device. For more information on messaging, see the extended user guide on the product support pages of the Nokia website. Messaging main view Press , and select Messaging (network service). To create a new message, select New message.
Check the size limit of e-mail messages with your service provider. If you attempt to send an e-mail message that exceeds the size limit of the e-mail server, the message is left in the Outbox folder, and the device attempts to resend it periodically. Sending an e-mail requires a data connection, and continuous attemps to resend the e-mail may increase your phone bill. In the Outbox folder, you can delete such a message or move it to the Drafts folder. 1.
Messaging 7. To add an attachment to an e-mail, select Options > Insert > Image, Sound clip, Video clip, Note, or Other for other file types. E-mail attachments are indicated by . 8. To send the message, select Options > Send, or press the call key. Note: Your device may indicate that your message was sent to the message center number programmed into your device. Your device may not indicate whether the message is received at the intended destination.
to do so. To start creating the e-mail settings with the mailbox guide, select Start. When you open a multimedia message ( ), you may is shown if sound is see an image and a message. if video is included. To play the sound included, or or the video, select the indicator. When you create a new mailbox, the name you give to the mailbox replaces Mailbox in the Messaging main view. You can have up to six mailboxes. If the message includes a multimedia presentation, is displayed.
Messaging Important: Exercise caution when opening messages. E-mail messages may contain malicious software or otherwise be harmful to your device or PC. 1. When you have an open connection to a remote mailbox, select Options > Retrieve e-mail > New to retrieve all new messages, Selected to retrieve only the messages that have been marked, or All to retrieve all messages from the mailbox. To stop retrieving messages, select Cancel. 2.
Some or all message centres or access points may be preset for your device by your service provider, and you may not be able to change, create, edit, or remove them. within the validity period, the message is deleted from the message centre. ● Message sent as — Contact your service provider to learn if your message centre is able to convert text messages into these other formats. ● Preferred connection — Select the connection to use.
Messaging Auto in home netw.. Outside your home cellular network, you receive a notification that there is a message to retrieve in the multimedia message centre. Outside your home cellular network, sending and receiving multimedia messages may cost you more. If you select Multimedia retrieval > Always automatic, your device automatically makes an active packet data connection to retrieve the message both in and outside your home cellular network. ● Allow anon. msgs.
To edit the settings for the e-mail you send, select Outgoing e-mail and from the following: ● My e-mail address — Enter the e-mail address given to you by your service provider. ● Outgoing mail server — Enter the IP address or host name of the mail server that sends your e-mail. You may only be able to use the outgoing server of your service provider. Contact your service provider for more information.
Messaging Retrieval settings Press , and select Messaging > Options > Settings > E-mail > Mailboxes, a mailbox, and Retrieval settings. Select from the following: ● E-mail to retrieve — Define which parts of the email are retrieved: Headers only, Size limit (POP3), or Msgs. & attachs. (POP3). ● Retrieval amount — Define how many new e-mail messages are retrieved to the mailbox. ● IMAP4 folder path (for IMAP4 only) — Define the folder path for folders to be subscribed.
For information on conference calls, speed dialling, voice dialling, call waiting, and options during calls, see the extended user guide on the product support pages of the Nokia website. Video sharing is also explained in the extended user guide. Voice calls 1. In the standby mode, enter the phone number, including the area code. To remove a number, press C.
Make calls When you select Silence to mute the ringing tone of an incoming call, you can send a text message without rejecting the call, informing the caller that you cannot answer the call. Select Options > Send text message. To set up this option and write a standard text message, select Tools > Settings > Phone > Call > Reject call with SMS. Make a video call When you make a video call (network service), you can see a real-time, two-way video between you and the recipient of the call.
If you do not activate the video call, video sending is not activated, and you only hear the sound of the caller. A grey screen replaces the video image. To replace the grey screen with a still image captured by the camera in your device, select Tools > Settings > Phone > Call > Image in video call. To end the video call, press the end key. Internet calls With the internet call service (network service), you can make and receive calls over the internet.
Make calls To use the created profile for connecting to the internet call service automatically, press , and select Tools > Connectivity > Internet tel. > Preferred profile. To log in to the internet call service manually, select Registration > When needed, and Transport type > UDP or TCP in the SIP settings when creating an internet call profile. Connect to the internet call service To make or receive an internet call, your device must be connected to an internet call service.
Service settings Press , select Tools > Connectivity > Internet tel. > Options > Settings, and select the default settings or service-specific settings. To set internet call as the preferred call type for all outgoing calls, select Default call type > Internet call. When your device is connected to an internet call service, all calls are made as internet calls. To log in automatically to the internet call service, select Login type > Automatic.
Make calls To monitor the approximate duration of your incoming and outgoing calls, select Call duration. Note: The actual time invoiced for calls by your service provider may vary, depending on network features, rounding off for billing, and so forth. To clear call duration timers, select Options > Clear timers. For this you need the lock code.
In Contacts, you can save and update contact information, such as phone numbers, home addresses, or e-mail addresses of your contacts. You can add a personal ringing tone or a thumbnail image to a contact card. You can also create contact groups, which allow you to send text messages or e-mail to many recipients at the same time. For more information on Contacts and SIM contacts, see the extended user guide on the product support pages of the Nokia website. Save and edit names and numbers 1.
Contacts (phonebook) 88 To remove the ringing tone, select Default tone from the list of ringing tones. Copy contacts To copy names and numbers from a SIM card to your device, press , and select Contacts > Options > SIM contacts > SIM directory, the names you want to copy, and Options > Copy to Contacts. To copy contacts to your SIM card, in Contacts, select the names you want to copy and Options > Copy to SIM directory, or Options > Copy > To SIM directory.
Calculator Press , and select Applications > Calculator. Note: This calculator has limited accuracy and is designed for simple calculations. To make a calculation, enter the first number of the calculation. Select a function such as add or subtract from the function map. Enter the second number of the calculation, and select =. Application manager With Application manager, you can see the software packages installed in your device.
Applications folder Important: Only install and use applications and other software from trusted sources, such as applications that are Symbian Signed or have passed the Java VerifiedTM testing. Before installation, note the following: ● To view the application type, version number, and the supplier or manufacturer of the application, select Options > View details. To display the security certificate details of the application, in Details:, scroll to Certificates, and select View details.
After you install applications to mass memory, installation files (.sis or .sisx) remain in the device memory. The files may use large amounts of memory and prevent you from storing other files. To maintain sufficient memory, use Nokia Nseries PC Suite to back up installation files to a compatible PC, then use the file manager to remove the installation files from the device memory. If the .sis file is a message attachment, delete the message from the Messaging inbox.
Tools folder Tools folder For information on Voice commands, Device manager, and synchronisation, see the extended user guide on the product support pages of the Nokia website. Mass memory tool File manager To monitor the amount of used and free space in the device mass memory, press , and select Tools > Utilities > Memory. To see how much memory the different applications and data types use, select Options > Memory details. Press , and select Tools > File mgr..
Some settings may be preset for the device by your service provider, and you may not be able to change them. For information on application settings, see the extended user guide on the product support pages of the Nokia website. General settings In general settings, you can edit the general settings of your device or restore the device to original default settings. You can adjust time and date settings also in the clock. See "Clock ", p. 70.
Settings you change the display rotation setting manually in an application. When you exit the application, automatic rotation is activated again. Standby mode ● Active standby — Activate shortcuts to applications in the standby mode. ● Shortcuts — Assign a shortcut to the selection keys in the standby mode. If the active standby is set off, you can also assign keypad shortcuts for the different presses of the scroll key. ● Active standby apps.
To change the settings for a TV-out connection, select TV-Out and from the following: ● Default profile — Set the profile that you want activated each time you connect a Nokia Video Connectivity Cable to your device. ● TV screen size — Select the aspect ratio of the TV: Normal or Widescreen for widescreen TVs. ● TV system — Select the analogue video signal system that is compatible with your TV. ● Flicker filter — To improve image quality on the screen of your TV, select On.
Settings list of SIM cards that are recognised as the owner’s cards. ● Closed user group — You can specify a group of people to whom you can call and who can call you (network service). ● Confirm SIM services — You can set the device to display confirmation messages when you are using a SIM card service (network service). Certificate management Press , and select Tools > Settings > General > Security > Certificate management.
● Integrated GPS — Use the integrated GPS receiver of your device. ● Assisted GPS — Use Assisted GPS (A-GPS). ● Bluetooth GPS — Use a compatible external GPS receiver with Bluetooth connectivity. ● Network based — Use information from the cellular network (network service). Positioning server To define an access point, and positioning server for AGPS, select Positioning server. The positioning server may be preset by your service provider, and you may not be able to edit the settings.
Settings ● ● ● ● call after an unsuccessful call attempt. To stop automatic redialling, press the end key. Show call duration — Activate this setting if you want the length of a call to be displayed during the call. Speed dial — Select On, and the numbers assigned to the number keys (2 to 9) can be dialled by pressing and holding the key.
A roaming agreement is an agreement between two or more service providers to enable the users of one service provider to use the services of other service providers. ● Cell info display — Select On to set the device to indicate when it is used in a cellular network based on microcellular network (MCN) technology and to activate cell info reception. Connection settings In connection settings, you can edit access points and other connectivity settings.
Settings ● Connection name — Enter a descriptive name for the connection. ● Data bearer — Select the data connection type. Depending on the data connection you select, only certain setting fields are available. Fill in all fields marked with Must be defined or with a red asterisk. Other fields can be left empty, unless you have been instructed otherwise by your service provider.
To enter the settings for the selected security mode, select WLAN security settings. For more information, see the extended user guide on the product support pages of the Nokia website. Packet data settings Press , and select Tools > Settings > Connection > Packet data. The packet data settings affect all access points using a packet data connection.
Settings Internet call settings Press , and select Tools > Settings > Connection > Internet tel.. To create a new internet call profile, select Options > New profile. To edit an existing profile, select Options > Edit.
Q: What is my password for the lock, PIN, or PUK codes? A: The default lock code is 12345. If you forget or lose the lock code, contact a Nokia Care point or your service provider. If you forget or lose a PIN or PUK code, or if you have not received such a code, contact your network service provider. For information about passwords, contact your access point provider, for example, a commercial internet service provider (ISP) or network service provider.
Troubleshooting Q: Why can’t the other device see the files stored on my device in the home network? A: Make sure that you have configured the home network settings, content sharing is turned on in your device, and the other device is UPnP compatible. Q: What can I do if my home network connection stops working? A: Switch off the wireless LAN (WLAN) connection from your compatible PC and your device, and switch it on again. If this does not help, restart your compatible PC and your device.
Q: How can I save my data before deleting it? A: To save data, use Nokia Nseries PC Suite to make a back-up copy of all data to a compatible computer; send images to your e-mail address, then save the images to your computer; or send data using Bluetooth connectivity to a compatible device. Q: Why can’t I select a contact for my message? A: The contact card does not have a phone number, an address, or an e-mail address. Press , select Contacts, and edit the contact card.
Battery information Battery information Charging and discharging Your device is powered by a rechargeable battery. The battery can be charged and discharged hundreds of times, but it will eventually wear out. When the talk and standby times are noticeably shorter than normal, replace the battery. Use only Nokia approved batteries, and recharge your battery only with Nokia approved chargers designated for this device.
Nokia battery authentication guidelines Always use original Nokia batteries for your safety. To check that you are getting an original Nokia battery, purchase it from an authorised Nokia dealer, and inspect the hologram label using the following steps: Successful completion of the steps is not a total assurance of the authenticity of the battery.
Care and maintenance Care and maintenance Your device is a product of superior design and craftsmanship and should be treated with care. The following suggestions will help you protect your warranty coverage. ● Keep the device dry. Precipitation, humidity, and all types of liquids or moisture can contain minerals that will corrode electronic circuits. If your device does get wet, remove the battery, and allow the device to dry completely before replacing it.
The crossed-out wheeled-bin symbol on your product, literature, or packaging reminds you that in the European Union all electrical and electronic products, batteries, and accumulators must be taken to separate collection at the end of their working life. Do not dispose of these products as unsorted municipal waste. Return the products to collection to prevent possible harm to the environment or human health from uncontrolled waste disposal and to promote the sustainable reuse of material resources.
Additional safety information Additional safety information Small children Your device and its enhancements may contain small parts. Keep them out of the reach of small children. Operating environment This device meets RF exposure guidelines when used either in the normal use position against the ear or when positioned at least 1.5 centimeters (5/8 inch) away from the body.
● Hold the wireless device to the ear opposite the medical device to minimize the potential for interference. ● Turn the wireless device off immediately if there is any reason to suspect that interference is taking place. ● Read and follow the directions from the manufacturer of their implanted medical device. If you have any questions about using your wireless device with an implanted medical device, consult your health care provider.
Additional safety information cause an explosion or fire resulting in bodily injury or even death. Switch off the device at refuelling points such as near gas pumps at service stations. Observe restrictions on the use of radio equipment in fuel depots, storage, and distribution areas; chemical plants; or where blasting operations are in progress. Areas with a potentially explosive atmosphere are often, but not always, clearly marked.
The exposure guidelines for mobile devices employ a unit of measurement known as the Specific Absorption Rate or SAR. The SAR limit stated in the ICNIRP guidelines is 2.0 watts/kilogram (W/kg) averaged over 10 grams of tissue. Tests for SAR are conducted using standard operating positions with the device transmitting at its highest certified power level in all tested frequency bands.
Index Index A access codes 13 access points 27, 99 accessories See enhancements activation keys 45 active standby mode 69, 94 active toolbar in camera 48 in gallery 57 address book See contacts alarm clock 70 alarm, calendar note 71 albums, media 58 anniversary notes 71 answering calls 81 application manager 89 applications 89 attachments 75, 76 audio messages 72 auto-update for time/date 70 B 114 backlight time-out 93 battery power saver setting 93 saving power 14 birthday notes 71 blogs 22 Bluetooth
D H data connections cable 31 PC connectivity 31 date and time 70 declining calls 81 dialled numbers 85 dismissing calls 81 display settings 93 DRM (digital rights management) 45 duration of calls 85 help application 12 HSDPA (high-speed downlink packet access) 20 I E e-mail messages 75 enhancements settings 94 F factory settings, restoring feeds, news 22 FM radio 40 font settings 93 G gallery 56 games 19 general information 12 96 IAPs (internet access points) 27 images sharing online 59 inbox,
Index memory web cache 24 messages e-mail 75 folders for 72 icon for incoming 74 multimedia 74 settings 77 voice 81 Mini Map 22 MMS (multimedia message service) 72, 74 multimedia menu 20 multimedia messages 72, 74 music player 36 muting sound 81 my numbers 87 N N-Gage 19 navigation tools 61 network settings 98 news feeds 22 O offline mode 19 operator logo 94 outbox, message 72 116 P packet data connection access point settings 100 settings 101 page overview 22 personal certificates 96 personalisatio
T templates, message 73 text messages receiving and reading 74 replying to 74 sending 72 settings 77 themes 68 time and date 70 time zone settings 70 time-out for backlight 93 tones ring settings 68 settings 93 toolbar 48, 57 transferring data 16 transferring music 38 troubleshooting 103 TV configuration 95 tv-out mode 58 U week settings, calendar 71 welcome 16 welcome note 93 widgets 23 wireless LAN (WLAN) 26 wireless LAN settings 101 world clock 70 Index Video Centre 35 web browser 24 WLAN 101 WLAN