User Guide Lumia with Windows 10 Mobile Issue 1.
About this user guide This guide is the user guide for your software release. Important: For important information on the safe use of your device and battery, read “For your safety” and “Product and safety info” in the printed or in-device user guide, or at www.microsoft.com/mobile/support before you take the device into use. To find out how to get started with your new device, read the printed user guide. For the online user guidance, videos, even more information, and troubleshooting help, go to support.
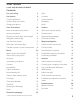
User Guide Lumia with Windows 10 Mobile Contents For your safety 5 Calls 63 Get started 6 Contacts 67 Turn the phone on 6 Social networks 72 Lock the keys and screen 7 Messages 73 Charge your phone 7 Email 77 10 Camera 82 Learn more about your phone 10 Open your camera quickly 82 Set up your phone 10 Camera basics 82 Explore your tiles, apps, and settings 11 Advanced photography 84 Navigate inside an app 14 Photos and videos 86 Use the touch screen 15 Maps & naviga
Sync music and videos between your phone and computer 102 Games 103 Lifestyle apps and services 105 Office 108 Work with Word 108 Work with Excel 109 Work with PowerPoint 109 Write a note in OneNote 110 Use your phone like a PC with Continuum 111 Connect devices with Continuum 112 Work with Continuum 112 Use the calculator 113 Phone management & connectivity 114 Update your phone software 114 Use a secure VPN connection 115 Wi-Fi 115 NFC 116 Bluetooth 118 Memory and stora
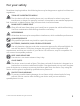
For your safety Read these simple guidelines. Not following them may be dangerous or against local laws and regulations. TURN OFF IN RESTRICTED AREAS Turn the device off when mobile phone use is not allowed or when it may cause interference or danger, for example, in aircraft, in hospitals or near medical equipment, fuel, chemicals, or blasting areas. Obey all instructions in restricted areas. ROAD SAFETY COMES FIRST Obey all local laws. Always keep your hands free to operate the vehicle while driving.
Get started Take care of the basics, and have your phone up and running in no time. Turn the phone on Turn your phone on, and start exploring it. Press the power key until the phone vibrates. Turn the phone off Press and hold the power key, and drag the lock screen down. © 2015 Microsoft Mobile. All rights reserved.
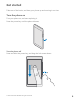
Lock the keys and screen If you want to avoid accidentally making a call when your phone is in your pocket or bag, you can lock your keys and screen. You can also set the keys and screen to lock automatically. To lock your keys and screen, press the power key. Unlock the keys and screen Press the power key, and drag the lock screen up. Tip: If you can hide your navigation bar, you can also lock your keys and screen by double-tapping the bar.
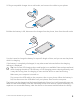
1. Plug a compatible charger into a wall outlet, and connect the cable to your phone. 2. When the battery is full, disconnect the charger from the phone, then from the wall outlet. You don't need to charge the battery for a specific length of time, and you can use the phone while it's charging. If the battery is completely discharged, it may take several minutes before the charging indicator is displayed. Tip: You can use USB charging when a wall outlet is not available.
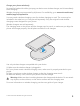
Charge your phone wirelessly No need for hassle with cables, just pop your device on a wireless charger, and it immediately starts charging. Wireless charging is not supported by all phones. For availability, go to www.microsoft.com/ mobile/support/wpfeatures. You may need a wireless charging cover for wireless charging to work. The cover may be included in the sales box, or it may be sold separately. Only use original Lumia wireless charging covers designed for your phone.
Your first Lumia? Let’s get started. Set up your new phone, explore your phone’s views and menus, and learn how to use the touch screen. Learn more about your phone When you want to learn more about your phone, or if you're unsure how your phone should work, there are several support channels for you to check. To help you get the most out of your phone, there's a user guide in your phone with additional instructions. Tap Lumia Help+Tips. You can also go to www.microsoft.
• Outlook You can use the same username and password on your computer and phone. 1. Turn your phone on, and follow the instructions shown on your phone. 2. When asked, create a Microsoft account. If you already have an account for Microsoft services, such as Xbox Live, Hotmail, or Outlook, or you have created a Microsoft account on your Surface tablet or Windows PC, sign in with that username. Make sure you remember the credentials for the Microsoft account you added to your phone.
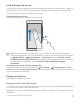
1. To see all the apps on your phone, on the start screen, simply swipe left. To return to the start screen, swipe right. Tip: To go back to the start screen from any view, tap the start key . The apps menu is the home to all your apps – in neat alphabetical order. All the installed apps end up here. To look up an app in the apps menu, tap the search bar at the top of the screen, or tap a letter. © 2015 Microsoft Mobile. All rights reserved.
Recently installed apps show up at the top of the apps menu. 2. To add an app shortcut to your start screen, in the apps menu, tap and hold the app, and tap Pin to Start. Check notifications and change settings quickly Swipe down from the top of the screen. In the action center, you can quickly see notifications, such as your missed calls and unread emails and messages, open the camera, and access all phone settings. © 2015 Microsoft Mobile. All rights reserved.
Navigate inside an app There’s more to your apps than meets the eye. To find more views in an app, swipe left. To discover more actions, use the options menu. In most apps, to go to another view, swipe left. Tip: To switch between views, you can also tap the tab heading at the top of the screen. Find more options in an app or . Tap In the options menu, you can find additional settings and actions that are not shown as icons. © 2015 Microsoft Mobile. All rights reserved.
Use the touch screen Explore your phone with a tap, swipe, or drag. Important: Avoid scratching the touch screen. Never use an actual pen, pencil, or other sharp object on the touch screen. To open an app or other item, tap the app or item. Tap and hold to open further options Place your finger on an item until the menu opens. Tap and hold to drag an item Place your finger on the item for a couple of seconds, and slide your finger across the screen. © 2015 Microsoft Mobile. All rights reserved.
Swipe Place your finger on the screen, and slide your finger in the direction you want. For example, swipe left or right between the start screen and the apps menu, or between different views in the apps. Scroll through a long list or menu Slide your finger quickly in a flicking motion up or down the screen, and lift your finger. To stop the scrolling, tap the screen. Zoom in or out Place 2 fingers on an item, such as a map, photo, or web page, and slide your fingers apart or together.
Lock the screen orientation The screen rotates automatically when you turn the phone 90 degrees. To lock the screen in its current orientation, swipe down from the top of the screen, tap All settings > System > Display, and switch Rotation lock to On . Screen rotation may not work in all apps or views. Back, start, and search keys The back, start, and search keys help you navigate your phone. • • • • • • To see which apps you have open, tap and hold the back key .
• Cortana is not available in all regions and languages. For info on the supported languages, go to support.microsoft.com, and browse to the instructions for Windows phones. To switch the vibration of these keys on or off, swipe down from the top of the screen, tap All settings > Extras > Touch, and switch Vibrate when I tap the navigation keys. on or off . Changing the vibration setting for incoming calls doesn’t affect the vibration of the keys.
Copy contacts Have your nearest and dearest instantly at your fingertips. Use the Transfer my Data app to easily copy your contacts, text messages, and pictures from your old phone. The app does not work with all phone models. Tip: If your old phone is a Lumia, or if you have previously backed up your contacts to your Microsoft account, to import your contacts from the service, just sign in to your account on your phone. The contacts are imported automatically. Your old phone needs to support Bluetooth.
accounts > Sign in with a Microsoft account instead, and create a Microsoft account following the instructions shown on the screen. 1. On your old phone, make sure you back up all the content you want to move to your new phone. To learn more about how to back up your phone, go to support.microsoft.com, and browse to the instructions for Windows phones. 2. On your new Lumia phone, sign in to your Microsoft account. The backed up content is automatically transferred to your new Lumia phone.
3. Select Copy content to Nokia Lumia, sign in to your Microsoft account, and follow the instructions shown on your computer. Your content is copied to OneDrive. Your photos are copied to the folder in OneDrive, and your contacts and calendar events to your Outlook.com account. 4. To access your photos, on your Lumia phone, tap Photos. To access other files, such as your music, on the start screen, tap OneDrive. Your contacts and calendar events are synced automatically.
Basics Learn how to get the most out of your new phone. What’s new in this release? Check some of the key things in this release at a glance. Some of the features are not supported by all phones. For availability, go to www.microsoft.com/mobile/support/wpfeatures. • • • • • • • • • • Set up Windows Hello Beta, a biometric authentication feature, and unlock your phone with one look. Add a full-size background photo to your start screen and apps menu.
Get to know your phone Your phone has 2 views: the start screen and the apps menu. To switch between the views, simply swipe left or right. Start screen: The animated live tiles show your missed calls and received messages, the latest news and weather forecasts, and more. Updates of your pinned contacts are shown on the tile, and you can view your contacts' details directly on the start screen. Apps menu: All your apps are listed here, all neatly ordered.
Tip: To find an app quickly, tap any letter in the apps menu, and in the following menu, tap the first letter or character for the app you want. View, switch between, and close open apps To view the open apps, tap and hold the back key . To switch to an app, tap the app you want. To close the apps you no longer need, tap . Navigate the settings menu Swipe down from the top of the screen, and tap All settings. To go to a settings group, tap any settings group title, and select the group you want.
Hide the navigation bar when you don’t need it All Lumia phones have 3 keys across the bottom:the back, start, and search key.You can hide this navigation bar from the start screen when you don’t need it. Hiding the navigation bar is not supported by all phones.For availability, go to www.microsoft.com/mobile/support/wpfeatures. To hide the navigation bar from the start screen when it’s not needed, swipe up from the bottom of the screen.To see the navigation bar again, swipe up.
In this screen, you can: • • • • • • See your missed calls and recent unread emails and messages Check any notifications, such as available app updates in Store Act quickly on notifications even without opening the app. You can, for example, reply to a text message straight from the action center. Open apps Quickly jump to all settings Tap a shortcut to easily turn some of the features on or off. Or, tap and hold a shortcut to change the settings of some features, such as Wi-Fi. 2.
Change the volume for media and apps Press a volume key on the side of your phone to see the volume status bar, tap , and tap the volume bar for media and apps to set the volume you want. The maximum volume level is 30. Switch to silent mode Press a volume key on the side of your phone, tap on the volume status bar, and tap To turn silent mode off, on the volume status bar, set the volume you want. . Turning silent mode on does not affect your alarms and reminders.
may remain active. Comply with the instructions and safety requirements given by, for example, an airline, and any applicable laws and regulations. Where allowed, you can connect to a Wi-Fi network to, for example, browse the internet or turn Bluetooth on in airplane mode. 1. Swipe down from the top of the screen, and tap wireless > Airplane mode. 2. Switch Status to On .
A high-speed (HSPA+/DC-HSDPA) data connection is open. Your phone is connected to a 4G network. Data is transferred over a cellular data connection. Wi-Fi connection A Wi-Fi connection is active. A cellular data connection is shared with other devices over Wi-Fi. Data is transferred over Wi-Fi. Bluetooth device A Bluetooth device is connected to your phone. Battery Battery power level The battery is charging. Battery saver mode is turned on.
Accounts Learn about the different accounts on your phone and what you can do with them. Benefits of creating a Microsoft account With a Microsoft account, you can access Microsoft services with a single username and password on your computer or phone. You can also use the same username and password on your Xbox.
Create your Microsoft account Spice up your life and get more from your phone – create a Microsoft account. If you didn’t create a Microsoft account during the first start-up, you can always do it later. If you already have an Xbox Live, Hotmail.com, or Outlook.com account, or if you have created a Microsoft account on your Surface tablet or Windows PC, you don’t have to create a new one – just sign in with the username and password for that account.
You can also create or manage your account at account.microsoft.com. Add a Microsoft account to your phone If you didn’t sign in to your Microsoft account during the first start-up, you can add the account to your phone later and get your data and settings easily on all your devices. 1. Swipe down from the top of the screen, and tap All settings > Accounts > Your email and accounts > Sign in with a Microsoft account instead. 2. Sign in with your existing Microsoft account username and password.
OneDrive Learn what OneDrive is and how to use it. OneDrive cloud storage Store your stuff in the clouds. You don't need to worry about freeing memory for your favorite or new apps. OneDrive is cloud storage for all your documents, photos, and music, so you can access, share, or restore them if needed. You can also set OneDrive to back up your stuff automatically, so when you take a photo or record a video, it's copied to your cloud album.
2. Tap > Photos, select the photo you want to upload, and tap Save a file to OneDrive Tap OneDrive > > . This device . When working on a Word, Excel, or PowerPoint document, your files are saved automatically to OneDrive. You can continue working on the document right where you left it, on any device connected to your Microsoft account – just open it from OneDrive. Tip: You can also upload files stored on your memory card. Tap OneDrive > > SD card, and select the file you want to upload.
Personalize your phone Learn how to personalize the start screen, and how to change ringtones. Personalize the start screen Make your start screen yours – choose your background photo, pin your favorite apps and much more to the start screen, or change the tile size and layout as you like. To get the most out of the space on the start screen, group apps into folders. Add a background photo 1. Swipe down from the top of the screen, and tap All settings > Start. 2.
Resize or unpin a tile To resize, tap and hold the tile, and tap the arrow icon. The tiles can be either small, medium, or wide. The bigger the tile is, the more information it can show. To unpin the tile, tap and hold the tile, and tap . Tiles are shortcuts to your apps. If you unpin the tile, the app is not deleted from your phone. © 2015 Microsoft Mobile. All rights reserved.
Group tiles into folders Tap and hold the tile, and drag and drop it on top of the tile or folder you want to group it with. To open an app from the folder, tap the folder, then tap the app you want. To change the name of the folder, tap and hold the name, and type in the name you want. To remove a folder, unpin the tiles in it. Pin an app Swipe left to go to the apps menu, tap and hold the app, and tap Pin to Start. Pin a contact Tap People, tap and hold the contact, and tap Pin to Start.
Personalize the lock screen Change the lock screen to your liking. You can, for example, have your own favorite photo in the background. Add a background photo Swipe down from the top of the screen, and tap All settings > Personalization > Lock screen. Switch Background to My picture, and tap Browse. Select a photo, adjust it to get the best possible fit, and tap . Change the background photo Swipe down from the top of the screen, and tap All settings > Personalization > Lock screen.
Change the glance screen settings To save power, your screen goes on standby when you’re not using your phone actively.With the glance screen, you can easily check the time and other lock screen content even when your screen times out. Some of the glance screen settings are not supported by all phones. 1. Swipe down from the top of the screen, and tap screen. 2. Choose the time the glance screen stays on.
2. Tap next, choose which content your kids can use, and follow the instructions. If you want to make sure your kid doesn’t have access to your own start screen, you can set a sign-in PIN. As Microsoft Edge is not available in Kid's Corner, you don’t have to worry about the websites your kids visit. Go to your own start screen Press the power key twice, and swipe up on your own lock screen. If you've set a sign-in PIN, type it in.
Turning silent mode on does not affect your alarms and reminders. If you want to rest, make sure you don’t have any incoming alarms or reminders, or turn your phone off. Tip: Don’t want to keep your phone in silent mode but can’t answer right now? To silence an incoming call, press the volume down key. Turn silent mode off Press a volume key on the side of your phone, tap volume you want.
You can do all this using your voice, with only a minimum of fiddling with the touch screen to distract you from other activities. You need a Microsoft account to use Cortana. Set up Cortana Tell Cortana a little bit about yourself, so you can get better help and find what you’re looking for. Cortana is not available in all regions and languages. For information on the supported languages, go to support.microsoft.com, and browse to the instructions for Windows phones.
Hey Cortana Wake your personal assistant up just by saying Hey Cortana. You can also teach Cortana to respond to your voice only. Cortana is not available in all regions and languages. For information on the supported languages, go to support.microsoft.com, and browse to the instructions for Windows phones. The Hey Cortana voice activation is not available in all regions or languages and not supported by all phone models. For availability, go to www.microsoft.com/mobile/support/ wpfeatures. 1.
Use your phone with a TTY/TDD Swipe down from the top of the screen, tap options, and switch TTY Mode to Full. All settings > Ease of Access > More The available TTY/TDD modes may vary depending on your network service provider. Use your phone with a hearing aid Swipe down from the top of the screen, tap options, and switch Telecoil to On . All settings > Ease of Access > More Use the screen reader The screen reader reads the information on your screen aloud.
Take a screenshot You can take screenshots of what’s on your phone screen and use them like any photos. 1. Press the volume up key and the power key at the same time. 2. To view or manage the screenshots you’ve taken, tap Photos > Albums > Screenshots. Extend battery life Get the most out of your phone while getting the battery life you need. There are steps you can take to save power on your phone. To save power: Charge wisely Always charge the battery fully.
switch Mode to Off. Glance screen is not supported by all phones. For availability, go to www.microsoft.com/mobile/support/ wpfeatures. Lower the screen brightness • Swipe down from the top of the screen, and tap All settings > System > Display. Make sure that Automatically adjust display brightness is switched to Off . To adjust the brightness, drag the Brightness level slider. Automatic screen brightness is not supported by all phones. For availability, go to www.microsoft.
• • • Use a Wi-Fi connection to connect to the internet, rather than a cellular data connection. Stop your phone scanning for available wireless networks. Swipe down from the top of the screen, tap and hold Wi-Fi, and switch Wi-Fi networking to Off . If you're listening to music or otherwise using your phone, but don't want to make or receive calls, turn Airplane mode on. Swipe down from the top of the screen, tap All settings > Network & wireless > Airplane mode, and switch Status to On .
Stop data roaming Swipe down from the top of the screen, tap All settings > Network & wireless > Cellular & SIM, and under the SIM you use for cellular data, switch Data roaming options to don't roam. Download email less frequently To set your phone to check for new email less frequently, or even by request only, tap Outlook Mail > > Accounts. Select an account, tap Change mailbox sync settings, and select how often to sync. If you have several email accounts, change the setting for all your accounts.
Switch between upper and lower case characters Tap the shift key. To turn caps lock mode on, double-tap the key. To return to normal mode, tap the shift key again. Type in a number or special character Tap the numbers and symbols key. To see more special character keys, tap . Some special character keys bring up more symbols. To see more symbols, tap and hold a symbol or special character.
Tip: To put a period at the end of a sentence, and to start a new sentence, tap the space key twice. Copy or paste text Tap a word, drag the circles before and after the word to highlight the section you want to copy, and depending on the app, tap Copy or . To paste the text, depending on the app, tap Paste or . Add an accent to a character Tap and hold the character, and tap the accent or the accented character, if supported by your keyboard. Delete a character Tap the backspace key.
Correct a word If you notice that you have misspelled a word, tap it to see suggestions for correcting the word. Add a new word to the dictionary If the word you want isn't in the dictionary, write the word, tap it, and tap the plus sign (+) in the suggestion bar. Your phone also learns new words when you have written them a few times. Turn word suggestions off Swipe down from the top of the screen, and tap All settings > Time & language > Keyboard.
Remove a language from your phone Swipe down from the top of the screen, tap All settings > Time & language > Language, tap and hold the language you want to remove, and tap Remove. Move the keyboard to write with one hand If your phone has a large screen, you can move the keyboard on the screen to easily write with one hand. Move the keyboard to the left or right 1. Tap and hold the numbers and symbols key. 2. Tap . 3. Tap or .
Clock and calendar Keep track of time – learn how to use your phone as a clock, as well as an alarm clock, and how to keep your appointments, tasks, and schedules up to date. Set an alarm You can use your phone as an alarm clock, and even set your favorite song as your alarm tone. 1. Tap Alarms & Clock > . 2. Set the time, and tap . 3. Fill in the other alarm details, and tap . Tip: Too tired to fiddle with the phone much? Tap and hold the search key Cortana when you need the alarm.
Snooze an alarm If you don’t want to get up just yet, when the alarm sounds, tap Snooze. Before snoozing, you can change the snooze time. Turn an alarm off Tap Alarms & Clock, and switch the alarm to Off Delete an alarm Tap the alarm and . delete. Update the time and date automatically You can set your phone to update the time, date, and time zone automatically. Automatic update is a network service and may not be available depending on your region or network service provider. 1.
See the night and day around the world Tap Alarms & Clock > World Clock > , and swipe left and right along the timeline. Use the countdown timer No more overcooking – use the countdown timer to measure your cooking times. 1. Tap Alarms & Clock > Timer > . 2. Set the duration, and tap > . 3. To start the countdown, tap . Tip: To pause, tap . To start the countdown again, tap See the timer in full screen Tap . To go back to the normal view, tap . .
Create an event on another calendar Tap Outlook Calendar > . By default, your events go to your Outlook Calendar. If you have, for example, a shared calendar with your family, you can create and share the event instantly. To change the calendar when creating the event, tap the calendar name, then tap and the calendar you want to use. Example: You can create an event to a calendar you are sharing with other people, such as your work calendar, so they know when you are busy.
5. To go back to today, tap . Turn week numbers on and off Tap Outlook Calendar > > Settings > Calendar Settings, then tap week number menu, and tap the option you need. to open the Dual SIM You can have 2 SIMs in your phone, for example, one for your work and one for your personal use. Dual SIM features Don’t want work to interfere with your free time? Or do you have a cheaper data connection on one SIM? With a dual SIM phone, you can use 2 SIM cards at the same time.
Tip: Want to make sure you don’t miss a call on one SIM while having an active call on the other? Use Smart dual SIM to set your SIMs to forward calls between them or to another phone. For availability of this feature, contact your network service provider. Manage your SIMs Don’t want work to interfere with your free time? Or do you have a cheaper data connection on one SIM? You can decide which SIM you want to use. Dual SIM is not supported by all phones. For availability, go to www.microsoft.
Browse your SIM apps If your service provider has included apps on your SIM card, here's how to find them. 1. Swipe down from the top of the screen, and tap All settings > Network & wireless > Cellular & SIM. 2. Under the SIM, tap SIM settings. Or if you have a dual SIM phone, tap SIM 1 settings or SIM 2 settings. 3. Tap SIM applications. Store Make your phone your own with more apps, games, and other items, some of which are free of charge. Browse Store to find the latest content for you and your phone.
The availability of Store and the selection of items available for download depend on your region. To download from Store, you need to be signed in to your Microsoft account on your phone. When you're signed in, you are offered content compatible with your phone. Many items are free of charge, but some you need to pay for with your credit card or on your phone bill. The availability of payment methods depends on your country of residence and your network service provider.
For more information on an item, contact the publisher of the item. Tip: Use a Wi-Fi connection to download large files. Tip: In the Store main view, you can see a notification at the top right corner of the screen on how many of your downloaded apps, games, and other content have updates. Tip: If your kid’s phone is running Windows Phone 8.1 or Windows 10 Mobile, you can use the My Family website to manage their game and app downloads and settings. To set up My Family, go to account.microsoft.
Troubleshoot Store issues If you can’t download a game • • • • • Check that your cellular data connection or Wi-Fi connection is turned on. The app you want to download may require more memory than available on your phone. Try freeing up some space by uninstalling apps or deleting other data, like photos. Use only a Wi-Fi connection to download large files. If My Family is set up on your phone, you may be restricted from downloading some apps. Check that the time and date are set correctly.
People & messaging Contact your friends and family, and share your files, such as photos, using your phone. Stay tuned with the latest updates to your social networking services even when on the go. Calls Learn how to make calls on your new phone and talk to your friends. Call a contact Calling your friends is quick and easy when you've saved them as contacts in your phone. 1. Tap > . 2. Tap the contact and the number, if the contact has several numbers.
1. Tap Skype, and sign in with the same Microsoft account that you use with your phone. 2. To call a Skype contact, tap people and the contact you want to call, and tap . For more information on Skype-to-Skype calls, see the video at www.youtube.com (in English only). Tip: To save on data costs, use a Wi-Fi network connection with Skype whenever possible. Make a video call with Skype Skype Video and the contact you want to call.
Reply to a call by a text message If you can’t speak right now, you can reply to the caller by a text message. 1. When someone calls you, tap Text reply. 2. Tap one of the pre-written messages, or tap Type a message..., and write your message. Turn text reply on or off Swipe down from the top of the screen, tap Text reply to On or Off . Edit a pre-written text message Swipe down from the top of the screen, tap replies, and edit the reply you want.
Forward calls to your voice mail Besides forwarding calls to another phone number, you can also forward these calls to your voice mail and listen to them later. For availability of this feature, contact your network service provider. Dual SIM is not supported by all phones. For availability, go to www.microsoft.com/mobile/support/wpfeatures. Swipe down from the top of the screen, tap All settings > System > Phone, and type in the voice mail number given by your service provider, if needed.
Switch between calls Tap Tap to swap. Turn call waiting off Swipe down from the top of the screen, tap services, and switch Call waiting to Off . All settings > Extras > Network Contacts You can save and organise your friends' phone numbers, addresses, and other contact information in the People app. You can also get in touch with your friends through social networking services. People The People app is where all your friends’ contact information is kept.
Add or delete a contact Keep your friends with you. Save their phone numbers, addresses, and other information to the People app. Add a contact 1. Tap People > CONTACTS > . 2. If you're signed in to several accounts, select the account to which you want to save the contact. You cannot save a contact to your phone only, it’s always saved to an account. 3. Add the contact details, and tap . Your contacts are backed up automatically to your Microsoft account. Edit a contact Tap People > CONTACTS.
Save a number from a received message When you’ve received a message, you can easily save the number if it’s not yet saved in your contacts. You can save the number in a new or existing contacts list entry. 1. Tap Messaging. 2. In the conversations list, tap a conversation and a phone number. 3. If you have a dual SIM phone, select the SIM you want to use to call the contact. While editing a contact, tap SIM 1 or SIM 2. Dual SIM is not supported by all phones. For availability, go to www.microsoft.
Copy contacts Have your nearest and dearest instantly at your fingertips. Use the Transfer my Data app to easily copy your contacts, text messages, and pictures from your old phone. The app does not work with all phone models. Tip: If your old phone is a Lumia, or if you have previously backed up your contacts to your Microsoft account, to import your contacts from the service, just sign in to your account on your phone. The contacts are imported automatically. Your old phone needs to support Bluetooth.
Tip: If you have a dual SIM phone, you can select the SIM card from which you want to import contacts. Tap SIM 1 or SIM 2. Dual SIM is not supported by all phones. For availability, go to www.microsoft.com/mobile/support/wpfeatures. If you have multiple accounts, you can tap the account name and choose the account you want to import your contacts to. The default account is Outlook. 3. Tap Next. To import all your contacts, tap import. Tip: To select individual contacts, tap clear, and use the check boxes.
Social networks Set up social networking services on your phone to keep in touch with your friends. Set up a social media account Set up your social networking service accounts. Tap the social networking app you want to sign in to, such as Facebook, and follow the instructions shown. To download more social networking apps, tap Store. Tip: When you sign in to an account, the contacts in the account are automatically imported.
3. Tap the social networking service where you want to upload the photo. 4. Add a caption if you want, and share or send your photo. Messages Stay in touch with your friends with text or multimedia messages. Send a message With text and multimedia messages, you can quickly contact your friends and family. 1. Tap Messaging > . If you start writing a message and switch to another app before sending it, you can continue your message later. In Messaging, tap the draft you want to continue. 2.
1. Tap Messaging. 2. To read a message, tap a conversation. Tip: To prevent others from accidentally seeing notifications about your messages on the lock screen, swipe down from the top of the screen, and tap All settings > Personalization > Lock screen > Choose an app to show detailed status > none. If you’re unable to open a multimedia message, check the following: • • Your mobile subscription supports multimedia messages. All Your data connection is turned on.
Reply to a message Don't keep your friend waiting – reply to the message straight away. 1. Tap Messaging. 2. Tap the conversation containing the message. Tip: If you have a dual SIM phone, you can select which SIM you use to send the message. Tap , and select the SIM you want to use. Dual SIM is not supported by all phones. For availability, go to www.microsoft.com/mobile/support/wpfeatures. 3. Tap the message box, and write your message. 4. Tap .
Send your location in a message When you ask your friends to come and meet you, you can send them your location on a map. This feature may not be available for all regions. Your phone may ask you about using your location. You need to allow it to use this feature. 1. When writing a text message, tap > Your location. Sending a message with an attachment may be more expensive than sending a normal text message. For more info, contact your service provider. 2. Tap .
• • • Send a multimedia message to your own phone number. This way, you can test if you’re able to send and receive multimedia messages. If you can connect to the internet but you can’t send multimedia messages, try searching online to find the multimedia (MMS) settings for your network service provider. Check that data roaming is turned on in your phone settings. Tip: You must be connected to the internet to send and receive multimedia messages.
If your phone doesn't find your email settings, advanced setup can find them. For this, you need to know your email account type and the addresses of your incoming and outgoing email servers. You can get this information from your email service provider. To find out more about setting up different email accounts, go to support.microsoft.com, and browse to the instructions for Windows phones. Add an account later Tap Outlook Mail > > in.
Open email from the start screen With live email tiles you can open email directly from the start screen. From the tiles, you can see the number of unread emails and if you've received new email. You can pin several mailboxes to the start screen. For example, dedicate a tile for business email and another for personal email. 1. Tap Outlook Mail > . 2. Tap and hold the account you want to pin to your start screen, and tap Pin to start. Your mailbox appears on the start screen as a new tile.
6. Tap to send the email. Read email If you’re waiting for important news, you don’t have to wait until you’re at your desk. Use your phone to read your emails. You can see when you have new email on the start screen. 1. Tap Outlook Mail. 2. In your inbox, tap the email. Unread email is marked in a different color. Tip: To zoom in or out, place 2 fingers on the screen, and slide them together or apart. Tip: If an email contains a web address, tap it to go to the website.
Tip: To reply to the sender only, tap reply. To reply to the sender and all the other recipients, tap reply all. Forward mail Open the mail, and tap > forward. Delete email When your mailbox is overflowing, delete some mails to free up space in your phone. 1. In your mailbox, tap to the left of the emails you want to delete. 2. Tap the check boxes that appear next to the emails, and tap . All the emails you selected are deleted.
Camera Why carry a separate camera if your phone has all you need for capturing memories? With your phone camera, you can easily take photos or record videos. Open your camera quickly Make sure you get to your camera in a flash when you need it – use the shortcut in the action center. If your phone has a camera key, it is the fastest way to start snapping. Swipe down from the top of the screen, and tap Camera. Tip: If the Camera shortcut is not visible, tap Expand.
Tip: If your phone has a camera key, to focus, press and hold the camera key halfway down. To take the photo, press the camera key down fully. 4. To take the photo, tap . Tip: To see the screen at its best, make sure you're not covering the light sensor. The light sensor is not supported by all phones. For availability, go to www.microsoft.com/ mobile/support/wpfeatures. Keep a safe distance when using the flash. Do not use the flash on people or animals at close range.
2. Check that Location is switched to On location. , and that your camera is allowed to use your Location info can be attached to a photo or video, if your location can be determined using satellite or network methods. If you share a photo or video that contains location information, the location information may be shown to those who view the photo or video. You can turn off geotagging in the phone settings.
The photos you take from now on are taken in timer mode. 4. To take the photo, tap . Turn timer mode off Tap Camera > > Photo timer > . Pick the best exposure with bracketing If the lighting conditions are challenging, use bracketing mode to capture several photos at once with different exposure settings. Then you can choose the best shot among them. When exposure bracketing is used, the camera takes several photos at once, some of them brighter, some darker.
Record high-definition videos When you want to keep your memories of the important events in your life crystal clear, remember to record them in high definition. 4K and Full HD videos are not supported by all phones. For availability, go to www.microsoft.com/mobile/support/wpfeatures. 1. Tap Camera > > Settings. 2. Tap Video recording, and select a high-definition resolution. Depending on your phone, the highest available resolution is either 4K or Full HD.
3. To view the next photo or video, swipe left. To view the previous photo or video, swipe right. Tip: To zoom in or out, place 2 fingers on the screen, and slide your fingers together or apart. Copy your photos and videos to your computer Use your computer’s file manager to copy or move your photos and videos to the computer. If your computer is a Mac, install the Lumia Photo Transfer for Mac app from www.microsoft.com/en-us/mobile/support/product/nokia-photo-transfer-for-mac/. 1.
Apply a filter Tap Lumia Creative Studio and the photo you want to edit, tap , and select a filter. Enhance your photo Tap Lumia Creative Studio and the photo you want to edit, tap , select the type of enhancement, and drag the slider to adjust the level of enhancement. Blur a part of your photo Tap Lumia Creative Studio and the photo you want to edit, and tap > blur background. You can select the area you want to blur and adjust the amount of blur.
Maps & navigation Explore what’s out there and how to get there. Switch location services on Use Maps to find out where you are, and save your location to the photos you take. Some apps can use your location information to offer you a wider variety of services. 1. Swipe down from the top of the screen, and tap 2. Switch Location to On . All settings > Privacy > Location. Tip: You can choose the apps that can use your location. Under Choose apps that can use your location, tap the apps you want.
Get directions to a place Get directions for walking, driving, or using public transportation – use your current location or any other place as the starting point. 1. Tap Maps > > Directions. 2. If you don't want the start point to be your current location, tap the search bar, and search for a start point. 3. Tap the second search bar, and search for a destination. The route is shown on the map, along with an estimate of how long it takes to get there. To see detailed directions, tap the information.
Delete a map Tap Maps > > Settings > Download or update maps and the map you want to remove, and tap Delete. Positioning methods Your phone shows your location on the map using a satellite positioning system, Wi-Fi, or network (Cell ID) based positioning. The availability, accuracy and completeness of the location info depend on, for example, your location, surroundings, and third party sources, and may be limited. Location information may not be available, for example, inside buildings or underground.
Internet Learn how to create wireless connections and browse the web while keeping your data costs down. Define internet connections If your network service provider charges you on a pay-as-you-use basis, you may want to change the Wi-Fi and cellular data settings to reduce your data costs. You can use different settings for roaming and at home. Important: Use encryption to increase the security of your Wi-Fi connection. Using encryption reduces the risk of others accessing your data.
Use your data plan efficiently If you’re worried about your data usage costs, your phone helps you find more efficient ways to use cellular data and track your usage. You can also cut off data connections entirely. 1. Swipe down from the top of the screen, and tap wireless > Data usage. 2. Tap set limit, and choose the values you want. All settings > Network & Web browser Catch up on the news, and visit your favorite websites. You can use Microsoft Edge in your phone to view web pages on the internet.
Open a new tab When you want to visit several websites at the same time, you can open new browser tabs and switch between them. Tap Microsoft Edge > > . Open a tab for private browsing Tap Microsoft Edge > > > New InPrivate tab. Private browsing prevents your browser from storing browsing data, such as cookies, browsing history, and temporary internet files. Switch between tabs Tap Microsoft Edge > and the tab you want.
Add a website to your favorites If you visit the same websites all the time, add them to your favorites, so you can access them quickly. 1. Tap Microsoft Edge. 2. Go to a website. 3. Tap > add to favorites. 4. Edit the name if you want to, and tap ADD. Tip: You can also pin your favorite websites to the start screen. While browsing a website, tap > Pin this page to Start. Tip: Found a website you want to read, but don’t have time right now? Add it to your reading list. Tap > Add to reading list > ADD.
A cache is a memory location that is used to store data temporarily. If you have, or have tried to, access confidential information or a secure service, requiring passwords, clear the cache after each use. Delete an individual item in your browsing history Tap Microsoft Edge > > History, tap and hold the item you want to delete, and tap delete. Search the web Explore the web and the outside world with Bing search. You can use the keyboard or your voice to write your search words. 1.
• • If you are abroad, check that you have allowed roaming. Swipe down from the top of the screen, tap All settings > Network & wireless > Cellular & SIM and the SIM, tap Properties, and check that Data roaming options is switched to roam. Connecting to the internet when roaming, especially when abroad, can raise data costs substantially. If you have installed new settings from a text message, uninstall the new settings.
Entertainment Learn how to watch videos, listen to your favorite music, and play games. Watch and listen You can use your phone to watch videos and listen to music and podcasts while on the move. Play music Listen to your favorite music wherever you are. 1. Tap Groove Music. 2. Tap the artist, album, song, genre, or playlist you want to play. Tip: To sort your tracks so you can easily find what you’re looking for, tap you want to sort. and how Tip: You can buy music for your playlists from Store.
Play a podcast Keep up with your favorite podcasts and subscribe to them on your phone. 1. Tap Podcasts. 2. Swipe to COLLECTION. 3. Tap audio or video and the podcast you want to watch or listen to. Tip: To select a certain episode of the podcast, tap Subscribe to a podcast Tap the podcast you want to subscribe to, and tap . . Tip: You can also search for a podcast by name. Play a video Have your favorite media with you while on the move – watch videos wherever you are. Movies & TV > > Videos. 1.
2. To adjust the tone of music, drag the bands to your liking. You can also select one of the equalizer presets. Project your screen over Wi-Fi Project your screen over Wi-Fi on a compatible TV, monitor, or projector to watch a video on a bigger screen. Projecting your screen over Wi-Fi is not supported by all phones. For availability, go to www.microsoft.com/mobile/support/wpfeatures. The other device must support Miracast technology. Projection of copyrighted material may be restricted. 1.
FM radio Learn how to listen to the radio on your phone. Listen to FM radio Enjoy your favorite FM radio stations on the go. FM radio is not supported by all phones. For availability, go to www.microsoft.com/mobile/ support/wpfeatures. To listen to the radio, you need to attach a compatible headset to the device. The headset acts as an antenna. © 2015 Microsoft Mobile. All rights reserved.
The headset may be sold separately. 1. Tap 2. Tap FM Radio. to start playback. Go to the next or previous station Swipe left or right on the frequency bar. Listen to the radio through the speakerphone Tap > switch to speaker. The headset must still be connected to your phone. Close the FM radio app Tap to stop playback. Tap the back key to close the app. Save a radio station Save your favorite radio stations so you can easily listen to them later. FM radio is not supported by all phones.
Windows Phone app Windows Lumia Windows Phone app Photo Explorer for desktop Transfer for Mac app (photos and videos only) Windows 10 x Windows 8 and 8.1 x Windows 8 RT x x x x Windows 7 x x Windows Vista/XP x Mac x Games Keep yourself entertained by downloading and playing games on your phone. Get a new game Head to Store to download and install new games on your phone. 1. Tap Store > > Games. © 2015 Microsoft Mobile. All rights reserved.
2. Browse the selection, and tap the game you want. 3. If the game has a price, tap the price, or if the game offers a free trial, tap Free trial to try the item for free for a limited time. If the item is free, tap Free. Tip: To uninstall a game, on the start screen, swipe left to the apps menu, tap and hold the game, and tap Uninstall. The availability of payment methods depends on your country of residence and your network service provider.
Resume playing a game When you return to a game, there may be a resume icon in the game itself. If not, tap the screen. Get social with the Xbox app Tap Xbox. In the Xbox app, you can share your gaming experiences with friends. You can also check what games they’re playing, and see their posts, broadcasts, and achievements in the activity feed. If you don’t have an Xbox account yet, you can create one in the app. Tip: If you don’t have the Xbox app on your phone, you can download it from Store.
Sign in to your Microsoft account to get the most out of the services. Some services may not be available in all countries or regions. Keep an eye on the stock market Find out what’s happening in the stock market with the Money app. 1. Tap Money. 2. To see the current stock exchange rates, tap > Markets. Follow your favorite stocks Tap > Watchlist > , and search for what you want to follow. Keep up to date with the news Check the latest news from your favorite sources. 1. Tap News. 2.
Tip: To easily follow your favorite sport or team, add it to My Favourites. Tap My Favourites > , and search for the sport or team. > Keep track of your daily activity Use your phone’s motion data sensor to keep track of all your daily activities, such as places you visit or the number of steps you take during the day. To monitor your daily activity, use the Microsoft Health app, or download another fitness app from Store, and allow it to use your phone’s motion tracking data.
Office Stay in touch with your documents while you’re travelling. Learn how to use the Office apps. Work with Word Polish your documents on the road with Word. You need a Microsoft account to edit files. Edit an existing document 1. Tap Word. 2. Tap Browse, and browse to the Word file you want to edit. 3. To zoom in or out, slide your fingers apart or together. 4. To see the page breaks on your document, tap . To go back to the full screen view, tap .
Work with Excel No need to travel to the office to check the latest figures. With Excel, you can edit your spreadsheets, create new ones, and share your work on a SharePoint site. You need a Microsoft account to edit files. Edit an existing Excel document 1. Tap Excel. 2. Tap Browse, and browse to the Excel file you want to edit. 3. To switch to another sheet tab, tap the sheet name at the bottom. 4. To add a new sheet, tap . Tip: To change the name or color of the new sheet, tap the sheet name.
Tip: To find a specific slide, tap a slide thumbnail. 4. To add a slide, tap . Tip: To zoom in or out, slide your fingers apart or together. PowerPoint saves your files automatically, so you don’t have to do it. You can find your files on OneDrive. Tip: If you want to save the document on your phone, tap for the file, tap , write a name for the file, and tap . > Save, choose the location Create a new presentation PowerPoint > New.
3. To format the text, for example, change the font or add bullets, tap the icons in the toolbar above the keyboard. Tip: To add a link, tap > , write the text to show on the link, and add the web address. Use Cortana to create a note Tap and hold the search key , and say Create a note and what you want to have in the note. This feature is not available in all regions and languages. For information on the supported languages, go to support.microsoft.
If you want to connect to an external screen, use the Display Dock. The keyboard and mouse can also be connected through the Display Dock, or using Bluetooth. Tap Continuum, and follow the instructions to set up your connection. Connect devices with Continuum Connect your phone to a monitor, keyboard, and a mouse to use it like a PC. Continuum is not supported by all phones. For availability, go to www.microsoft.com/ mobile/support/wpfeatures.
2. Tap an app on the start screen or apps menu. The app is optimized for the greater size and resolution of the external display. Your phone controls the external display as long as you stay in the Continuum app. If you want to use your phone normally, go to any other view. Any apps open in the desktop view stay open. Tip: To quickly open the Continuum app while Continuum is connected, tap your phone’s status bar at the top of the screen.
Phone management & connectivity Take care of your phone and its contents. Learn how to connect to accessories and networks, transfer files, create backups, lock your phone, and keep the software up to date. Update your phone software Stay in step with the beat – update your phone software and apps wirelessly to get new and enhanced features for your phone. Updating the software may also improve your phone performance.
By default, your phone automatically downloads available updates whenever the data connection settings allow it. When your phone notifies you that an update is available, just follow the instructions shown on your phone. If your phone is short on memory, you may need to move your apps, photos, and other stuff to the memory card. The memory card is not supported by all phones. For availability, go to www.microsoft.com/mobile/support/ wpfeatures.
Tip: If you want to track locations when satellite signals are not available, for example when you're indoors or between tall buildings, turn Wi-Fi on to improve positioning accuracy. Note: Using Wi-Fi may be restricted in some countries. For example, in the EU, you are only allowed to use 5150–5350 MHz Wi-Fi indoors, and in the USA and Canada, you are only allowed to use 5.15–5.25 GHz Wi-Fi indoors. For more info, contact your local authorities.
The NFC area is on the back of your phone, near the camera. Tap other phones, accessories, tags, or readers with the NFC area. 1. Swipe down from the top of the screen, and tap 2. Switch Tap to share to On . All settings > Devices > NFC. Tip: Before using NFC, make sure the screen and keys are unlocked. Enable NFC payments Swipe down from the top of the screen, tap Tap to pay to On . All settings > Devices > NFC, and switch Connect to a Bluetooth accessory with NFC Hands busy? Use a headset.
2. To make a payment, tap the reader with the NFC area of your phone. Your service provider may ask you to confirm the payment. Note: Payment and ticketing apps and services are provided by third parties. Microsoft Mobile does not provide any warranty or take any responsibility for any such apps or services including support, functionality, transactions, or loss of any monetary value. You may need to reinstall and activate the payment or ticketing app after repair of your device.
Connect to your friend’s phone with Bluetooth Use Bluetooth to wirelessly connect to your friend's phone, to share photos, and much more. 1. Swipe down from the top of the screen, and tap and hold . 2. Make sure Bluetooth is turned on in both phones. 3. Make sure both phones are visible to other phones. You need to be in the Bluetooth settings view for your phone to be visible to other phones. 4. You can see the Bluetooth phones within range. Tap the phone you want to connect to, and tap Pair. 5.
4. To send an automatic text message when someone calls or texts you, explaining why you can't answer, switch Text replies to calls, Text replies to texts, or both to On . To edit the message, tap the text box. 5. Tap Next > Add a device, and tap the Bluetooth device you connect your phone to when driving, such as a headset. Driving mode starts automatically when the phone and the added Bluetooth device connect.
Your phone backups are not visible in the main view of OneDrive, but you can find them in the OneDrive settings. Check people.live.com for your backed up contacts and calendar.live.com for your calendar events. For information on data security in OneDrive, go to windows.microsoft.com/en-gb/ onedrive/security. To back up other content, such as music, connect your phone to your computer, and follow the instructions on the computer screen.
Instead of removing, you can also move the files to the memory card. The quality of your memory card may affect the performance of your phone greatly. To get the best out of your phone, use a fast 4–128GB card by a well-known manufacturer. For more information on memory cards, check the frequently asked questions. Use only compatible memory cards approved for use with this device. Incompatible cards may damage the card and the device and corrupt data stored on the card.
If an installed app depends on a removed app, the installed app may stop working. For details, see the user documentation of the installed app. Tip: Want to keep the app, but running out of free memory on your phone? Move the app to the memory card instead of uninstalling it. Tap Storage > This Device > Apps & games, tap the app you want to move, and tap Move. The memory card is not supported by all phones. For availability, go to www.microsoft.com/mobile/support/ wpfeatures.
Copy content between your phone and computer Copy photos, videos, and other content created by you between your phone and computer. Tip: If you want to transfer your photos to a Mac, it is recommended that you use the Lumia Photo Transfer for Mac app, which you can download from www.microsoft.com/ en-us/mobile/support/product/nokia-photo-transfer-for-mac/. 1. Connect your phone to a compatible computer with a compatible USB cable. 2.
Windows Phone app Windows Lumia Windows Phone app Photo Explorer for desktop Transfer for Mac app (photos and videos only) Windows 10 x Windows 8 and 8.1 x Windows 8 RT x Windows 7 x x x x x Windows Vista/XP Mac x x Security Learn how to protect your phone, and to keep your data secure. © 2015 Microsoft Mobile. All rights reserved.
Protect your phone with a sign-in PIN Set up a sign-in PIN to make sure nobody else can unlock your phone. In addition, when you have set up a sign-in PIN, your phone asks you for this short PIN instead of your Microsoft account password when you change some security settings or buy an app from Store. 1. Swipe down from the top of the screen, and tap All settings > Accounts > Sign-in options. 2. To set the sign-in PIN, under PIN, tap Add. 3.
Answer a call If your phone is locked when someone calls you, swipe up, and tap Answer. View your notifications Press the power key, and swipe down from the top of the screen. Open the camera If you add a shortcut for the camera in the action center, you can quickly turn the camera on when your phone is locked. Press the power key, swipe down from the top of the screen, and tap Camera. If your phone has a camera key, press the camera key.
1. Swipe down from the top of the screen, and tap All settings > Accounts > Sign-in options. 2. To set up a sign-in PIN code, under PIN, tap Add. 3. Select the time after which your phone requires sign-in. 4. Once you’ve set up your sign-in PIN code, set up Windows Hello Beta. Tap Set up, and follow the instructions. If you wear glasses, remove them during the first setup. After that, to improve the recognition with your glasses on and in different lighting conditions, tap Improve recognition. 5.
The SIM PIN code can be 4-8 digits. Tip: If you don’t want to protect your SIM with a PIN code, in SIM settings, under Security, tap Remove SIM PIN, and type in your current PIN. If you have a dual SIM phone, you need to remove the SIM PIN in SIM 1 settings or in SIM 2 settings. Find your lost phone If you misplaced your phone, or are afraid it's been stolen, use Find My Phone to locate your phone, and lock or delete all data from it remotely. You need to have your Microsoft account on your phone. 1.
Protect your data with device encryption Swipe down from the top of the screen, tap All settings > encryption, and switch Device encryption to On . System > Device If you selected the recommended settings while setting up your phone, device encryption is off by default. When turned on, device encryption prevents a hacker from accessing your data or getting the files they need to steal your passwords.
Choose what information your apps can access Some apps work better if they can access relevant information, such as your calendar, in your phone. You can decide what information your apps can access. 1. Swipe down from the top of the screen, and tap All settings > 2. Tap the feature, and select if you want to let apps access it. Privacy. If you turn this setting on, you can still prevent specific apps from accessing the feature. Wallet Use Wallet to collect your payment methods in one place.
If you type in the code incorrectly 3 times in a row, you need to unblock the code with the PUK code. PUK This is required to unblock a SIM PIN code. If the code is not supplied with your SIM card, contact your network service provider. Security code (sign-in PIN, lock screen PIN) (min. 4 digits) This helps you protect your phone against unauthorized use and verify your identity.
• • If you are abroad, check that you have allowed roaming. Swipe down from the top of the screen, tap All settings > Network & wireless > Cellular & SIM and the SIM, tap Properties, and check that Data roaming options is switched to roam. Connecting to the internet when roaming, especially when abroad, can raise data costs substantially. If you have installed new settings from a text message, uninstall the new settings.
If your phone doesn't respond If your phone stops working or responding in the way you're used to, you can quickly restart it to get back on track. Try the following: • • 1-key restart method: Press and hold the power key for about 10 seconds. The phone restarts. 2-key restart method: Press and hold the volume down key and power key at the same time for about 10 seconds. The phone restarts. If you’re unsure about which restart method is for your phone, go to www.microsoft.com/ mobile/support/wpfeatures.
© 2015 Microsoft Mobile. All rights reserved.