
User manual
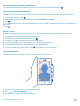
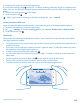
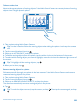
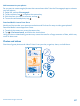
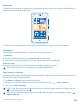
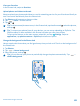
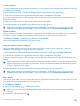
Table Of Contents
- Contents
- Safety
- Get started
- Basics
- People & messaging
- Camera
- Maps & navigation
- Internet
- Entertainment
- Office
- Phone management & connectivity
- Troubleshooting and support
- Find your model number and serial number (IMEI)
- Product and safety information

1. To switch the camera on, press the camera key.
2. To view the settings, drag
to the left. To change a setting, slide your finger up or down on the
slider. You can, for example, change Exposure compensation to control the amount of light in your
photo.
3. To close the settings, drag
to the right.
4. To take a photo, tap
.
Tip: To get hands-on learning on different settings, tap > tutorial.
Frame your photos with ease
Want to frame your photos professionally? Use viewfinder grids and compose perfect photos.
1. To switch the camera on, press the camera key.
2. Tap
> settings, and switch Framing grids to, for example, Golden ratio or Rule of thirds.
3. To take the photo, tap
.
Camera tips
Want to take full advantage of Nokia Pro Camera? Take a look at these tips and learn more about
your high-resolution camera.
• To quickly switch on the camera when your phone is locked, press and hold the camera key for a
couple of seconds.
• If you don't use the camera for about a minute, it goes to sleep. To wake the camera up, press
the power key, and drag the lock screen up.
• To switch from camera to video mode, tap
.
• You can zoom Nokia Pro Camera with only one finger. To zoom in, swipe up, and to zoom out,
swipe down.
• To view the photos you have taken, tap
on the top left corner of the screen.
• To focus the camera on a specific object, tap the object on the screen.
• To see the screen at its best, make sure you're not covering the light sensor.
© 2013 Nokia. All rights reserved.
64