
User manual
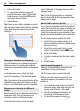


Table Of Contents
- Nokia C7–00 User Guide
- Contents
- Safety
- Get started
- Keys and parts
- Insert the SIM card and battery
- Insert or remove a memory card
- Charging
- Switch the device on or off
- Use your device for the first time
- Device set-up
- Copy contacts or pictures from your old device
- Lock or unlock the keys and screen
- Antenna locations
- Change the volume of a call, song, or video
- Attach the wrist strap
- Headset
- Use the in-device user guide
- Install Nokia Ovi Suite on your PC
- Basic use
- Touch screen actions
- Interactive home screen elements
- Switch between open applications
- Write text
- Display indicators
- Set the notification light to blink for missed calls or messages
- Flashlight
- Search in your device and on the internet
- Use your device offline
- Prolong battery life
- Restore original settings
- View your account
- Personalization
- Telephone
- Call a phone number
- Answer a call
- Reject a call
- Call a contact
- Mute a call
- Answer a waiting call
- Call the numbers you use the most
- Use your voice to call a contact
- Make calls over the internet
- Call the last dialed number
- Record a phone conversation
- Turn to silence
- View your missed calls
- Call your voice mailbox
- Forward calls to your voice mailbox or to another phone number
- Prevent making or receiving calls
- Allow calls only to certain numbers
- Video sharing
- Wi-Fi calling
- Contacts
- About Contacts
- Save phone numbers and mail addresses
- Save a number from a received call or message
- Contact your most important people quickly
- Add a picture for a contact
- Set a ringtone for a specific contact
- Send your contact information using My Card
- Create a contact group
- Send a message to a group of people
- Copy contacts from the SIM card to your device
- Messaging
- View your voice mail
- Internet
- Social networks
- About Social
- See your friends' status updates in one view
- Post your status to social networking services
- Link your online friends to their contact information
- See your friends' status updates on the home screen
- Upload a picture or video to a service
- Share your location in your status update
- Contact a friend from a social networking service
- Add an event to your device calendar
- Camera
- Your pictures and videos
- Videos and TV
- Music and audio
- Maps
- Office
- Time management
- Device management
- Connectivity
- Find more help
- Access codes
- Troubleshooting
- Protect the environment
- Product and safety information
- Copyright and other notices
- Index

2 Fill in the fields.
3 To repeat the calendar entry at
regular intervals, select
and the
time interval. Select Repeat until,
and enter the end date.
4 Select Done.
Tip: You can also add a calendar entry in
the day view. Select and hold the starting
time, and drag the arrows to set the
duration.
View your schedule for the week
You can browse your calendar entries in
different views. To easily check all the
entries for a particular week, use the week
view.
On the home screen, select the date.
Select the number of the desired week.
Tip: To increase or decrease the size of the
viewable area, place two fingers on the
screen, and slide them apart or together.
Browse your calendar in different
views
Want to see all your calendar entries for a
particular day? You can browse your
calendar entries in different views.
On the home screen, select the date.
Select Options > Change view and the
desired view.
Tip: To go to the previous or next day,
week, or month, in the appropriate view,
swipe left or right.
Add a task to your to-do list
Do you have important tasks to handle at
work, library books to return, or maybe an
event you want to attend? You can add
tasks (to-do notes) to your calendar. If you
have a particular deadline, set a reminder.
On the home screen, select the date.
1 Select (Tap to create entry), or if
there are existing entries, tap the area
below an entry.
2 Select the entry type field
, and
select To-do note as the entry type.
3 Fill in the fields.
4 To add a reminder for the task, select
.
5 Select Done.
Send a meeting request
You can create meeting requests, and
send them to the participants.
On the home screen, select the date.
Before you can create and send a new
meeting request, you need to set up a
mailbox.
1 In a calendar view, select and hold a
calendar entry, and from the pop-up
menu, select Send > Via mail.
2 Add the meeting participants as
recipients of the request mail.
3 To send the request, select
.
62 Time management