micros Systems, Inc. POS Configurator User’s Guide 3700 POS Restaurant Enterprise Series Copyright 1998 MICROS Systems, Inc.
Declarations Declarations Warranties Although the best efforts are made to ensure that the information in this manual is complete and correct, MICROS Systems, Inc. makes no warranty of any kind with regard to this material, including but not limited to the implied warranties of marketability and fitness for a particular purpose. Information in this manual is subject to change without notice.
Table of Contents Table of Contents Preface Welcome to the POS Configurator User’s Guide ............................... viii Conventions and Symbols................................................................... xi What’s New? ........................................................................................ xii Reader Response ................................................................................. xiii Chapter 1: The 3700 System Database Overview .....................................
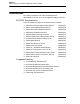
Table of Contents Chapter 4: Devices Overview .............................................................................................. 4-2 Network Node...................................................................................... 4-3 Devices ................................................................................................. 4-5 Order Devices ...................................................................................... 4-8 User Workstations...............................
Table of Contents Chapter 7: Revenue Centers Overview .............................................................................................. 7-2 RVC Credit Cards ............................................................................... 7-3 RVC Discount / Service ....................................................................... 7-7 RVC Display Design............................................................................ 7-8 RVC Posting ...............................................
Table of Contents vi
POS Configurator Preface Refer to the preface if you have any questions about the organization, conventions, or contents of this manual. In this chapter Welcome to the POS Configurator User’s Guide ..................... viii Conventions and Symbols........................................................... xi What’s New? ...............................................................................xii Reader Response .....................................................................
Preface Welcome to the POS Configurator User’s Guide Welcome to the POS Configurator User’s Guide The purpose of this manual is to provide MICROS installers and customers with an overview of the POS Configurator module. +RZ 7KLV 0DQXDO LV 2UJDQL]HG Chapter 1: Understanding the 3700 System Database This chapter contains an introduction to the structure and contents of a 3700 database. Chapter 2: Creating a New Database This chapter describes the methods for creating a new database.
Preface Welcome to the POS Configurator User’s Guide Appendix A: For 2700 Users This chapter describes the changes 2700 users will see in the 3700 POS Configurator. :KR 6KRXOG 8VH 7KLV PDQXDO" This manual is intended for use by: ❏ MICROS Installers/Programmers/Dealers ❏ MICROS Customer Service ❏ MICROS Training Personnel ❏ MIS Personnel This manual assumes that you have the following knowledge or expertise: ❏ Working knowledge of the Windows interface. ❏ Operational understanding of PCs.
Preface Welcome to the POS Configurator User’s Guide Related Manuals This section provides a list of the related MICROS documentation as well as a list of suggested reading materials.
Preface Conventions and Symbols Conventions and Symbols This section describes the conventions and symbols used in this manual. Conventions The following conventions are used throughout this manual. Convention Meaning [Key] Keys on a PC or PC Workstation. Example: [Enter] ‘Message’ Messages that may appear during the programming process. Example: ‘Select Menu Item Range’ | Indicates the sequence of menu items to be selected.
Preface What’s New? What’s New? What’s new in v1.01 No new forms were added for this version. What’s new in v1.02 Interfaces............................................................................... 4-18 Touchscreen Designer ........................................................... 4-27 Using Touchscreen Designer ................................................ 3-28 What’s new in v2.00 Com Ports ................................................................................ 4-4 Network ..........
Preface Reader Response Reader Response As you read this, the documentation staff at MICROS is hard at work preparing the next edition of this manual. Your feedback could be instrumental in changing that next edition. Tell us what you think— we’d like to hear from you! We are very interested in hearing from you about: ❏ Good ideas Tell us about some part of this manual that you think works well– we’ll be sure to maintain it.
Preface Reader Response xiv
Chapter 1 The 3700 System Database This chapter contains an introduction to the structure and contents of a 3700 database. It includes information about the characteristics of the 3700 database, the relationships between tables and the classification of database tables. In this chapter Overview .................................................................................... 1-2 Introducing the Database .........................................................1-3 Types of Database Tables..............
The 3700 System Database Overview Overview The 3700 system uses client/server architecture to manage the unique information about each restaurant’s POS environment. Details about the restaurant’s operation reside in tables on a database server, an application that manages the database. The database server in turn resides on the server PC. In a MICROS 3700 system, POS Configurator is the gateway to the tables managed by the database server and makes programming a 3700 system easier.
The 3700 System Database Introducing the Database Introducing the Database Characteristics of the 3700 system include: ❏ It is a relational database in which tables store all information. ❏ The Relational Database Management System (RDBMS) manages the database and functions as the database server. ❏ POS Configurator is the software layer between you and RDBMS. It’s your interface to the database. A Database System In a 3700 system, RDBMS acts as a multi-user database server.
The 3700 System Database Introducing the Database select * from micros.mi_def POS Configurator makes it easy for you to access and modify the tables necessary for programming a database. You don’t need to know SQL to use POS Configurator. You do not need to program every table in the database to configure a 3700 system. POS Configurator gives you access only to those tables and fields necessary for configuring POS operations and installed hardware. Database Tables A database consists of many tables.
The 3700 System Database Types of Database Tables Types of Database Tables Definition Class Definition Total Detail Status X X X X Updated by System Edited Manually Types of Database Tables Accessible from Configurator The tables in the database fall into several basic categories: definition, class definition, totals, detail, and status. X X X Not all of these types of tables can be accessed and edited through POS Configurator.
The 3700 System Database Types of Database Tables Some of the other definition tables in the 3700 database include: ❏ Employee ❏ Tax ❏ Order Type ❏ Table ❏ Menu Item ❏ Revenue Center ❏ Touchscreen Style ❏ Tender Media ❏ Reason ❏ Tax Class ❏ Help Screen ❏ Order Device ❏ Menu Item Group ❏ Color Combo Class Definition Tables This specialized type of definition table plays an important role in a 3700 database.
The 3700 System Database Types of Database Tables When you create a menu item that is an appetizer, you can assign it to the menu item class, “Appetizers”. This menu item then shares the same set of characteristics as other appetizers in the database. If you edit the characteristics in “Appetizers”, then you automatically change the characteristics for all menu items assigned to this class. Making changes to 12 menu items becomes a one-step process.
The 3700 System Database Types of Database Tables Totals Tables Totals tables contain accumulated totals information that reflect transaction activity, such as menu item sales and time period sales.
The 3700 System Database Types of Database Tables Detail Tables Detail tables hold supporting information about transactions and activities. For example, the Time Card detail table stores an employees clock in date and time, clock out date and time and total number of hours.
The 3700 System Database How Forms are Related to Tables How Forms are Related to Tables The forms in POS Configurator allow you to enter information into the database tables. The information you enter in a form is not always stored in just one table in the database. For example, when you program the Menu Items form you enter the name and price of each menu item. These are stored in the Menu Item Definition table and the Menu Item Price Definition table.
The 3700 System Database How Forms are Related to Tables Sequence and Object Numbers Each record in a 3700 database table is identified by a unique sequence number. Sequence numbers refer to individual records in the table and therefore may never change. You cannot view sequence numbers in most POS Configurator forms, because they are set in the database. Object numbers, on the other hand, are part of every form in POS Configurator.
The 3700 System Database How Forms are Related to Tables Scope The scope of the 3700 system allows you to consolidate and share data: ❏ for a revenue center ❏ for the entire system For instance, you can create sales and labor reports for each revenue center. And of course you can create these same reports on a system-wide basis.
Chapter 2 Chapter 5 Creating a Database This chapter describes the procedure for creating a database. In this chapter Overview .................................................................................... 2-2 Database Sources ......................................................................2-3 Programming Methods .............................................................2-5 Suggested Programming Order ................................................2-7 POS Configurator Folders and Forms .
Creating a Database Overview Overview Programming a new database requires you to do some planning. Use the 3700 Site Survey to gather information about the restaurant and its operation before you attempt to program a database.
Creating a Database Database Sources Database Sources There are several ways you can create a new database: ❏ Adapt the 3700 sample database ❏ Adapt a 3700 database from a similar site ❏ Convert a 2700 database ❏ Program a shell (blank) database Whether you choose to start fresh or with an existing database, you must plan ahead to ensure successful implementation.
Creating a Database Database Sources Converting a 2700 Database You can convert a 2700 database for use in the 3700 system. Although this is certainly preferable to typing a 2700 database into the 3700 POS Configurator, you’ll still need to make changes to areas of the database that are different in the 2700. For example, keyboards are not used in the 3700 database.
Creating a Database Programming Methods Programming Methods There are two ways to approach database programming: ❏ Programming by feature ❏ Programming by form The most efficient way to program a new database or make major changes to an existing database is to do so by form. If you need to modify or enable a particular feature, then you should do your programming by feature. Using the Feature Reference Manual The Feature Reference Manual is the primary reference to the 3700 system.
Creating a Database Programming Methods Programming by Form Systematically completing information in the forms is the fastest way to program a database. To minimize re-opening forms and save time, use the “Suggested Programming Order” on page 2-7. Programming Order This order is designed so that you program a database in much the same way that you would build a house: before you put up the walls, you need a foundation. Start with the first form and work your way down the list.
Creating a Database Suggested Programming Order Suggested Programming Order Don’t Lock Yourself Out When entering POS Configurator for the first time in a blank database, the system grants you access based on the fact that the database is empty. However, once records of any kind are entered in the database, the system enables Configurator Access security. This means that the system will allow only an authorized employee to continue editing POS Configurator.
Creating a Database Suggested Programming Order Form Use this link To Return to Periods Time Periods Serving Periods Print Classes Menu Levels Discounts/Service Charges Descriptors Program Discount/Service SLUs Touchscreen Style Tender/Media Descriptors Program Tender/Media SLUs Touchscreen Style RVC Credit Cards RVC Discount/Service RVC Display Design RVC Interfaces RVC Posting RVC Printing RVC Print Design RVC Seats RVC Taxes RVC Transactions Employee Classes Default Touchscreen Configurato
Creating a Database POS Configurator Folders and Forms POS Configurator Folders and Forms Sales Menu Items Courses Discount/Service Print Classes Menu Item classes Descriptors Tender/Media Tax Rates Condiments Menu Levels Currency Tax Classes Employees Employees Jobs Employee Classes Time and Attendance Configurator Access Time Clock Schedule Devices Network Node Order Devices Touchscreens Devices Interfaces Touchscreen Designer User Workstations CA/EDC Drivers Revenue Center RVC
Creating a Database Wrapping Up Wrapping Up After you finish programming, wrap up with the following checklist: ❏ Back up the database ❏ Review site survey ❏ Test the database ❏ Clear totals Perform these tasks before using the database in a live environment. Back Up the Database Once you have a working database in place, you will probably continue to make changes. When you make a change to the database, don’t forget to make a backup.
Creating a Database Wrapping Up Reports Run all autosequences to verify that reports are set up correctly, including tracking groups. Also, check that the reports print to the proper output device. Clear Totals After testing the database, clear any totals that you may have accumulated. For example, if you were testing printing and labor features, close all guest checks, clock out any employees, and clear all totals.
Creating a Database Wrapping Up 2-12
Chapter 3 Chapter 1 Using POS Configurator This chapter introduces the POS Configurator interface and describes the steps to performing basic operations. In this chapter Overview .................................................................................... 3-2 The Control Panel .....................................................................3-3 Opening POS Configurator.......................................................3-5 The Main Window ..................................................
Using POS Configurator Overview Overview The 3700 POS Configurator interface is easy to learn and use. Refer to the topics on the following pages to understand the tools and functionality of POS Configurator.
Using POS Configurator The Control Panel The Control Panel Before you can open and use POS Configurator, you must start the SQL Database Server through the Control Panel. (Note: if you are already running POS Operations then the database server is running. Go straight to “Opening POS Configurator” on page 3-5.) Starting the Control Panel Open the MICROS 3700 Applications program group and double-click the Control Panel icon.
Using POS Configurator The Control Panel Starting the SQL Database Server Once the Control Panel is open, select the PC that acts as the database server and click Database to start the server. The Database button will start the following processes: ❏ Diskless Boot Server (if installed) ❏ SQL Database Server ❏ 3700 DBS Server Control Panel Wait for the Control Panel to display “Ready” before starting POS Configurator.
Using POS Configurator Opening POS Configurator Opening POS Configurator Double-click the POS Configurator icon on your PC’s desktop. Choose this If this icon is not located on your desktop, use the Windows Start menu to open the MICROS 3700 Applications folder.The or choose this POS Configurator module opens. If this is the first time this database is being programmed, refer immediately to “Don’t Lock Yourself Out” on page 2-7.
Using POS Configurator Opening POS Configurator If this database has been opened before, the sign-in screen displays. Enter the PC Applications ID programmed in your employee record.
Using POS Configurator The Main Window The Main Window The main window provides easy access to the POS Configurator forms. Each folder on the main window displays a set of buttons that open forms. By completing the fields and options on the forms, you complete the database. Menus Folders Buttons Hints Menus Menus provide an alternate way to access information. The File Menu The File menu offers the same selections as the folders and buttons. It’s just another way to open a form for editing.
Using POS Configurator The Main Window The Options Menu The Options menu allows you to turn Caching on or off. Select Cached Updates to cause saved changes to be posted to the database when you exit a form. When this option is not selected, changes are posted to the database immediately (upon saving). The Help Menu POS Configurator offers online Help. Click Help in this menu to open the Table of Contents.
Using POS Configurator The Main Window Folders Each folder in POS Configurator contains buttons that open forms. When you click on a folder name, the buttons change to display the contents of that folder. The folders in POS Configurator include: ❏ Sales ❏ Employees ❏ Devices ❏ Revenue Center ❏ System ❏ Reporting Buttons The buttons on each folder open the forms for editing.
Using POS Configurator The Main Window Hints Hints appear at the bottom of each window to give you more detail about an object. To use Hints, simply place your cursor over a field, option, or object.
Using POS Configurator The Toolbar The Toolbar The POS Configurator toolbar provides shortcuts to common operations. These shortcuts can save you time as you program or make changes to the database. Refer to “Quick Reference to POS Configurator Tools” on page 3-12 for an explanation of each tool. Tool Tips Tools tips appear when you place the cursor over a toolbar button. The tip tells you what the tool does.
Using POS Configurator Quick Reference to POS Configurator Tools Quick Reference to POS Configurator Tools Cut Use this button to remove a record and save it to the clipboard. [CTRL+X] Copy Use this button to save selected information to the clipboard. [CTRL+C] Paste Use this button to place saved information in a new location. [CTRL+V] Copy Record Use this button to save all the information associated with a record to the clipboard.
Using POS Configurator Quick Reference to POS Configurator Tools Save Changes Use this button to save changes to the database. Note: If Post Cached Updates is not selected in the Options menu, changes are automatically posted as you move between records. [CTRL+S] Insert Use this button to insert a blank record. The next available record number will be used. [Insert] Delete Record Use this button to remove a record. [CTRL+DEL] Undo Use this button to erase the last change made.
Using POS Configurator Working with Forms Working with Forms The forms in POS Configurator allow you to enter information into the database tables. You can choose to work in either Record or Table View. In Record View, you see only the options and fields for the record that is selected. Record View is best when adding or changing a single record and Table View is best for adding or editing multiple records.
Using POS Configurator Working with Forms Selecting Options Option selections appear as checkboxes when you are working in record view. To select, click the box. A check appears to indicate that the option is selected. To clear an option, click the box to remove the check. Cleared Selected Sort By You can sort items for display by name or by record number. Sort by name to quickly locate a certain menu item. Sort by record number to quickly locate blank records within a group.
Using POS Configurator Working with Forms Folder Links Some fields are actually links to other tables. When you click on the folder next to the field it opens the other form so you can edit or create records in that form. Browse The browse button is displayed in certain form. The button will open a window containing the directory structure of the PC and allows the user to store the selected file. Context-sensitive Help To get information about a field or option, click the Help button.
Using POS Configurator Working with Forms Working in Table View Table View is best for adding multiple records. In Table View, you can copy and paste columns of information. You can also add, change, or delete multiple records more efficiently. For example, if you wanted to add three new soups to the menu, you could block copy/paste three existing soup records and then change their names, and other unique information.
Using POS Configurator Adding Records Adding Records POS Configurator makes it easy to add new records to the database. You can add a new employee or a new group of menu items simply by inserting a record in the corresponding file. If you are adding a long list of items, you may want to work in table view. See “Working in Table View” on page 3-17. To add a record 1. Click the record below which you wish to add a new record. 2. Click Insert.
Using POS Configurator Copying and Pasting Single Records Copying and Pasting Single Records You can copy and paste a single field or an entire record. Use Copy and Paste in Table view to add new items to the database. To add a record using copy and paste 1. Select the record you want to duplicate. 2. Click Copy Record. POS Configurator copies the record to the clipboard. 3. Use the Insert button to create a blank record if one is needed. 4. Click Paste Record.
Using POS Configurator Block Copying and Pasting Records Block Copying and Pasting Records You can copy a range of records and paste them in a new location using Block Copy/Paste. This is useful for adding a group of new records which share many of the same characteristics as existing records. For example, you may want to add three new salads to the menu by copying three existing salad records and changing the names. To copy and paste a block of records 1.
Using POS Configurator Finding a Record Finding a Record You can locate records within a form using Find. This is useful for searching a form that contains a long list of records, or for making changes to records that share a value. For example, you can search for a particular employee record by name, or find all the menu item records with the same price. To find a record 1. Click Find. POS Configurator displays a dialog box. 2. Choose a the name of the field you want to search. 3.
Using POS Configurator Editing a Record Editing a Record Edits may be completed in Table View or Record View. To edit a record 1. Click the field you want to edit. 2. Type the new information. 3. Click Save. To clear a field 1. Click the field you wish to clear. 2. Click Clear.
Using POS Configurator Deleting Single Records Deleting Single Records You may occasionally need to delete a record from the database. For example, a menu item that’s been discontinued could be deleted. To delete a record 1. Click the record you want to delete. 2. Click Delete. The system asks you to confirm the deletion. 3. Click OK. The record is removed from the database.
Using POS Configurator Block Deleting Records Block Deleting Records You can easily remove a range of records using Block Delete. To delete a block of records 1. Click Block Delete. A dialog box displays. 2. Type the record numbers for the range of records you want to delete. 3. Click OK. The system asks you to confirm the deletion. 4. Click OK.
Using POS Configurator Saving Changes Saving Changes To save a change 1. Click Save.
Using POS Configurator Printing Employee and Menu Item Definitions Printing Employee and Menu Item Definitions There is a print button on the Employee and Menu Item forms. The button will print out a report with either all, or a range of definitions. When the print button is selected, the following will be displayed: When Range is selected, the From and To pull down menus will be active. When All is selected, the From and To pull down menus will be inactive.
Using POS Configurator Printing Employee and Menu Item Definitions Menu Item Definition Report 3700 POS Configurator User’s 3-27
Using POS Configurator Using Touchscreen Designer Using Touchscreen Designer The illustrations below will help you get acquainted with Touchscreen Designer.
Using POS Configurator Using Touchscreen Designer Touchscreen Designer Fields Legend Enter the word or phrase to display on this key. Icon Select an icon to display on the key if one is desired. Icon Pos Select a position for this icon: Left, Right, Top, Bottom, Center Font Select a font to display the legend for this key. Color Select a color combination for this key. Next Enter the Next touchscreen to display when this key is pressed if appropriate.
Using POS Configurator Using Touchscreen Designer Right-click touchscreen key The following menu will pop up when you right-click a touchscreen key. You can then choose any of the options listed. Right-click touchscreen The following menu will pop up when you right-click any area of the touchscreen. You can then select from any of the options. Multiple Select Multiple Select allows you to select several touchscreen keys by holding the PC keyboard’s [Control] key while selecting the touchscreen keys.
Using POS Configurator Using Touchscreen Designer The Key Palette The key palette is a type of “clipboard” on which one or more keys can be stored while designing a touchscreen. Keys can be moved from the touchscreen to the key palette and back again. To enable the key palette, click the key palette button on the tool bar. To add a key to the key palette, right-click on the key you wish to move and select Send To Key Palette.
Using POS Configurator Using Touchscreen Designer 3-32
Chapter 4 Devices The Devices folder is your gateway to configuring the hardware devices used in a restaurant. It includes forms for programming user workstations, printers, touchscreens, and interfaces with other systems. In this chapter Overview .................................................................................... 4-2 Network Node............................................................................4-3 Devices ........................................................................
Devices Overview Overview Complete the forms in the Devices folder in following order to configure the system hardware: 1. Network Node 2. Devices 3. Order Devices 4. User Workstations 5. Interfaces 6. CA/EDC Drivers 7. Touchscreens 8.
Devices Network Node Network Node In the Network Node form, create a unique name for each PC in the system, and associate it with the computer’s name. Choose a name that identifies the location of each node for quick access. Programming Network Program a network name, IP Address, and Subnet Mask for each PC. Also program all Diskless PCs in the system. Example In the example above, the Server is located near the kitchen and the third workstation is located at the host station.
Devices Network Node COM Ports Program COM ports and parameters..
Devices Devices Devices Use the Devices folder to identify each physical device in the system. Select a name that identifies the function of the device. For example, Bar Printer is more descriptive than Printer #5. Methods When listing devices you can: ❏ List every UWS first, followed by peripheral devices. ❏ List each UWS with its associated peripheral devices immediately below. Programming General Name and identify each physical device in this system.
Devices Devices Printer Definition If the device is a printer, specify its type and settings. Example In the example above, record number 2 is identified as an Express Thermal with 42 Columns and 10 Linefeeds.
Devices Devices Printer Interface If the device is a printer, specify its IDN ID (if required) and its com port. Example The example above shows the IDN ID and COM Port for the Epson Printer.
Devices Order Devices Order Devices Use the Order Devices folder to configure the devices that print order output in this restaurant. Using Logical Order Devices It is possible to list more order devices than there are physical printers in the system, by creating “logical” devices. When logical devices are used, a single device, such as a thermal printer, can accept remote orders for several “logical” printers.
Devices Order Devices Backup and Redirection Devices A backup printer takes over the printing for a device if it fails to operate. (It can fail to operate when it’s out of paper, for example.) A redirection device allows the output for a printer to be rerouted automatically. For example, an autosequence might be created that includes redirecting order output during a certain serving period in the restaurant. Programming General Create a record for each logical order device this restaurant will use.
Devices Order Devices Options Select options to control the appearance of order chits printed by each device. Example In the example above, this restaurant selects options that cause the seat number to print on order device output.
Devices User Workstations User Workstations Use the User Workstations form to assign touchscreens, options, order devices, and printers to each UWS. Option settings can be customized for each UWS. For example, the auto sign out of employees at the UWS behind the bar may be disabled, but remain active at the wait staff ’s UWS. Guest check, and credit authorization/endorsement printers should be convenient to the workstation they serve. Remote printers should be convenient to the kitchen area they serve.
Devices User Workstations Programming General Make selections for each UWS. Use the folder link to go to RVC Transactions to create a name for each revenue center. Use the folder link to go to Order Types to create the order types for this restaurant. Make a note to return to the Default Transaction field after Touchscreen programming is complete if you are assigning default screens by UWS. Example In the example above, PCWS01 is assigned to the revenue center called Restaurant.
Devices User Workstations UWS Options Select the desired options for each UWS. Example This restaurant chooses to display 256 Colors on the PCWS01.
Devices User Workstations Cashier Select options to control cashier assignment when assigned by UWS (not employee). Example In the example above, this restaurant assigns a cashier link to each UWS. Cashier totals are used to balance by shift rather than by employee in this restaurant because the employee who begins the check is not the same employee who tenders the check. Cashiers may also be assigned in the Employees form in which case this tab is used only to assign the number of cash drawers.
Devices User Workstations Order Devices Enable the order devices associated with this UWS. Example The order devices you enable at each UWS can mask the printing of specific menu items or discounts. For example, CARROT CAKE is programmed in Menu Items to print at the Cold Line printer. The PCWS01 in the dining room has the Cold Line printer enabled. When CARROT CAKE is ordered at the PCWS01 the order prints at the Cold Line printer in the kitchen.
Devices User Workstations Printers Select the printers that will service each UWS. Example In this restaurant, customer receipts from the PCWS01 are programmed to print at the Express printer located nearby.
Devices User Workstations Peripherals Select the peripherals that will service each UWS.
Devices Interfaces Interfaces Use the Interface folder to identify the PMS (Property Management System), SIM (System Interface Module), or any other Interface System and there configuration. Programming General Create a record for different Interface System(s) this restaurant will use.
Devices Interfaces Interface Configuration the communications parameters.
Devices CA/EDC Drivers CA/EDC Drivers List and configure the credit card driver(s) this restaurant will use for authorization and settlement of credit card transactions. The driver activation code you enter determines the fields that will be active in the other tabs. Programming Driver Enter the name and Driver Activation Code for each driver this restaurant requires. You must save the Driver Code before configuring the other tabs in this form.
Devices CA/EDC Drivers System Complete the active fields. The fields in this form do not become active until you save the Driver Activation Code in the Driver tab. Example This restaurant uses the modem listed in the system properties folder for authorization and settlement. The number one is entered to indicate that the first modem listed should be used.
Devices CA/EDC Drivers Authorization Complete the active fields. The fields in this form do not become active until you save the Driver Activation Code in the Driver tab. Example To enable the MLI Header for the MAPP Driver, this restaurant enters a 1 in the MLI Header field.
Devices CA/EDC Drivers Settlement Complete the active fields. The fields in this form do not become active until you save the Driver Activation Code in the Driver tab. Example To enable the MLI Header for the MAPP Driver, this restaurant enters a 1 in the MLI Header field.
Devices Touchscreens Touchscreens Use the touchscreens form to enter a list of touchscreens and create styles for generated keys. Methods You can create touchscreens by: ❏ Using the touchscreens provided with the sample database. ❏ Editing sample touchscreens to suit the restaurant’s needs. ❏ Creating new touchscreens. The example below shows some sample touchscreens.
Devices Touchscreens Programming Touchscreens Enter a name for each touchscreen and template required by this restaurant. Example This restaurant uses different sign in screens for the Bar and Restaurant. The Bar sign in screen contains two one-touch sign in keys to allow bartenders to sign in quickly.
Devices Touchscreens Styles Create the styles for displaying generated keys and assign each style to a template. Example The style created by the settings above displays on the Bevg Shell template. These keys are generated based on the style. These are user-defined keys created in Touchscreen Designer on the Food Shell template.
Devices Touchscreen Designer Touchscreen Designer Use the Touchscreen Designer form to create new touchscreens and edit samples for this restaurant’s use. Programming Create a layout for each touchscreen listed. Use the fields below the design area to define each key’s characteristics. For more information on using Touchscreen Designer, see “Using Touchscreen Designer” on page 3-28.
Devices Touchscreen Designer 4-28
Chapter 5 System The forms in the System folder help you enter information about the name, local currency, table arrangement, and serving periods for a restaurant. In this chapter Overview .................................................................................... 5-2 Restaurant .................................................................................5-3 Order Types ...............................................................................5-6 Information Screens ....................
System Overview Overview Use the forms in the System folder to enter information that applies to the entire system or restaurant. Complete the forms in the following order: 1. Restaurant 2. Order Types 3. Information Screens 4. Reasons 5. Periods 6. Time Periods 7. Macros (Optional) 8. External Programs (Optional) 9.
System Restaurant Restaurant In the Restaurant form, enter information such as, the name(s) that apply to this restaurant, information about operational days and hours, base currency, and the taxes that apply to this location. Programming Descriptions Enter the descriptions that apply to this restaurant. Example This restaurant is located in a shopping mall and is also known by it’s mall location. The mall name is entered as a secondary name.
System Restaurant Business Settings Establish the business settings for this restaurant. Example The Business Day Start Time and Business Week Start Day fields establish a starting point for totals reporting that occurs daily and/or weekly. For example, if a restaurant wants weekly sales and labor reports to start at 6:00 a.m. on Monday, select 6:00 a.m. in Business Day Start Time and Monday in Business Week Start Day. (Click the clock button to select a.m. or p.m.
System Restaurant Options Select the options that apply to this restaurant. Example A restaurant located in Canada uses European date and time formats. The date appears as: 09SEPT96 when programmed to print on customer receipts, guest checks, and reports.
System Order Types Order Types At least one order type must be defined and enabled for every restaurant. Names Order type names can be up to eight characters. The name appears on balance reports, in the subtotal line during transactions, and can be programmed to print on guest checks and order receipts. It is not necessary to assign a name to an order type unless you want the name to display and print. Programming Create the order types required by this restaurant.
System Information Screens Information Screens The 3700 system allows you to design information screens that are unique to each restaurant. These screens are accessed through a touchscreen key and include information such as directions to the restaurant or group rates. The first screen in the Information Screens form displays when the [Info] key is pressed. It is often used as an index to list the name and number of the screens in the system.
System Information Screens Programming Create the information screens required by this restaurant. Use spaces to center the information. The name of the screen displays. Example Here is how Information Screen #2 will look.
System Reasons Reasons The 3700 sample database comes with a default set of reasons for use with voids, returns, and time card adjustments. Some common adjustment reasons are listed in the table below.
System Reasons Programming Enter the reasons this restaurant requires and select when the reason should display. . Example A restaurant that specializes in spicy dishes wants to track how many orders are returned because they are too spicy. The example above shows a new reason called “Too Spicy.” It will display as an adjustment reason whenever an item is returned.
System Periods Periods Use the Periods form to create a set of periods for the restaurant. These periods serve as the basis for reports and automatic menu level changes. Programming Create the periods this restaurant requires. Example A period is created for a daily Happy Hour which begins at 4:00 pm and ends at 7:00 pm M-F. This period can be used as a basis for reporting and automatic menu level changes.
System Serving Periods Serving Periods Serving Periods are use to track sales for a given period of time.
System Time Periods Time Periods Periods are used to analyze the sales activity during certain times of the day or shifts in small (to the minute) or large (up to 24 hours) increments. 3700 system report templates can generate reports for time periods for a revenue center or for the entire system. Programming Create the Time Periods required by this restaurant. Example This restaurant wants totals for different serving periods as well as hourly.
System Macros Macros Use the Macros form to create collections of keystrokes. Develop a macro for each task that requires a sequence of keystrokes by an employee. A macro may include any key or may be linked to another macro. When macros are chained together they execute in succession. There is no limit to the number of macros that can be linked together. If a macro is being linked to another, include the key code for that macro as the last step in the macro.
System External Programs External Programs Use this form to enter any external programs this restaurant will use in conjunction with the 3700 system. Programming Enter information about each external program this restaurant uses. Example This restaurant Validates and Backs up the database using an external program.
System Licensing Licensing This form includes the 3700 system software key licensing codes. Example This restaurant Validates and Backs up the database using an external program.
Chapter 6 Sales The Sales folder contains information about the types of food and beverages a restaurant serves. Not only do you enter the names and prices of menu items here, but you also determine what condiments will be available with each menu item, the types of tender/media accepted, and the discounts and taxes that apply to sales. In this chapter Overview .................................................................................... 6-2 Tax Rates ..............................................
Sales Overview Overview Use the forms in the Sales folder to enter information about the items this restaurant sells and the taxes, discounts and service charges that apply. Program the forms in the Sales folder in the following order: 1. Tax Rates 2. Tax Classes 3. Print Classes 4. Menu Levels 5. Discount / Service 6. Tender / Media 7. Currency 8. Courses 9. Descriptors 10. Menu Item Classes 11. Condiments 12.
Sales Tax Rates Tax Rates Use the Tax Rates form to define the tax rates that apply to sales in a particular restaurant. Some localities charge a different tax on food and beverages. Create a tax rate for each tax this restaurant charges. The restaurant’s location determines the method for calculating taxes. The 3700 system allows you to program the following tax types: Type Definition The tax is calculated by multiplying the amount in the percentage field by the total. $5.00 x 5% = .
Sales Tax Rates Programming General Create a tax rate for each tax this restaurant requires. Example This restaurant collects a 5% tax on food. They call the tax “Food Tax.” This name will print on customer receipts and reports.
Sales Tax Rates Breakpoints Complete the Breakpoints tab if Breakpoint is selected in the Type field on the General tab. ❏ Using the breakpoint tax tables provided by the local government, calculate the difference between the first and second amounts in the From Amount column. ❏ Enter the result in the Amount column of the Breakpoints table. Do not enter a decimal point. ❏ Repeat these steps until a pattern emerges. ❏ Select the Number of the breakpoint that begins the pattern in Begin Repeat.
Sales Tax Rates Canadian Tax Complete the Canadian Tax form for Canadian Tax rates.
Sales Tax Classes Tax Classes Once you’ve created the tax rates a restaurant will use, you can group them into tax classes. Tax classes are applied in the Menu Item Classes form and determine the taxes that apply to specific classes of food and beverages. For example, menu item classes that are food items might have a tax class called “Food Tax” applied, beverages might have “Beverage Tax” and condiments might have a tax class called “No Tax.” Programming Create the tax classes this restaurant requires.
Sales Print Classes Print Classes Use this form to create print classes to control how and where different types of menu items print. You can select from the following print locations for each print class you create: Print on... ❏ Customer receipt ❏ Local order receipt ❏ Journal ❏ Report ❏ Guest Check In addition you can select from the list of remote order devices you programmed in Devices| Order Devices to control where items in each print class print.
Sales Print Classes Programming Create the print classes required by this restaurant. Example This restaurant uses two print classes to control the printing of bar condiments. Priced bar condiments are programmed to print on the journal and reports. Unpriced condiments do not print to the journal or reports. They are only programmed to print in red on the customer receipt/check.
Sales Menu Levels Menu Levels Use this form to define a set of menu level classes to simplify menu item programming. Menu levels serve to “filter out” menu items that should not be available under certain conditions. Each menu item is linked to a menu level class in the Menu Items form.
Sales Menu Levels Programming Menu Level Classes Create the menu level classes required by this restaurant. Example (Main) This restaurant offers a Bagel w/ Crm Cheese during Breakfast, Lunch, and Dinner. By assigning Bagel w/Crm Cheese to the Menu Level Class “All Levels”, the bagel is available at all times of the day. The price of the bagel defaults to the breakfast (Price1) price.
Sales Menu Levels Automatic Menu Levels Create a record for each automatic menu level change this restaurant requires. Example In this restaurant, the menu level automatically changes to Main Level 2 for Happy Hour in the Bar. Menu items with a Price2 value, automatically change to this price during the Happy hour period. Note The menu item must belong to a Menu Item Class with the option Enable prices 2-4 selected.
Sales Discount/Service Discount/Service Use this form to program the discounts and service charges used in this restaurant. Discounts include such items as Senior Citizen Discounts, Employee Meal Discounts, and Coupon Promotions. Typical service charges include Autogratuities, Room Service Charges, and Entertainment Cover Charges. Programming General Create each discount and service charge this restaurant requires. Example This restaurant allows employees a 24% discount on employee meals.
Sales Discount/Service Options Select the options and itemizers that apply to each discount or service charge. Example Selecting the Preset option for the Empl. Meal discount, causes the 3700 system to apply the amount entered in the Percent field on the General tab. This discount is programmed to require a reference (the employee number) and prints a validation chit for the employee to sign.
Sales Discount/Service Discount/Service Charge Use this tab to complete the programming of Discounts and Service Charges. Note: Only the options that apply to the Type are available to each record. Example This restaurant limits the Empl. Meal discount to a maximum of $5.00. To create this limit, the option Limit discount was selected and $5.00 was entered in the Amount field on the General tab.
Sales Tender/Media Tender/Media Organizing Tender/Media Micros recommends that tender/media keys be organized numerically based on their type. This makes reports easy to read and simplifies database maintenance tasks. Types of Tender/Media A Payment subtracts the amount entered from the amount due. If the result is 0, the check is closed and the transaction finalized. Examples of payment keys include: cash, credit cards, room charges and foreign currency.
Sales Tender/Media Programming General Create each tender/media key this restaurant requires. Example This restaurant accepts cash, traveler’s checks, personal checks, food stamps, and a variety of credit cards. A tender Media key is created for each. In addition keys are created for Media handling and service total functions. The 3700 system allows you to associate an icon with each Tender/Media key.
Sales Tender/Media Tender Select the options that apply to each tender/media key. Example For example, the option Open drawer is used with the[Cash] key, as well as with the [Tips Paid] key. Other options here are used to control the posting, HALO, and required entries for each key.
Sales Tender/Media Preset Tender Keys Create any Preset Tender Keys this restaurant uses. Example This restaurant speeds up cash handling by programming payment keys for common denominations of U.S. dollars.
Sales Tender/Media Credit Card Tender Select options to control the verification and authorization requirements for credit cards accepted by this restaurant. Example This restaurant selects Verify before authorization to check the credit card number against known parameters of each credit card company before sending an authorization request. Micros recommends selecting this option for all credit cards. For more information refer to The Feature Reference Manual.
Sales Tender/Media Credit Authorization Authorization Define the authorization limits and the Credit Authorization and Electronic Draft Capture processor for each credit card key you create. Example In the example above, Visa and Mastercard are both authorized by the DEMO driver. Initial authorization requests are made for $20.00 and a 25% tip is automatically added to subsequent authorization requests.
Sales Tender/Media Preambles Enter the range of digits that identify each credit card type. The preamble is used to associate credit cards read with the magnetic card reader with the correct payment key. Example For example, Visa is the only card that starts with 4. By entering 4*, any card that begins with 4 is identified as Visa by the system.
Sales Tender/Media Property Management System (PMS) Select the options that apply to each PMS key. Example For example, the Room Charge key allows the posting of 0.00 dollar amounts and a 19 character reference.
Sales Tender/Media Service Total Options Select options to add functionality to service total key types. Example To create a key that will “chain” several checks together, select Chain Order. The orders on the chained checks will all be sent to order output devices when the Fire key is pressed. This feature ensures that guests at the same table, but with separate checks, receive their food at the same time.
Sales Tender/Media Printing Select the printing options that this restaurant requires for each key. Example The Media Declaration key above is programmed to print a validation chit. However, none of the print check options are selected because a media declaration does not require a check to print.
Sales Currency Currency Use this form to program the system to accept alternate currencies. Programming Define the other currencies this restaurant accepts. Example Customers in this restaurant often pay with Canadian currency. The system is programmed to prompt the cashier for the currency in which to issue change. The UWS has two cash drawers assigned in the User Workstations form; one for U.S. currency and one for Canadian currency.
Sales Courses Courses Use this form to define courses in restaurants that offer fixed price meals. For more information about Fixed Price Meals, see the 3700 Feature Reference Manual.
Sales Courses Programming Courses Create a record for each course this restaurant offers as part of a fixed price meal. The name can be descriptive, such as “Soup” or numeric, Course 1, Course 2, etc. Example This restaurant offers two fixed price meals; one at lunch and one at dinner. The lunch meal offers a choice from three courses: Soup/Salad, Entree, and Dessert. The dinner meal offers four courses: Appetizer, Soup/Salad, Entree, and Dessert.
Sales Courses Course Membership Create the course membership groups required by this restaurant. Example The lunch meal allows a choice of either Soup or Salad as one of its courses. A course membership that includes soup and salad items is created. In the Menu Items form, items that are offered in this course are assigned to this Course Membership.
Sales Courses Course Selection Create a record for each type of fixed price meal this restaurant offers and select the courses included in the meal. Example The fixed price lunch meal in this restaurant includes selections from the Soup/Salad, Entree, and Dessert courses.
Sales Descriptors Descriptors In the 3700 system, a descriptor is a word or phrase that appears on a UWS display, report, and/or prints at a 3700 printer. Use the Descriptors form to program: ❏ SLU names and styles ❏ Sales Itemizers ❏ Headers and Trailers Programming Discount/Service SLU Enter a name to describe each SLU this restaurant requires and select a style for generated keys. Example This restaurant displays two different SLUs for discounts.
Sales Descriptors Menu Item SLU Enter a name to describe each Menu Item SLU this restaurant requires and select a style for generated keys. Example The employee can easily locate the menu item, Ice Cream, because it’s logically assigned to an SLU.
Sales Descriptors Tender/Media SLU Enter a name to describe each Tender/Media SLU this restaurant requires and select a style for generated keys. Example This restaurant places keys for tendering cash, checks, credit cards and Traveler’s Checks on a Screen Lookup that can be accessed from the Default Transaction screen.
Sales Descriptors Sales Itemizers Create the itemizers this restaurant requires for subtotaling menu items. Example This restaurant subtotals food and soft beverages separately from liquor, beer and wine.
Sales Descriptors Headers and Trailers Enter a name to describe each Header and Trailer this restaurant requires. Example The Bar Check header created above prints on customer receipts.
Sales Condiments Condiments Use the Condiments form to program the condiment groups for this restaurant. Programming Condiment Groups Create a group for each type of condiment required by this restaurant. Example This restaurant requires condiment groups for Meat and Fish preparation because it offers several entrees of this type.
Sales Condiments Condiment Membership Create larger membership classes for condiments and select the groups that belong to each. Example A condiment Membership class called “Meat Temperatures” is created.
Sales Condiments Condiment Selection Create the allowed and required condiment selections required for each type of menu item in this restaurant. Example A separate condiment selection is created for cheeseburgers in this restaurant. When used as a Required Condiment selection in the Menu Items form, the employee is required to post the Meat Temperature, Cheese Choice, and Starch choice for cheeseburgers.
Sales Menu Item Classes Menu Item Classes Use the Menu Item Classes form to simplify programming by assigning the same privilege levels and option settings to all menu items in a class. Programming Description Create the Menu Item Classes required by this restaurant. Example Menu items assigned to the Menu Item Class “Cocktail/Liquor” share characteristics assigned to the class. A Bloody Mary and a Daiquiri, for example, share the same Tax Class and itemizer selections.
Sales Menu Item Classes General Options Define the characteristics of each menu item. Example You can define certain Menu Item Classes as Beverages when you are using the Beverage Control feature of the 3700 system. See the 3700 Feature Reference Manual for information about this feature.
Sales Menu Item Classes Print/Display Options Select options to control the printing and display of each class of menu items on order chits, customer receipts, and UWS displays. Example Menu Items in the “Cocktail/Liquor” class are programmed to print as nicknames at the order printer located behind the bar. The nickname for each item is entered in the Name2 field of the Menu Items form.
Sales Menu Item Classes Price/Totals Select the required pricing and posting options for each class of menu items. Example This restaurant reduces drink prices during Happy Hour. By selecting Enable prices 2 through 4 and Use sub menu level for prices, the restaurant can create several prices for the drinks in this Menu Item class.
Sales Menu Items Menu Items Use this form to program menu items. The Menu Item table is one of the largest in the database. You should plan and organize it before program it. Note Condiments which are offered as charged items and as non-priced items must be entered twice. Organizing the Menu Items form MICROS recommends that menu items be organized numerically based on their Major Group and further divided by Family Group. This makes reports easy to read and simplifies database maintenance tasks.
Sales Menu Items Naming Menu Items The 3700 system allows you to assign two names to each menu item. Programming determines whether Name1, Name2, or both, appear in the transaction detail, and on guest checks, receipts and remote order devices. Name1 prints on reports. Name2 can be used where the kitchen staff speaks a another language, or where the kitchen uses abbreviations. SLU Priorities Assign an SLU priority to control the order in which items display on touchscreens.
Sales Menu Items Programming Definition/General Create a record for each menu item and condiment this restaurant requires. Example In this restaurant, bottled wines are programmed to display in an NLU (Number Lookup) window because the list is so lengthy. The employee chooses an item by entering the NLU number.
Sales Menu Items Definition/Groups Select the groups for each menu item this restaurant requires. Example You can select a Menu Item and Condiment Group for each menu item. The menu item will be included in sales totals for the selected group.
Sales Menu Items Definition/Options Select the options that apply to this menu item. Example This restaurant has a limited number of lobsters each day for sale. Selecting the option Check availability causes the system to display the prompt: “THIS MENU ITEM IS SOLD OUT” when there are no more lobsters available. If an order is placed for more lobsters than is on hand, the system responds with the prompt, “ONLY [#] ITEMS REMAINING”.
Sales Menu Items Reports Select the Major and Family Groups for each menu item this restaurant requires. You can select a Major, and Family Group, for each menu item. The menu item will be included in sales totals for the selected groups.
Sales Menu Items Prices Create prices for each menu item and condiment this restaurant requires. Example Each menu item may have up to four different prices. The prices may change depending on the revenue center, time of day, or active menu level. In order for a menu item to have more than one price, the option Enable prices 2-4 must be selected in Menu Item Classes | Price/Totals.
Sales Menu Items 6-50
Chapter 7 Revenue Centers The forms in the Revenue Centers folder contain options for customizing restaurant operations in each revenue center. In this chapter Overview .................................................................................... 7-2 RVC Credit Cards......................................................................7-3 RVC Discount / Service .............................................................7-7 RVC Display Design ......................................................
Revenue Centers Overview Overview Different revenue centers are defined within a system to provide sales tracking, accounting, and transaction control. Usually, a revenue center matches an outlet in the restaurant, such as a bar, dining room, or a retail shop. Defining options for each revenue center allows a restaurant to: ❏ Provide accounting information for outlets in the system, as a subset of the system. ❏ Control or restrict access. ❏ Define functional characteristics for the outlet.
Revenue Centers RVC Credit Cards RVC Credit Cards Different revenue centers require different credit card handling options. The 3700 system allows you to customize credit card handling in each revenue center. Programming General Select the credit card options that apply to each revenue center. Example This restaurant has several workstations in the Restaurant revenue center.
Revenue Centers RVC Credit Cards Headers/Trailers Select the headers and trailers to print on credit card vouchers for each revenue center. Example The example below shows the credit card trailer for the Restaurant revenue center. Trailers are programmed in Sales|Descriptors.
Revenue Centers RVC Credit Cards Floor Limits Enable the secondary floor limits for each revenue center. Example The Restaurant revenue center enables a secondary floor limit to control when a second request for authorization is initiated. In this example, a second authorization is requested anytime the service total reaches 10% more than the initial authorization amount. Floor limits are established in Sales|Tender/Media (Credit Auth tab).
Revenue Centers RVC Credit Cards Printing Select options to control the printing of credit card vouchers in each revenue center. Example This restaurant selects the option Print voucher in background to cause a credit card voucher to print automatically when authorization is received. This feature is used with the Suspend /Resume feature of the 3700 system. For more information about the Suspend/Resume feature, see the 3700 Feature Reference Manual.
Revenue Centers RVC Discount / Service RVC Discount / Service Discounts and Service Charges may be controlled at the revenue center level. Programming Select discount and service charge options for each revenue center. Example This revenue center charges a 15% autogratuity on every check. This service charge is created in the Sales|Discount/Service form.
Revenue Centers RVC Display Design RVC Display Design The options in RVC Display Design allow you to control the display in each revenue center. For example, you can control the sorting and consolidation of items posted in a previous round for each revenue center. Programming Select the display options for each revenue center. Example This restaurant uses the term “Beverage” to display with the Beverage Control prompt in the Restaurant. They might choose “Drinks” to display in the Bar.
Revenue Centers RVC Posting RVC Posting Use the RVC Posting form to select the keys to which cash and bank tenders should post, and choose the number of days of check detail to store. Other posting options that can be determined at the revenue center level include rounding, posting to transaction or check employee, and order type totals posting options. Programming General Select separate posting options for each revenue center.
Revenue Centers RVC Posting Options Select totals and rounding options for each revenue center. Example In this restaurant, the host seats the guests and begins a check before the waiter or waitress is assigned (the host is the check employee.) The restaurant selects the option Current round posts to transaction employee to track the revenue generated by each waiter or waitress. Otherwise totals in this restaurant would only post to the host.
Revenue Centers RVC Printing RVC Printing Use the Revenue Center Printing form to customize check operations and printing in each revenue center. Programming General Complete the fields to control printing in each revenue center. Example The Restaurant revenue center is programmed to allow three checks to print before authorization is required. The Bar however, only allows one check to print before authorization since more supervision is desired in the Bar environment.
Revenue Centers RVC Printing Options Select the desired printing options for each revenue center. Example This restaurant selects the option Partial cut after customer receipt, to keep receipts printed near the door to the restaurant from blowing away.
Revenue Centers RVC Print Design RVC Print Design Use this form to design a different look for receipts and guest checks in each revenue center. Programming General Enter the names to print on guest checks, customer receipts, and order output for each revenue center. Example This revenue center uses the word “Subtotal” on guest checks and receipts.
Revenue Centers RVC Print Design Parameters Enter the number of lines needed to control the length of customer receipts in each revenue center. Example The Restaurant uses a guest check that includes a pre-printed logo. By entering 12 in the Lines before header field, the guest check begins printing below the logo. (Micros slip printers print 6 lines per inch.
Revenue Centers RVC Print Design Guest Checks Select options to determine what prints on guest checks in each revenue center. Example Guest checks in the Bar revenue center include the time and date.
Revenue Centers RVC Print Design Options Select options to control the printing of checks and order chits in each revenue center. Example In the Restaurant revenue center, voids print in red on order chits to alert kitchen employees not to prepare the item.
Revenue Centers RVC Print Design Headers and Trailers Select a different header and/or trailer to print on guest checks, customer receipts, and local orders in each revenue center. Example In this restaurant, checks printed in the Bar revenue center display a different name than checks printed in the Restaurant revenue center.
Revenue Centers RVC Interfaces RVC Interfaces Use the RVC Interface folder to identify the PMS (Property Management System) and SIM (System Interface Module) configuration on a Revenue Center basis. Programming SIM Select the display options for each revenue center.
Revenue Centers RVC Interfaces PMS Select the display options for each revenue center.
Revenue Centers RVC Seats RVC Seats Use the RVC Seats form to control the operation of the Seats feature in each revenue center. Programming Enable seat handling in appropriate revenue centers. Example This restaurant has four revenue centers: Bar, Restaurant, Catering and Retail. Seats are enabled only in the Restaurant and Bar.
Revenue Centers RVC Table Seating RVC Table Seating Use the RVC Table Seating form to define service points in the in each revenue center. Usually, the point of service is a table, but a “table” can be any conveniently defined point or area of service. Table Names A table names can be any 4 alphanumeric characters. Table names need not be in any particular order.
Revenue Centers RVC Taxes RVC Taxes Use the RVC Taxes form to customize tax operations in each revenue center. Programming General Define the tax options for each revenue center. Example In the Restaurant revenue center the phrase that prints on customer receipts and guest checks is “Tax.
Revenue Centers RVC Taxes Value Added Tax (VAT) Select options that affect how Value Added Taxes (VAT) print on guest checks in each revenue center. VAT is a form of sales tax used outside the United States.
Revenue Centers RVC Taxes Canadian Tax Configure the Canadian tax printing options for each revenue center. Example The example below shows how tax lines print when the option Print separate Canadian tax lines is selected.
Revenue Centers RVC Touchscreens RVC Touchscreens Use the RVC Touchscreens form to customize touchscreen displays in each revenue center. Programming Touchscreens Select the touchscreens to display in each revenue center. Example For example, the sign in screen displayed in the Restaurant revenue center may differ from the one displayed in the Bar. Use the folder link to open the Touchscreens form if you need to create more touchscreens.
Revenue Centers RVC Touchscreens Styles Choose a style to display open checks when an employee presses the [Pick Up Check] or [Transfer key]. You can select a different style in each revenue center for splitting checks, editing seats, and sharing checks. Example A restaurant might design more than one style for the keys that display when the [Pickup Check] key is pressed.
Revenue Centers RVC Touchscreens Alerts Enable alerts in the appropriate revenue centers. Example Alert times in the Restaurant are set for 900 and 1800 seconds.
Revenue Centers RVC Transactions RVC Transactions Use the RVC Transactions form to customize the options that control the operation of the 3700 system for each revenue center. Programming General Select the options for each revenue center. Example This restaurant often serves large groups. The option Allow table chaining is selected to allow employees to Chain and Fire orders at multiple tables. This ensures that the customers in a group receive their food at the same time.
Revenue Centers RVC Transactions Checks/Receipts Select options to control check and receipt handling in each revenue center. Example In the Bar, Allow fast transactions enables employees to begin a check by pressing a menu item key. This allows for faster service in this revenue center.
Revenue Centers RVC Transactions Cashier Select the options that control cashiering in each revenue center. Example For example if you enter “Cashier” in the Cashier Name field the prompt “ENTER CASHIER ID NUMBER” displays.
Revenue Centers RVC Transactions Security Select the security options required by each revenue center. Example This restaurant wants to be sure employee meals are charged to the correct employee. The option Use employee ID when entering employee meal, adds an additional layer of security. The employee ID is entered in the ID field of the Employees form.
Revenue Centers RVC Transactions Menu Levels Select a default menu level for each revenue center. Example In the Bar, when a customer orders a large drink, the price is drawn from Sub Menu Level 3 and the prefix “LG” prints and displays in front of the menu item. Note A menu level “pops up” when it returns to the default menu level after a transaction such as a service total.
Revenue Centers RVC Transactions Retail The Retail options will be available in a later version.
Revenue Centers RVC Transactions 7-34
Chapter 8 Employees Use the Employees folder to program information about a restaurant’s employees and schedule. In this chapter Overview .................................................................................... 8-2 Employee Classes ......................................................................8-3 Configurator Access ................................................................ 8-11 Jobs ..........................................................................................
Employees Overview Overview Use this folder to create Employee Classes to control privileges, and to enter individual employee information. If you are using the Time and Attendance feature, you’ll assign job codes and program the Time and Attendance and Time Clock Schedule forms. Before you begin to enter information about individual employees, use the forms provided with the 3700 Site Survey to organize the information. Program the forms in this folder in the following order: 1. Employee Classes 2.
Employees Employee Classes Employee Classes Employee Classes allow you to: ❏ Generate reports for specific kinds of employees ❏ Simplify programming by assigning the same privilege and option settings to all employees in a class Organize employees according to the duties that they perform most often, and then by privileges. Assign each division in duties or privileges to a separate Employee Class.
Employees Employee Classes Privileges Select the privileges for each employee class. Example The Managers in this restaurant are privileged to create and settle credit card batches, as well as to edit and report on credit card batches. The table below shows the privilege hierarchy in the 3700 system.
Employees Employee Classes Procedures Select the procedures that each employee class may perform. Example In this restaurant, Managers often redirect printer output during slow periods when two order output devices are not needed.
Employees Employee Classes Transactions Select the options that control the transactions each employee class may perform. Example In this restaurant cashiers are privileged to use the [No Sale] key in order to make change for the jukebox.
Employees Employee Classes Guest Checks Assign privileges involving checks to the appropriate employee classes. Example In this restaurant, the options Pickup check and Begin check are selected for servers. Other options, such as Pick up others’ check, are reserved for managers and cashiers. Remember, if you do not assign a privilege to an employee class, employees may only perform the operation by obtaining authorization.
Employees Employee Classes Printing Select the options that control printing for each employee class. Example In this restaurant, servers print checks when the customer requests one (on demand). A [Print Check] key is programmed on the touchscreen.
Employees Employee Classes Void/Return Select the void and return privileges for each employee class. Example Servers in this restaurant may void only current round menu items. The privilege of voiding previous round menu items is reserved for management. Note Voids and returns can be programmed to require a reason. See “Reasons” on page 5-9.
Employees Employee Classes Options Assign privileges to each employee class to control tendering, cashier and cash drawer assignment, and menu level changes. Example In this restaurant cashiers are responsible for balancing a cash drawer. The employees in this class use an [Assign Cashier] key to create a cashier link. Another method of assigning a cashier link is by UWS. See “User Workstations” on page 4-11 for more information.
Employees Configurator Access Configurator Access The Configurator Access form allows you to privilege some employee classes to view programming information, or to make changes to all or some forms. Programming Choose the forms that each employee class may access in POS Configurator, and indicate the actions they may perform. Example This restaurant allows servers to read the Menu Items form. They may not update, add, or delete records however.
Employees Jobs Jobs In most cases the employee classes you create will translate into specific jobs. You might create jobs such as, Dishwasher, Chef, Kitchen Manager, Line Cook, Headwaiter, Server, Bartender, Manager, and Assistant Manager. You can define a default pay rate for each job and specify if employees clocking into that job are required to declare tips in the Jobs form. Programming Job Definitions Create the jobs required by this restaurant.
Employees Jobs Job Categories Create categories for reporting purposes. Then assign each Job in the definitions tab to a category. Example This restaurant groups Dishwashers, Chefs, and Cooks into a job category called Back.
Employees Employees Employees Organizing Employee Information There are several ways to organize the employees form. You can list employees alphabetically from A to Z, or you can list employees alphabetically according to their employee class. This arrangement simplifies programming and maintenance. Programming General Enter each employee’s name. Then complete the fields on the General form. Example Jake, a Server, is assigned the employee ID 5.
Employees Employees Options Assign a cash drawer to employees that require one. Example In this restaurant, Bartenders are responsible for balancing a cash drawer at the end of their shift. Jennifer and Mathew are assigned cash drawers 1 and 2 respectively.
Employees Employees Employee Status Select a cashier link for each employee’s totals posting. Example Jake’s totals will post to Cashier 1 in reports.
Employees Employees Job Rates Select the Job that this employee most often performs and indicate any change in pay or clock in grace. Example Matthew, a long-time employee, is paid at a higher rate than the default pay rate established for cooks in the Jobs form. The higher rates are entered in the Override Rate fields.
Employees Time and Attendance Time and Attendance Note Programming of this form is not required unless your restaurant uses Time and Attendance. Use the Time and Attendance form to program the 3700 system to keep track of wages, hours, and schedules. Programming General Define the payroll information for this restaurant. Example This restaurant’s payroll begins on Sunday and is calculated weekly.
Employees Time and Attendance Time Clock Schedule Enable the schedule created in the Time Clock Schedule form, and select the desired options and grace periods. Example This restaurant uses the Time Clock Schedule. Employees in this restaurant are allowed a 15 minute grace period when clocking in or out. This means they may clock in up to 15 minutes before or after their scheduled start time. If they attempt to clock in outside this grace period, the system will require authorization.
Employees Time and Attendance Overtime Define the overtime parameters for this restaurant. Example This restaurant’s daily overtime begins after 24 hours on the time clock.
Employees Time and Attendance Breaks Enter information about break durations, prompts and authorization for this restaurant. Example This restaurant allows employees one paid and one unpaid break each day. When employees clock out, they are prompted, “Are you taking a paid break?” In addition, the system is programmed to require authorization for employees clocking in late from paid or unpaid breaks. The restaurant does not track early clock ins.
Employees Time Clock Schedule Time Clock Schedule Programming of this form is not required unless the Time and Attendance feature is used in this restaurant. While Time and Attendance tracks hours and wages, the Time Clock Schedule lists the days and hours each employee works. Each employee may be assigned a job. To reduce labor costs, employees may be prevented from clocking in early or clocking out late, and the schedule can be used to call attention to employees who clock in late or clock out early.
Chapter 9 Reporting Use the Reporting folder to program totals tracking, create autosequences, and automate routine tasks. In this chapter Overview .................................................................................... 9-2 Report Templates ......................................................................9-3 Report Classes ...........................................................................9-5 Report Date Range ....................................................................
Reporting Overview Overview Use the forms in the Reporting folder to customize reporting to meet a specific restaurant’s needs. The 3700 system comes with many standard report templates which may be used to run reports manually, or included in autosequences. You can create additional Report Classes, Date Ranges, Schedules, Totals information, and Tracking and Reporting Groups in this folder. Program the forms in the following order: 1. Report Groups 2. Tracking Groups 3. Historical Totals 4.
Reporting Report Templates Report Templates The system ships with a set of standard report templates designed by MICROS. The reports run from the Autosequences and Reports module are based on the templates in the Report Templates form. Templates also include formulas that calculate information for some fields.
Reporting Report Templates Programming Use this form to add any specialized report templates this restaurant requires. Example This report was generated by the Daily System Sales Detail template.
Reporting Report Classes Report Classes The sample database provides you with predefined report classes. Report classes are useful because there are over 200 report templates in the sample database. Report classes allow you to assign similar attributes to a group of reports. Programming Create any additional Report Classes required by this restaurant. Example The report templates System Job Summary, Employee Time Card and Job Detail, and Employee Job Summary belong to the Report Class “SYS Labor.
Reporting Report Date Range Report Date Range Use the Report Date Range form to create date ranges for reports whose Report Class have the option Prompt for Date Range selected. Offset The Offset field can be used to modify a date type by selecting a specific start or end date. For example, you could create a report range for yesterday by selecting Business Date (for the current business date) and entering -1 in the Offset Day field. Programming Create the reporting ranges required by this restaurant.
Reporting Schedule Classes Schedule Classes Use the Schedule Classes form to create schedules for reports generated by autosequences. Programming General Create the report schedules this restaurant requires. Example In this example Daily Shift Reports runs every day beginning at 10:00a.m. and repeats every four hours.
Reporting Schedule Classes Days/Months Use the numbers 1 - 31 (for days) and 1 - 12 (for months) to specify the dates or months included for schedule types Dates in Month or Months in Year. Example This Report Schedule reports totals for the 7th, 14th, 21st, and 28th of each month.
Reporting Cashier Totals Cashier Totals Use this form to create a name for each cashier link in the system. The name might be assigned to an employee or a UWS depending on the method this restaurant uses to track cashier totals. Programming Create a cashier link for each UWS or Employee. Example In this restaurant each employee is assigned a cashier link.
Reporting Historical Totals Historical Totals Use the Historical totals form to determine a period of time for saving totals accumulated by the 3700 system. Before you can assign Historical Totals to each database totals table, you must create the classes. The sample database includes some predefined classes for your use. Programming Classes Create any additional Historical Totals classes required by this restaurant. Example Totals in the Weekly Totals class are saved for 7 days.
Reporting Historical Totals Descriptor Assign an Historical Totals class to each Historical Total to determine how data is stored in this totals table. Note The Name field in the Descriptors tab is not editable. The field contains a descriptive title for each totals table in the database. Example In the table above, Shift Employee Total is assigned to the Weekly Totals class. Totals will be saved for seven days and no daily totals will be created.
Reporting Report Groups Report Groups Report Groups provide a means for creating subtotals and sorting items on reports, as well as selecting items to include in a report. Each menu item in the system can be programmed to post to one major group, family group, and menu item group. Sales reports provide sales information for each group. Note There is no implicit relationship between these groups; no hierarchical structure. For example, family groups are not required to be a subset of major groups.
Reporting Report Groups Family Groups Create the Family Groups required by this restaurant. Example This restaurant creates a Family Group for each type of menu item. Soups, Salads, and Sandwiches are assigned the same category to ensure they will print together on reports.
Reporting Report Groups Menu Item Groups Create the Menu Item groups required by this restaurant. Example Menu item groups can be used to track sales of menu items that are not part of the same family group. For example, “Light and Healthy” selections are a part of the following Family Groups: Appetizers, Entrees, Salads, and Desserts. An additional Menu Item Group called “Light and Healthy” is created to track sales of these diverse menu items separately.
Reporting Tracking Groups Tracking Groups A tracking group is a set of totals used to track specific information. How Many Totals Can I Track in One Group? When setting up tracking groups, keep in mind that you can create up to 64 tracking totals in a group, but only 48 will print on Micros standard reports. The system records information for the remaining tracking totals, but you must create a custom report to print it.
Reporting Tracking Groups Programming Create each Tracking group required by this restaurant. Note Once totals are posted to a tracking group, it can no longer be modified. The Tracking Group form displays the message “Tracking Group in Use.” Example A restaurant that specializes in hamburgers may want to establish a tracking group to track the sale of these important menu items. First a name for the tracking group is entered in the Tracking Groups section on the left, in this case Hamburger Sales.
Reporting Autosequences Autosequences An Autosequence is a predefined set of reports or other commands. The steps in an autosequence can be programmed to print reports, execute external programs, call stored procedures, or call another autosequence. Programming Create each autosequence this restaurant requires. Example This restaurant creates an autosequence called “Lunch Reports” to run a series of reports after the lunch hour.
Reporting Autosequence Steps Autosequence Steps Use this form to create each step in the autosequence. If the step is a report, select the report template to use and give it a unique title on the Reports tab. You can indicate what should happen if the autosequence encounters an error on the Error Actions tab, and determine the scope of the report using the options on the Ranges tab. If an autosequence step calls another autosequence or a stored procedure, select those options on the respective tabs.
Reporting Autosequence Steps Error Actions Choose what should happen if an error occurs during this step. Example The system will ignore any errors encountered during this step.
Reporting Autosequence Steps Call/Ext. Prog Choose another autosequence or and external program as a step. Example Starting NT Backup is a step that calls an External Program.
Reporting Autosequence Steps Report Select a report template as a step in an autosequence. Example The first step in the Lunch Reports autosequence is to run the Revenue Center Time Period Totals report.
Reporting Autosequence Steps Stored Procedures Add any stored procedures to this autosequence. Example The first step in an end of day autosequence could be to run the stored procedure which checks for open guest checks. Using the Branch option, when open guest checks are found during this step, the system can be programmed to print an open check report.
Appendix A For 2700 Users This chapter describes the changes 2700 users will see in the 3700 POS Configurator. In this appendix What Happened to… .................................................................
What Happened to… What Happened to… Some 2700 features have changed extensively or no longer exist. If a 2700 feature has been removed, it is usually because: ❏ a new 3700 feature has replaced the old feature. ❏ we implemented the feature in a different way. ❏ we are not including the feature in the current version of the 3700 system software.
What Happened to… File Configuration In the 2700 system, you must allocate a set amount of RAM to variable-length files to program the database.The amount of RAM installed in a 2700 system unit determines the size available for each of these variable-length files. Allocating RAM to definition tables in the 3700 database is unnecessary. The size of your 3700 database is only limited by system resources. Hexadecimal Type Fields Most fields in the 2700 database required hexadecimal values.
What Happened to… MAP Characters In the 2700 System, you can substitute up to six default characters with international or special characters, called MAP characters. 2700 Special Characters ! “ $ < > \ Ä Å Æ Ö Ü £ ß Ø É Ñ Now, you access special characters by using the Windows® 95 and Windows NT™ ANSI character set. PC ISN In a 2700 network, the MICROS PC ISN board allows you to link multiple 2700 Systems in a global communications network (ISN), creating logical systems.
Index Note: A Master Index is located in the 3700 Feature Quick Reference Manual. All page numbers are hotspots.
Index D D daily totals creating 1-8 database adding records 3-18 backing up 2-10, 2-11 broadcasting A-2 changes, saving 3-25 fields, copying 3-19 records, copying 3-19 relational 1-3 testing 2-10 to 2-11 database server described 1-2 starting 3-4 database table types 1-5 to 1-9 updated by POS Configurator 1-2, 1-3 default touchscreen assigning 4-11 definition tables access options 1-5 described 1-5 to 1-6 delete record tool, in POS Configurator 3-13 deleting records 3-23 deleting records, as blocks 3-24 de
Index I help.
Index P Order Types form programming 5-6 P paste record tool, in POS Configurator 3-12 paste tool, in POS Configurator 3-12 pasting blocks of records 3-20 fields 3-19 records 3-19 payment defined 6-16 payment keys 6-16 PC Applications ID 3-6 PC ISN, in 2700 A-4 periods programming 5-11 Periods Form programming 5-11 physical devices programming 4-5 pickup keys 6-16 pop-up menu levels 7-32 POS Configurator folders and forms listed 2-9 menus in 3-7 to 3-8 starting 3-5 toolbar 3-11 to 3-13 preambles specifyin
Index S returns privileges for employees, assigning 8-9 reasons 5-9 Revenue Center folder programming order of forms 7-2 RVC Credit Cards form programming 7-3 to 7-6 RVC Discount/Service form programming 7-7 RVC Display Design form programming 7-8 RVC Posting form programming 7-9 to 7-10 RVC Print Design form programming 7-13 to 7-17 RVC Printing form programming 7-11 to 7-12 RVC Seats form programming 7-20 RVC Table Seating form programming 7-21 RVC Taxes form programming 7-22 to 7-24 RVC Touchscreens for
Index U Touchscreens form programming 4-24 to 4-26 Tracking Groups form programming 9-15 to 9-16 tracking totals number of 9-15 subtotals of 9-15 transaction detail storing 1-8 U undo tool, in POS Configurator 3-13 User Workstations form programming 4-11 to 4-16 V Value Added Tax (VAT) programming 7-23 view all tool, in POS Configurator 3-11 view current tool, in POS Configurator 3-11 voids privileges for employees, assigning 8-9 reasons 5-9 Index 6