
User`s guide


Projects and Workspaces
© 2006 Microchip Technology Inc. DS51519B-page 63
4.2.4 Project Wizard – Name Your Project
Step 3: Name Your Project – Enter a name and location for your new project. To set
the directory:
• Type in the path to an existing directory, or type in the path to a new directory,
which will prompt you to create the directory when you click Next.
•Click Browse to browse to an existing directory or to one level above where you
wish to place a new directory. Click OK in the Browse for Folder dialog. Complete
the path if you are creating a new directory and then click Next. You will be
prompted to create the directory if it does not exist.
4.2.5 Project Wizard – Add Files
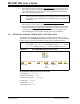
Step 4: Add Any Existing Files to Your Project – If you already have files that you would
like to add to the new project, select them now:
• Choose the file(s) to add. Click on a file name to select that file. Ctrl-Click to select
more than one file. Click Add>> to list file(s) to be added to the new project.
• To remove file(s) from the list, click on the file name(s) to select and then click
Remove.
If you wish to copy, and not move, the select files to the new project, check the
checkbox that appears next to the files that have been added.
Click Next to continue.
4.2.6 Project Wizard – Summary
Check the summarized information on the project. If anything is incorrect, use Back to
return to the dialog you need and change the information.
Click Finish when you are satisfied with the project setup.
4.3 CREATING/UPDATING ANY PROJECT
The process for creating or updating a project is the same regardless of whether you
are using a single or multiple project workspace.
1. Create/open a project in the current workspace. The project will appear in the
Project window.
• Create a new project by selecting Project>New
. Enter the new project name
and location in the dialog.
• Open an existing project by selecting Project>Open
.
2. Assign/change paths for project files by selecting Project>Build Options>Project
,
General tab.
3. Assign/change language tools in a project by first selecting Project>Set Lan-
guage Tool Locations to specify the path to each language tool. Then select
Project>Set Language Toolsuite
to set the toolsuite for the project.
4. Setup/change language tool properties for the project by selecting Project>Build
Options>Project or by right clicking on the project name in the Project window
and selecting Build Options. Then click the appropriate language tool tab.