
User`s guide


Walk-Through and Detailed Tutorial
© 2006 Microchip Technology Inc. DS51519B-page 49
3.4 CREATING SOURCE CODE WITH THE EDITOR
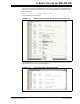
Select File>New to open an empty editor window in which to type your source code. To
save your work, select File>Save
.
For more on the editor, see Chapter 15. “Using the Editor”.
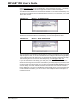
Tutorial Step 3:
Create/locate a folder (directory), using Windows Explorer, where you will place
application project files. Then, type the following code into an MPLAB IDE editor win-
dow, or cut and paste from here. Save the file as cnt8722.asm to the project folder
when complete.
title “PIC18F8722 Counting Program”
#include <p18f8722.inc>
udata 0x60 ;declare COUNT variable
COUNT res 1 ; in bank 1
RST code 00h ;reset vector
goto Start
PGM code ;program vector
Start clrf WREG ;clear W register
movwf PORTC ;clear PORTC
movwf TRISC ;config PORTC as outputs
Init
clrf COUNT ;clear COUNT
IncCount
incf COUNT,F ;increment COUNT
movf COUNT,W
movwf PORTC ;display on Port C
goto IncCount ;loop
end
For more information on the assembly instructions, see the “PIC18F8722 Family Data
Sheet” (DS39646), Instruction Set. For more information on MPASM assembler direc-
tives and expressions, see the “MPASM™ Assembler, MPLINK™ Object Linker,
MPLIB™ Object Librarian User’s Guide” (DS33014) or MPASM assembler on-line help
in MPLAB IDE.
3.5 CREATING A NEW PROJECT
A project contains the source files needed to build and test an application. A project
configuration (workspace) includes the following: processor and display information,
such as the nature, size and position of all open windows, toolbars, execution and
debug settings. For more on projects and workspaces, see Chapter 4. “Projects and
Workspaces”.
Project and workspace global setting may be selected on the Project and Workspace
tabs of the Settings dialog (Configure>Settings
).
Tutorial Step 4:
For the tutorial, keep the default setup for projects and workspaces. Most notably, this
means you will be using the one-to-one project-workspace model.