
User`s guide


A Basic Tutorial for MPLAB IDE
© 2006 Microchip Technology Inc. DS51519B-page 45
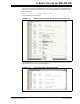
Use Debugger>StopWatch to bring up the StopWatch dialog. Make sure that a single
breakpoint is set at the movwf COUNT instruction, and then press Debugger>Reset
and
then Debugger>Run
to halt at the movwf COUNT instruction. With the default processor
frequency of 4 MHz, the StopWatch should show that it took 8 microseconds to reach
the first breakpoint.
FIGURE 2-26: STOPWATCH – AT FIRST BREAKPOINT
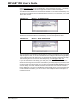
Execute Run again to go around the loop once, and note that the StopWatch shows
that it took about 49 milliseconds. To change this, you can change the values in the
delay loop.
FIGURE 2-27: STOPWATCH – AFTER DELAY
2.13 TUTORIAL SUMMARY
By completing this tutorial, you have performed the major steps for creating, building
and testing a simple project. Tasks completed include:
• Selecting the device – the PIC18F8722.
• Using the Project Wizard to create a project, and using the wizard to:
- select the MPLAB IDE built in MPASM assembler and MPLINK linker
language tools,
- add files for the project: a template file for the device selected and a linker
script to build it properly.
• Writing some simple code to send a changing value out an I/O port.
• Building the project.
• And finally, testing the code with the simulator.
These are the essential steps for getting started with MPLAB IDE. You are now ready
to continue exploring the capabilities of MPLAB IDE.