
User`s guide


MPLAB
®
IDE User’s Guide
DS51519B-page 26 © 2006 Microchip Technology Inc.
2.3 TUTORIAL OVERVIEW
In order to create code that is executable by the target PICmicro MCU, source files
need to be put into a project. The code can then be built into executable code using
selected language tools (assemblers, compilers, linkers, etc.). In MPLAB IDE, the
project manager controls this process.
All projects will have these basic steps:
• Select Device
The capabilities of MPLAB IDE vary according to which device is selected. Device
selection should be completed before starting a project.
• Create Project
MPLAB IDE Project Wizard will be used to Create a Project.
• Select Language Tools
In the Project Wizard the language tools will be selected. For this tutorial, the
built-in assembler and linker will be used. For other projects, one of the Microchip
compilers or other third party tools might be selected.
• Put Files in Project
Two files will be put into the project, a template file and a linker script. Both of
these exist in sub-folders within the MPLAB IDE folder. It is easy to get started
using these two files.
• Create Code
Some code will be added to the template file to send an incrementing value out an
I/O port.
• Build Project
The project will be built – causing the source files to be assembled and linked into
machine code that can run on the selected PICmicro MCU.
• Test Code with Simulator
Finally, the code will be tested with the simulator.
The Project Wizard will easily guide us through most of these steps.
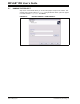
Note: Some aspects of the user interface will change in future product releases
and the screen shots in this tutorial may not exactly match the appearance
of the MPLAB IDE desktop in later releases. New features will be added as
additional parts are released. None of the functions described in this tutorial
will be removed, but more features may be added.The on-line help is the
most up-to-date reference for the current version of MPLAB IDE.