
User`s guide


© 2006 Microchip Technology Inc. DS51519B-page 241
MPLAB
®
IDE
USER’S GUIDE
Chapter 19. Using Stimulus – PIC17 Devices
19.1 INTRODUCTION
Stimulus functions allow you to direct the simulator to apply artificial stimuli while
debugging your code. You can set pins high or low and inject values directly into
registers.
Select Stimulus from the Debugger menu, then choose the tab for the stimulus type.
Topics covered in this chapter:
• Using Pin Stimulus – Synchronous or Asynchronous stimulus on I/O pins
• Using File Stimulus – Triggered stimulus on I/O pins or file registers, set up from
files
19.2 USING PIN STIMULUS
Pin Stimulus is user-defined. It may be:
• Asynchronous – Fired by the user.
• Synchronous – Regular, repeating series of high/low voltages with adjustable duty
cycle set by number of clock cycles per high/low time.
Pins can be set high or low at program counter addresses. Addresses in the list will be
looked for sequentially.
The contents of the pin stimulus list can be edited, saved and restored from a file.
• Creating/Editing Pin Stimulus
• Applying Pin Stimulus
• Pin Stimulus Display
19.2.1 Creating/Editing Pin Stimulus
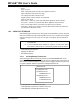
1. Select Debugger>Stimulus Controller and then click the Pin Stimulus tab.
2. To create a new file, click Add Row to create a new row for entering data. To
open an existing pin stimulus file for editing, click Load and select the file using
the Open dialog.
3. Click in the “Type” column of the table row for which you wish to add or change
data. Select or change the type of stimulus (Async or Synch). Depending on the
stimulus type chosen, each cell gets an appropriate control which allows you to
specify the value of that cell.
Note: Changing stimulus files outside the Stimulus dialog is NOT recommended.