
User`s guide


MPLAB IDE Windows
© 2006 Microchip Technology Inc. DS51519B-page 131
Save As
Save the active project to a new location/name. See Section 13.22 “Save Project As
Dialog”.
Close
Close/remove the selected project in the workspace.
Add Files
Insert files into the project. Depending on the type of file, MPLAB IDE will sort the files
into the correct type within the project window tree.
Add New File
Requests a name for the new file in a dialog (see Section 13.10 “File Management
Dialog”). On Save, the file is added to the project and a new file window is opened.
Depending on the type of file, MPLAB IDE will sort the files into the correct type within
the project window tree.
Reload
This command causes MPLAB IDE to go out to disk and read the project file in again.
It also does a Refresh immediately after. This functionality is useful if you modify your
project and then decide you don't want the modifications. As long as you haven't saved
and overwritten the old project, you can “Reload” and get back to your original project.
Refresh
This command causes MPLAB IDE to go out and check the status of all the files in the
project.
For version control system files, the files' status is updated in the project window.
For missing files that you have relocated, “file not found” text will be removed.
Select Language Toolsuite
Select the toolsuite you will use for your project, e.g., Microchip MPASM Toolsuite. See
Section 13.24 “Select Language Toolsuite Dialog”.
Select Version Control System
Set up your project to use files from a version control system. See
Section 13.29 “Version Control Dialog”.
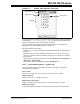
12.4.2.3 FILE TYPE MENU
If you right click on a file type in the project tree, a menu with file type commands will
be displayed.
Library Link Order (Library Files Only)
Opens the Library Link Order dialog, which shows you the true order of the library files
and allows you to resequence them. This is important for MPLAB C30 users.
Note: Adding Header Files to the project window will not cause these files to be
added to the project build. You must use a #include statement in your
code.
Note: Adding Header Files to the project window will not cause these files to be
added to the project build. You must use a #include statement in your
code.