
User manual


Table Of Contents
- Introduction
- Document Layout
- Conventions Used in this Guide
- Recommended Reading
- The Microchip Web Site
- Customer Support
- Document Revision History
- Chapter 1. Product Overview
- 1.1 Introduction
- 1.2 MCP6XXX Amplifier Evaluation Board 4 Kit Contents
- 1.3 MCP6XXX Amplifier Evaluation Board 4 Description
- Chapter 2. Installation and Operation
- 2.1 Introduction
- 2.2 Required Tools
- 2.3 MCP6XXX Amplifier Evaluation Board 4 Set-up
- 2.4 MCP6XXX Amplifier Evaluation Board 4 Operation
- A.1 Introduction
- A.2 Board - Schematic
- A.3 Board - Top Silk and Metal Layers
- A.4 Board - Top Metal Layer
- A.5 Board - Bottom Metal Layer
- B.1 MCP6XXX Amplifier Evaluation Board 4 BOM
MCP6XXX Amplifier Evaluation Board 4 User’s Guide
DS51681A-page 14 © 2007 Microchip Technology Inc.
2.4.3 Amplifier Modifications Using 8-Pin SOIC Op Amps
There are two options available when using single op amps in SOIC-8 packages
(150 mil wide):
• Soldering onto the MCP6XXX Amplifier Evaluation Board 4, or
• Soldering it onto a separate board which is connected to the DIP-8 socket
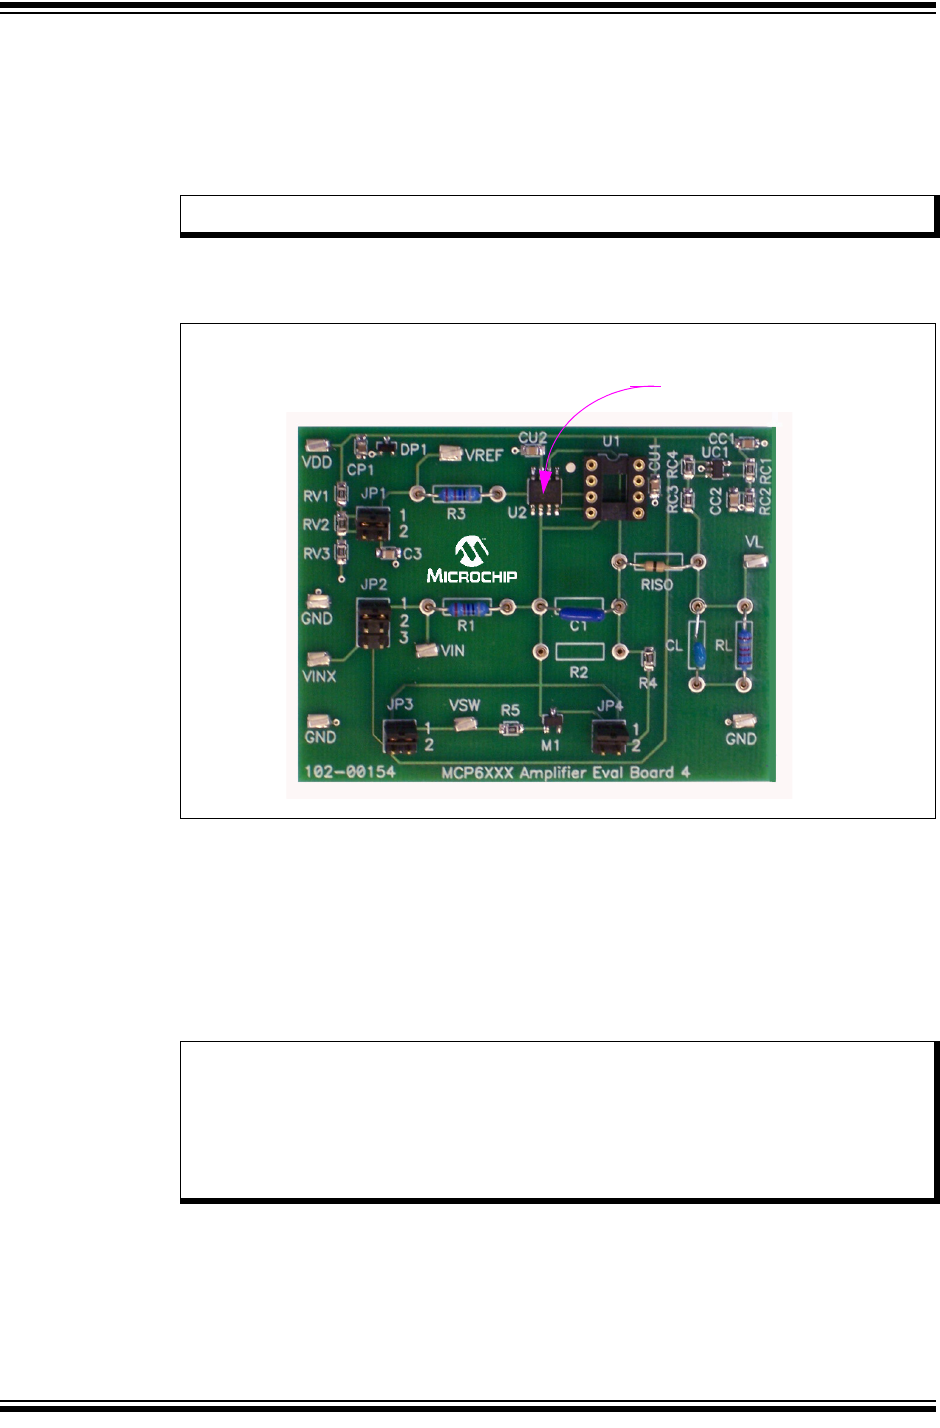
Figure 2-10 shows a SOIC-8 op amp soldered onto the MCP6XXX Amplifier Evaluation
Board 4.
FIGURE 2-10: Op Amp in SOIC-8 package soldered onto MCP6XXX Amplifier
Evaluation Board 4.
Figure 2-11 shows a SOIC-8 op amp and a DIP-8 socket, soldered onto the 8-Pin
SOIC/MSOP/TSSOP/DIP Evaluation Board available from Microchip Technology Inc.
(order # SOIC8EV). The two interconnect strips on the bottom are Samtec part #
BBS-14-T-B or equivalent and are soldered into the through holes for the DIP-8 socket.
Figure 2-12 shows this board plugged into the MCP6XXX Amplifier Evaluation Board
4.
Note: The DIP-8 socket must be empty; only one op amp can be used at a time.
Solder an SOIC-8
Op Amp onto the
board
Note: Insert the interconnect strips into the DIP-8 socket on the MCP6XXX Ampli-
fier Evaluation Board 4. Place the SOIC8EV board on the top of the inter-
connect strips with the same pin orientation. Now solder the strips to the top
board; this procedure ensures correct alignment of the strips. Clip the pins
flush with the top surface of the SOIC8EV board, then solder the SOIC-8
op amp on the top.