MECABLITZ 45 CL-4 Bedienungsanleitung Gebruiksaanwijzing Manuale istruzioni Mode d’emploi Operating instruction Manual de instrucciones
Contents ķ 1. 2. 2.1 2.2 2.3 2.3.1 2.3.2 2.3.3 2.4 3. 4. 5. 6. 6.1 6.2 6.3 7. 8. 8.1 8.2 8.3 9. 10. 11. 11.1 11.2 12. 13. 14. 40 Foreword . . . . . . . . . . . . . . . . . . . . . . . . . . . . . . . . . . . . . . . . . 40 Points worth knowing . . . . . . . . . . . . . . . . . . . . . . . . . . . . . . . . . 41 Special flash functions . . . . . . . . . . . . . . . . . . . . . . . . . . . . . . . . 41 Safety instructions . . . . . . . . . . . . . . . . . . . . . . . . . . . . . . . . . . .
Point worth knowing The mecablitz 45 CL-4 is available in two versions: • mecablitz 45 CL-4-NC (with NiCad battery and battery charger) The NC version can be expanded to alkaline manganese battery operation by way of the battery holder 45-39 (available as an optional extra).
ķ system as soon as the ambient light level is no longer sufficient for automatic focusing. The autofocus ermitter emits a striped pattern. If an SCA 300 autofocus adapter is used, only the autofocus measuring beam built into the adapter is activated. • Program auto flash mode Some cameras merge in the „Program“ mode the ambient light with the light emitted by the flashgun. The camera automatically adjusts a shutter speed/aperture combination, and controls the flash in TTL mode.
1. Safety instructions 2. Preparing the flashgun for use • The flash unit is exclusively intended and approved for photographic use! • Never fire a flash in the vicinity of flammable gases or liquids (petrol, solvents, etc.) - DANGER OF EXPLOSION! • Never take flash shots of car, bus or train drivers, or of motorcycle and bicycle riders, whilst they are travelling.
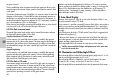
included with the flashgun if NiCad is featured). • Power Pack P 50 (optional accessory) 2.3 Battery replacement Press the two locking keys of the battery housing, and pull out of the flashgun (fig. 4a). To return the battery housing press the two locking keys together and press into the handle-mount grip of the flashgun until it audibly engages. 2.3.
Adjusting procedure for TTL flash mode: • Adjust the camera according to the manufacturer’s operating instructions. • Turn the adjusting knob for film speed until the white marker is positioned opposite the ISO film speed so that the distance range can be read off. The film speed must also be set on the camera and, if necessary, on the SCA adapter. • Fit the flashgun with the appropriate SCA adapter and mount on the camera. • Switch on the flashgun with the main switch . • Turn the selector dial to TTL.
ķ 5. Manual Flash Mode 6. Bounced Flash In this mode the flashgun will emit its full power, provided that partial light output (M1/2 - M1/4) has not been adjusted. The flashgun can be adapted to the actual picture shooting situation by setting the corresponding aperture on the camera. If the displayed value does not coincide with the actual distance, then the aperture and/or partial light output level (M1/2 and M 1/4) have to be changed accordingly.
use of the secondary reflector is only expedient with bounced ☞ The flash. Switch turns the secondary reflector on and off. When the secondary reflector is activated, 85% of the light will be emitted by the main reflector, and approx. 15% by the secondary reflector. The quoted percentages may vary somewhat when flash with partial light output is adjusted, and the secondary reflector switched on. Light output can be reduced with a light reducing filter by approx. 40%.
the given camera). The two established values for aperture and shutter speed can be set on the camera because the camera’s shutter speed is slower than the camera’s flash synch speed. To maintain a balanced range of highlights, for instance in order to retain the character of the shadows, it is advisable to select the automatic aperture on the flashgun one setting lower than the aperture adjusted on the camera. In the above example the camera was adjusted to f/8.
. Exposure Corrections 12. Care and Maintenance The automatic exposure systems are based on a subject reflection factor of 25%, this being the average reflection factor for subjects shot with flash. Dark backgrounds absorb a lot of light, while bright backgrounds reflect a great deal of light (e.g. backlit scenes), thereby resulting in subject overexposure or underexposure, respectively. Remove dust and grime with a soft dry cloth, or a silicon-treated cloth.
ķ Recycling time: 7 sec. (in M mode)...0.3 with NiCad battery 13 sec. (in M mode)...0.3 sec. with alkaline-manganese batteries 11 sec. (in M mode)...0.3 sec. with high-capacity alkaline-manganese batteries Swivelling range and locking positions of zoom reflector: Upwards: 15° 30° 45° 60° 75° 90° Anti-clockwise 90° 180° Clockwise 90° 180° Dimensions (w x h x d), approx. Flashgun 92 x 247 x 102 mm Weight: Flashgun without power sources: approx. 680 g Table 1: Guide numbers at maximum light output (Pag.
• Electric shutter release 45-25 (Order No: 0004525) As 45-26, except with switch for electric actuation. • Ever-ready case 45-34 (Order No: 0004534) for flashgun and accessories. • Filter set 45-32 (Order No: 0004532) Consists of a set of 4 colour effects filters and 1 clear filter to hold any coloured foil. • Light reducing filter set 45-28 (Order No: 0004528 Consists of three neutral density filters, and a transparent filter holder for coloured foils.
Ķ ISO 25/15° 32/16° 40/17° 50/18° 64/19° 80/20° 100/21° 125/22° 160/23° 200/24° 250/25° 320/26° 400/27° 500/28° 650/29° 800/30° 1000/31° ĸ ń ķ ƴ į Leitzahl, No-guide, Richtgetal Guide number, Numero guida, N°-Guia [m] [ft] 23 25 28 32 36 40 45 50 57 64 71 80 90 101 113 127 142 74 83 93 105 118 132 148 166 186 209 235 263 295 331 372 417 468 Tabelle 1: Leitzahlen bei maximaler Lichtleistung Tableau 1: Nombres-guides pour niveau de puissance maximal Tabel 1: Richtgetallen bij vol vermogen Table 1: Gui
Kamera -Blende / Ouverture de l’appareil / camera-diafragma Camera aperture / Diaframma della fotocamera / Diafragma de la cámara ISO Tabelle 3: Entfernungsbereich Tableau 3: Portée Tabel 3: Flitsbereiken Table 3: Distance range Tabella 3: Campo di utilizzo Table 3: Gama de distancias 1,4 2 2,8 4 5,6 8 11 16 22 32 25/15° 50/18° 100/21° 200/24° 400/27° 800/30° 3......16 2......11 2......11 1,5...8 1,5...8 1......6 1......6 0,7...4 0,7...4 0,5...3 0,5...3 0,4...2 0,4...2 0,3...1,5 - 4......23 3....
Bild 1 Fig. 1 Afb. 1 Grab. 1 78 Bild 2 Fig. 2 Afb. 2 Grab.
Reflektor / Réflecteur / Reflector / Riflettore Sensor / Sensore Schienenhalter / Support de barrette / Beugelhouder, Bracket holder / Supporto staffa / Porta-regleta Haltebock / Bloc d’attache / Vastzetblok / Holder block / Blocco reggi-staffa / Zapata de sujeción Anschluß Power Pack / Prise pour Power Pack / Aansluiting Power Pack / Power Pack connection / Presa per Power Pack / Conexión Power Pack Einstellmarke für Blendenvorwahl / Repère de réglage carré pour la présélection du diaphragme /
➭ ➭ ➭ ➭ Bild 4a: Batterie-bzw. Akku auswechseln Fig. 4a : Remplacement des piles ou de l’accu Afb. 4a: Batterij- c.q. accu verwisselen Fig. 4a: Battery changing Fig. 4a: Sostituzione delle batterie Grabado 4a: Cambio de batería o pilas 80 Bild 4b: Batteriekorb öffnen (nur bei BAT-Ausstattung sonst Sonderzubehör) Fig. 4b : Ouverture du tiroir à piles (seulement avec version BAT, sinon accessoire optionnel) Afb. 4b: Batterijkorf openen (Alleen bij batterij-uitvoering anders als accessoire) Fig.
Bild 5a: Spannungswähler Fig. 5a : Sélecteur de tension Afb. 5a: Spanningskiezer Fig. 5a: Voltage selector Fig. 5a: Selettore di tensione Grabado 5a: Selector de tensión Bild 5b: Akku laden Fig. 5b : Charge de l’accu Afb. 5b: Accu opladen Fig. 5b: Charging the battery Fig.
Ķ Hinweis: Im Rahmen des CE-Zeichens wurde bei der EMV-Prüfung die korrekte Belichtung ausgewertet. ķ SCA-Kontakte nicht berühren ! Note: Within the framework of the CE approval symbol, correct exposure was evaluated in the course of the electromagnetic compatibility test. In Ausnahmefällen kann eine Berührung zur Beschädigung des Gerätes führen. In exceptional cases the unit can be damaged if these contacts are touched.
Metz - Werke GmbH & Co KG • Postfach 1267 • D-90506 Zirndorf • info@metz.de • www.metz.de Consumer electronics Metz. Always first class. Photoelectronics Plastics technology Industrial electronics 703 47 0149.