
Operating instructions
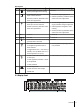
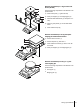

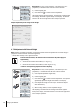

Balances with readability of 0.1 g with square
weighing pan
Place the following components on the balance in the
specified order:
●
Pan support (1)
●
Weighing pan (2)
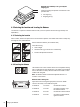
4.3 Selecting the Location and Leveling the Balance
Your balance is a precision instrument and will thank you for an optimum location with high accuracy and
dependability.
4.3.1 Selecting the Location
Select a stable, vibration-free position that is as horizontal as possible. The surface must be able to safely carry
the weight of a fully loaded balance.
Observe ambient conditions (see Technical Data).
Avoid the following:
●
Direct sunlight
●
Powerful drafts (e.g. from fans or air conditioners)
●
Excessive temperature fluctuations
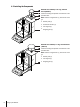
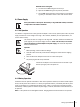
4.3.2 Leveling the Balance
The balances have a level indicator and two or four adjustable leveling
feet to compensate for slight irregularities in the surface of the weighing
bench. The balance is exactly horizontal when the air bubble is in the
middle of the level glass.
Note: The balance should be leveled and adjusted each time it is
moved to a new location.
C
Balances with 2 leveling feet
Adjust the two front leveling feet appropriately until the air bubble
comes to rest exactly in the middle of the glass:
Air bubble at "12 o'clock" turn both feet clockwise
Air bubble at "3 o'clock" turn left foot clockwise, right
foot counterclockwise
Air bubble at "6 o'clock" turn both feet counterclockwise
Air bubble at "9 o'clock" turn left foot counterclockwise,
right foot clockwise
16 Setting up the Balance