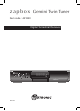
z a p b o x Gemini Twin Tuner Item code : 441820 Digital Terrestrial Receiver MENU OK Gemini Twin Tuner ANT VIDEO DIGITAL AUDIO TV - + LOOP IN B A 110 - 250V~ 50/60Hz - 40W L/G AUDIO TV/VCR LOOP OUT R/D VCR R/ MET742 OPTICAL S - VIDEO
WARNING - IMPORTANT Before installing your ZAPBOX Gemini it is important that you read and understand the instructions completely. Remember that contact with 230V AC mains can be lethal or can cause severe electric shock. To avoid this risk : • • • • • • • Never remove the top cover of the receiver. There are no userserviceable parts inside it, but there are some high-voltage live parts. Never attempt to repair your receiver. Please contact your retailer.
Programming the receiver is achieved through the various menus. In order to make this manual easier to understand, we will describe accessing a menu as shown below : Go to MENU / Setup / Service Setup / xxxx / Manual Scan. This means : • • • • • • • Press the MENU key to access the main menu. Press the 6 arrow to select Setup. Press OK to confirm. Press the 6 arrow to select Service Setup. Press OK to confirm. Enter the 4 digit PIN code (0000 on purchase).
INDEX 1 Installation 2 Remote description 3 Receiver description 4 Daily use 5 Personalising the channels listing 6 Parental lock 7 Resetting the receiver 8 Adjusting the TV signal 9 Radios 10 Channel Search 11 Using the receiver with a VCR A - Programming B - Connecting 12 TV guide 13 What to do if you experience a reception problem 14 Glossary 15 Multiplexes - channels 16 Channels list 06 10 12 13 13 15 16 17 17 17 18 18 19 20 21 23 24 25 5 info@metronic.
1 - Installation A - Simplified installation Before plugging your receiver into the main source, connect the antenna directly to the ANT input of the receiver. Close the loop with the coaxial lead provided. Connect the TV to the TV scart outlet of the receiver. Switch on the TV and connect the receiver to the main source. Insert the batteries in the remote. ZAPBOX A Screened cable. Replace in case of poor reception by a high quality cable. 6 info@metronic.com.
A red indicator appears on the receiver. Press the ON/OFF key of the remote. The green indicator will light on and the welcome screen appears on the screen. If this is not the case, you should double-check the scart connections and or force the A/V or EXT mode of your TV (refer to the TV manual). Press OK to start the installation. The automatic channels lookup will start. At the end, the first channel will appear, meaning the standard installation is done.
B - Wedging / adjusting the aerial If no channels have been found through your current antenna, it means that it probably is pointing towards an analogue only transmitter. If your area is covered by digital, it means that the programs are coming from another transmitter. You will hence have to adjust the antenna. There are two possible options, as follows : Option 1 You know at least one network number (between 21 and 69) used in your area. • Go to Menu / Setup / Service Setup / xxxx / Manual Scan.
Option 2 You are able to receive national channels in analogue and you have no idea what you can receive in digital quality. If you are certain that you can receive additional channels, but you do not know which network is used for these channels, we advise that you do the following : Find a UHF antenna with high gain (at least 15 dB) and connect it to the ANT input of the receiver.
2 - Remote Description 2 1 11 1 2 3 4 5 6 TV/R 7 8 9 ST MENU 4 12 8 5 14 20 17 22 10 info@metronic.com.
1 Digital keys. In normal use, they will allow you to enter the channel number you wish to view. In programming mode, they will allow you to enter digital values. 2 ON / OFF key : allows you to put the receiver on standby or switch it on. In standby, the A/V feature remains available for the recorder. You can hence switch off the unit even if a recording is in progress. 3 MENU key : allows you to enter the main menu or to come back to the previous menu when you are in a sub-menu.
3 - Receiver Description A B C D E F G H I J K L M N Infra-red receiver (detects the remote infra-red signal). Status indicators : red when the product is on standby / green when it is switched on. MENU,6CH5,6VOL5 and OK key, same as on remote control. ON / OFF key : allows you to put the receiver on standby or switch it on. (In standby, the A/V feature remains available for the recorder. You can hence switch off the unit even if a recording is in progress.
4 - Daily use In normal use, you will only use the following keys (the function of these keys is explained in the previous paragraph) : • 6CH5 keys to change channels. • MUTE to stop and bring back the sound. • Digital keys to go directly to a channel. • EPG to access the programs guide. • INFO to find out about the channel you are viewing (name, program, next program). • RED to access the digital teletext. • A B to select what you want to record.
• • • • • • Press the yellow key and then the 4key. Press the yellow key again to view the keyboard. Go to Delete using the arrows and press OK to delete the unwanted letters. Use the arrows to select one by one the letters of your choice, and press OK for every letter. Press the green key to save the changes. Press EXIT to quit. Modifying the content of a favourites list • • • • • • Go to Menu / Favourites. Use the 56keys to select the list you wish to edit. Press the yellow key and then the 4key.
B - Modifying the channel list Deleting channels • • • • • Go to Menu / Service Organiser. Use the 56 keys to select the channel you wish to delete. Press the RED key. You are then requested to enter a code to confirm. Enter your PIN code (0000 on purchase). Press EXIT to quit. Moving channels • Go to Menu / Service Organiser. • Use the 56 keys to select the channel you wish to move. • Press the green key and move the channel where you want it to be using the 56 keys.
Modifying the PIN code • • • • • • Go to Menu / Setup / Parental Control. Enter the 4-digits code (0000 on purchase). Select Change PIN and press OK to confirm. Enter the new 4-digits code. Enter this code once more. Press EXIT to quit and save the changes. IMPORTANT ! Keep your PIN code safe. Locking channels • • • • Go to Menu / Setup / Parental Control / xxxx / Lock Services. Use the 56 keys to select the channel you wish to lock. Press OK to confirm and a lock symbol will appear next to the channel.
8 - Adjusting the TV signal You can access the adjusting options for the TV signal in Menu / Setup / TV Setup. • On Aspect Ratio, select 4:3 or 16:9 depending on your screen format. • If you have a 4:3 screen, you can choose on widescreen the way a 16:9 image will appear on your TV. - The CenterCutout mode increases the image size without distorting it to fill the whole screen. - The FullFrame mode resizes the image horizontally in a 4:3 screen. The image is therefore distorted.
11 - Using the receiver with a VCR A - Connecting. Simply connect your VCR to the VCR scart on your receiver, as shown on the picture below. The coaxial cable between the TV/ VCR connector and your TV allows you to watch analogue channels. TV BACK To play a tape, the receiver should be on standby. Simply insert the tape and start playing. The image will appear on the screen. If this is not the case, press the TV/VCR key on your VCR remote. B - Live-Recording.
C - Programming • Go to Menu / Timer Programming. • The Timer Programming window lists the programs to be recorded. • To program a new recording, press OK on an empty line. • On CN, select the channel you wish to record using the 34keys • On Date, enter the date of the program with the digital keys. • On Hour, enter the time at which the program starts. • On Duration, enter the duration time of the program.
12 - TV Guide Pressing the GUIDE key will allow you to access the list of programs playing now or later. The name of the program playing now appears in orange at the bottom right of the screen. You can select the following program with the 4arrow. A description of the program selected appears at the top left of the screen. Use the 56 keys to select programs on the following and previous channels.
13 - What to do if you experience a reception problem To help you figure out the problem you have come across, it could be useful for you to obtain more information on the position of digital emitters, as well as the UHF networks that are used.
Symptom Possible Cause Solution (to try) You are receiving all digital channels but the reception is disrupted at times (i.e. when another electrical product is switched on). You are experiencing electric disturbances. 1 - Replace the TV cable that links the TV plug to the antenna with a screened cable. 2 - Replace the accessories (splitters etc) with screened products. 3 - Replace the cable that connects the antenna to the mains.
14 - Glossary Receiver Equipment that allows you to receive digital TV, like Free To View channels. Set-top-box Receiver connected to your TV that allows to receive additional channels. Analogue Nature of the signals used for terrestrial television since the middle of the 20th Century. Since digital has come along, analogue is disappearing (starting 2008). Network Number given to a frequency band. In UHF, networks are numbered from 21 to 69.
15 - Multiplexes - channels (please check http://www.dtg.org.uk/retailer/dtt_channels.
16 - Channels list CENTRAL SCOTLAND AND TAYSIDE Torosay Darvel Rosneath Craigkelly Angus 41 44 47 51 55 65 21 23 26 29 31 33 22 25 28 30 32 34 48 53 57 60 63 67 23 26 29 33 39 42 56 59 62 65 66 68 1 A 2 B C D C 1 2 A D B 1 2 B C A D D 2 A B C 1 A B 2 1 D C C A B D 2 1 TRANSMITTER Frequency/ MULTIPLEX NAME Network N° EAST ANGLIA Tacolneston Sudbury Sandy Heath 53 58 60 61 63 64 39 48 49 50 54 68/56 40 42 43 45 46 67 A B 2 C 1 D B A 1 D C 2 C 1 A 2 D B Frequency/ Network N° MULTIPLEX TRANSMI
MULTIPLEX 41 44 47 51 52 55 56 59 62 65 66 68 23 26 29 30 33 34 39 41 44 47 51 52 21 24 27 31 57 60 22 25 28 30 32 34 21 24 27 31 53 57 39 42 45 49 42 45 53 57 60 63 29 34 48 51 52 68 23 26 33 42 45 49 29 39 53 59 63 67 1 2 A B C D A B D 2 C 1 B C 2 D A 1 2 D B A C 1 1 A B 2 C D A B C 2 D 1 1 A B 2 C D 1 A B 2 C D 1 2 A B D 1 C A B 2 2 A B D C 1 C 1 A D B 2 Brierley Hill Bromsgrove Malvern Larkstoke MIDLANDS Fenton The Wrekin A The Wrekin B Ridge Hill Oxford Waltham Nottingham 26 info@metron
SOUTH OF ENGLAND Limavady Broughe Mountain 23 26 29 33 34 48 53 57 58 60 63 67 23 26 29 30 33 34 A B 1 2 D C A B 2 C D 1 A B C 1 D 2 TRANSMITTER Frequency/ MULTIPLEX NAME Network N° Rowridge 23 1 26 C 30 A 32 B 33 D 28 2 Salisbury 52 D 55 1 56 2 59 A 62 B 65 C Whitehawk Hill 48 B 50 2 55 A 58 C 61 D 66 1 Hannington 40 A 41 D 43 2 44 C 46 B 50 1 Midhurst 56 1 59 B 60 D 62 A 64 C 65 2 Heathfield 29 2 North 34 1 47 B 48 A 51 D 54 C Hastings 21 A 24 B 27 2 31 1 60 D 63 C SOUTH WEST NORTHERN IRELAND Divi
As per the EN 60065 norm requirements, please pay particular attention to the following safety guidelines. Do not obstruct the air vents with objects such as newspapers, table cloths, curtains etc. Allow at least 5 cm around the product to allow enough ventilation. Do not place the product on or near flamable objects such as lit candles. The device may not be exposed to dripping or splashing and no object filled with liquid, such as vases, must be put on the device.