
User Manual
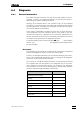


6.4 Diagnosis
766 IC Sample Processor
121
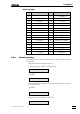
Key code table
Code Key Code Key
0 16 <7 / SAMPLE>
1 <HOLD / LEARN> 17 <4 / PUMP>
2 <STOP> 18 <1 / SCAN>
3 <START> 19 <0>
4 <CONFIG> 20 <END>
5 <PARAM> 21 <è>
6 <USER METHOD> 22 <CLEAR / RESET>
7 23 <ENTER>
8 <9 / LIFT> 24 <é>
9 <6> 25 <
ê
>
10 <3 / WAIT> 26 <SELECT / TOWER>
11 <* / ENDSEQ> 27 <QUIT>
12 <8 / MOVE> 28 <HOME>
13 <5> 29 <ç>
14 <2 / CTRL> 30 <INSERT >
15 <. / PRINT> 31 <DELETE>
6.4.6 Remote interface
This diagnosis step tests the functionality of all the output (14) and in-
put lines (8).
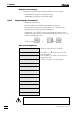
• Prepare instrument for diagnosis (see section 6.4.2).
• If necessary, press <
ê
> several times until
diagnosis
>remote test
• <ENTER>
>remote test
remote test connector ?
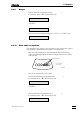
• Plug 3.496.8550 test plug into the remote interface without turning
the instrument off.
• <ENTER>
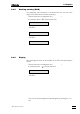
The test runs automatically. If no error occurs, the following appears:
>remote test
remote test ok
• Remove test plug and press <ENTER>.
diagnosis
>RS232 test