
Owner's manual
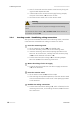
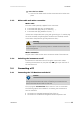
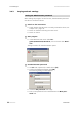
Table Of Contents
- Table of contents
- Table of figures
- 1 Introduction
- 2 Overview of the instrument
- 3 Installation
- 4 Operation
- 4.1 Fundamentals of operation
- 4.2 Instrument and Program Settings
- 4.3 Program information
- 4.4 Calibration functions
- 4.5 Methods
- 4.6 Determinations
- 4.6.1 Preparing samples
- 4.6.2 Preparing the instrument and the accessories
- 4.6.3 Preparing the determination
- 4.6.4 Starting the determination
- 4.6.5 Cleaning the instrument and accessories
- 4.6.6 Adjusting the method parameters during the determination
- 4.6.7 Stopping the determination manually
- 4.6.8 Status of the live curve
- 4.7 Results
- 4.8 GLP functions
- 5 Handling and maintenance
- 6 Troubleshooting
- 7 Technical specifications
- 8 Conformity and warranty
- 9 Accessories
- Index

3.4 Connecting a PC
■■■■■■■■■■■■■■■■■■■■■■
20
■■■■■■■■
743 Rancimat
Connect the RS-232 interface of the Rancimat to the required serial COM
port on the PC using the RS-232 cable 6.2134.100 (9-pin/9-pin). For 25-
pin COM ports, the optional RS-232 cable 6.2125.110 (not in the scope of
delivery) or a commercially available adapter must be used.
3.4.2 Installing the software
3.4.2.1 System requirements
Operating system Windows 2000, Windows XP Professional, Win-
dows Vista
RAM 256 MB (Windows 2000 / Windows XP)
1 GB (Windows Vista)
Processor Pentium III or higher
Memory approx. 20 MB for program files
RS-232 interface one free RS-232 interface (COM)
The windows user must have administrator rights in order to be able to
install 743 Rancimat.
3.4.2.2 Installing the program
Proceed as follows to install 743 Rancimat:
1
Start the installation program
■ Place the installation CD in the CD drive. The installation program
is started automatically.
If this option is deactivated on your computer, double click the file
Setup.exe.
Windows Vista: Select the option "Approve".
■ Click on 743.
2
Select the dialog language
■ Select the dialog language of the program.
■ Click on the [OK] button.
■ Click on the [Next >] button.
3
Accept the license agreement
■ Read through the license agreement and accept it with [Yes].
4
Define a target folder for the program
■ If required, choose another folder than the default target folder
for the program files. For that, click on the [Browse...] button.
■ Confirm the target folder with [Next >].