
Owner's manual

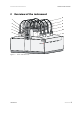
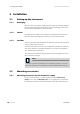

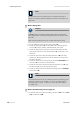
Table Of Contents
- Table of contents
- Table of figures
- 1 Introduction
- 2 Overview of the instrument
- 3 Installation
- 4 Operation
- 4.1 Fundamentals of operation
- 4.2 Instrument and Program Settings
- 4.3 Program information
- 4.4 Calibration functions
- 4.5 Methods
- 4.6 Determinations
- 4.6.1 Preparing samples
- 4.6.2 Preparing the instrument and the accessories
- 4.6.3 Preparing the determination
- 4.6.4 Starting the determination
- 4.6.5 Cleaning the instrument and accessories
- 4.6.6 Adjusting the method parameters during the determination
- 4.6.7 Stopping the determination manually
- 4.6.8 Status of the live curve
- 4.7 Results
- 4.8 GLP functions
- 5 Handling and maintenance
- 6 Troubleshooting
- 7 Technical specifications
- 8 Conformity and warranty
- 9 Accessories
- Index
■■■■■■■■■■■■■■■■■■■■■■
3 Installation
743 Rancimat
■■■■■■■■
11
Molecular sieve flask
Filter
Air out
2
Air/N in
From
flask
To
flask
8
9
10
12
11
1
2
3
654 7
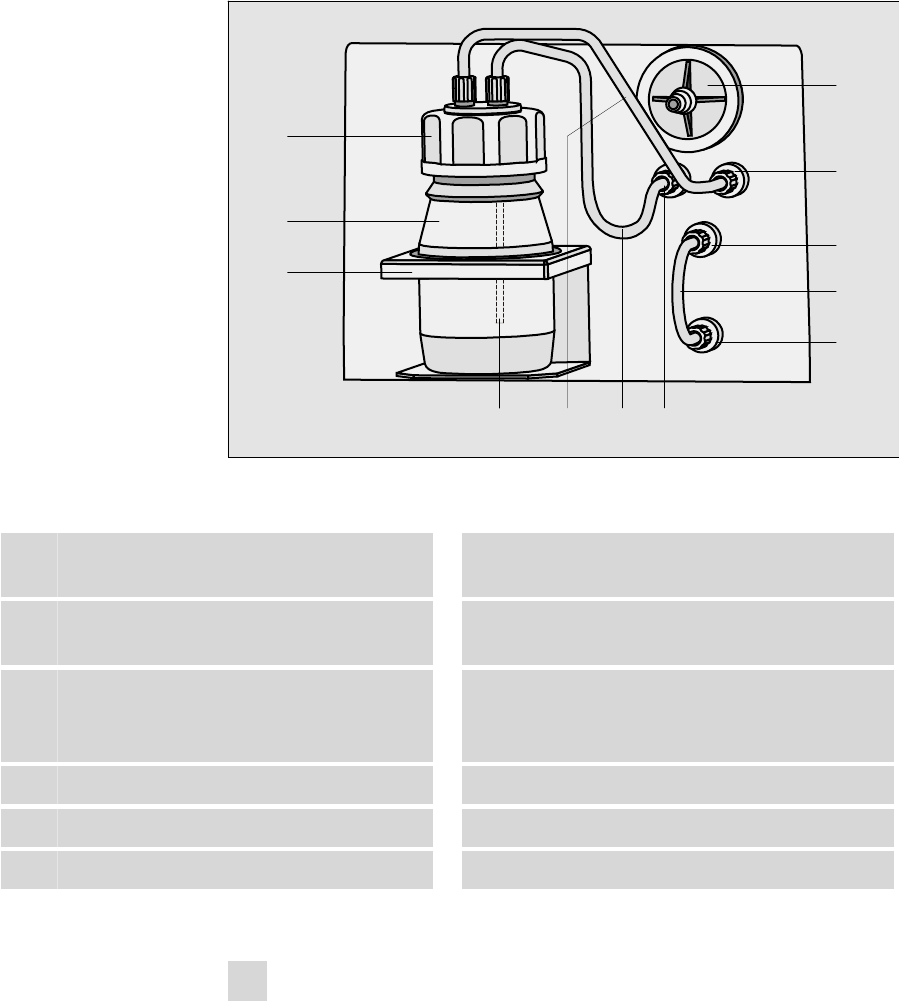
Figure 4 Mounting accessories for the air supply (rear of the instru-
ment)
1
Drying flask cover (6.1602.145)
Cover for the drying flask.
2
Drying flask (6.1608.050)
3
Flask holder
For fastening the drying flask.
4
Filter tube (6.1821.040)
5
FEP tubing 250 mm (6.1805.080)
For supplying the air from the internal pump
to the drying flask.
6
FEP tubing 250 mm (6.1805.080)
For supplying the air from the drying flask to
the reaction vessel (2-11).
7
"From Flask" connection
8
Dust filter (6.2724.010)
9
"To Flask" connection
10
"Air out" connection
11
FEP tubing 130 mm (6.1805.010)
12
"Air/N
2
in" connection
Mount the accessories for the air supply as follows:
1
Mount dust filter
■ Insert the dust filter (4-8) on the connection marked with Filter
on the rear of the Rancimat.
■ If the laboratory air is heavily contaminated, a tubing for supply-
ing fresh air can be connected to the dust filter.