
Owner's manual
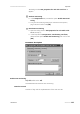
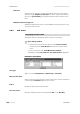
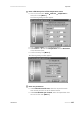
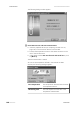
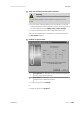
Table Of Contents
- Table of contents
- Table of figures
- 1 Introduction
- 2 Overview of the instrument
- 3 Installation
- 4 Operation
- 4.1 Fundamentals of operation
- 4.2 Instrument and Program Settings
- 4.3 Program information
- 4.4 Calibration functions
- 4.5 Methods
- 4.6 Determinations
- 4.6.1 Preparing samples
- 4.6.2 Preparing the instrument and the accessories
- 4.6.3 Preparing the determination
- 4.6.4 Starting the determination
- 4.6.5 Cleaning the instrument and accessories
- 4.6.6 Adjusting the method parameters during the determination
- 4.6.7 Stopping the determination manually
- 4.6.8 Status of the live curve
- 4.7 Results
- 4.8 GLP functions
- 5 Handling and maintenance
- 6 Troubleshooting
- 7 Technical specifications
- 8 Conformity and warranty
- 9 Accessories
- Index
■■■■■■■■■■■■■■■■■■■■■■
4 Operation
743 Rancimat
■■■■■■■■
143
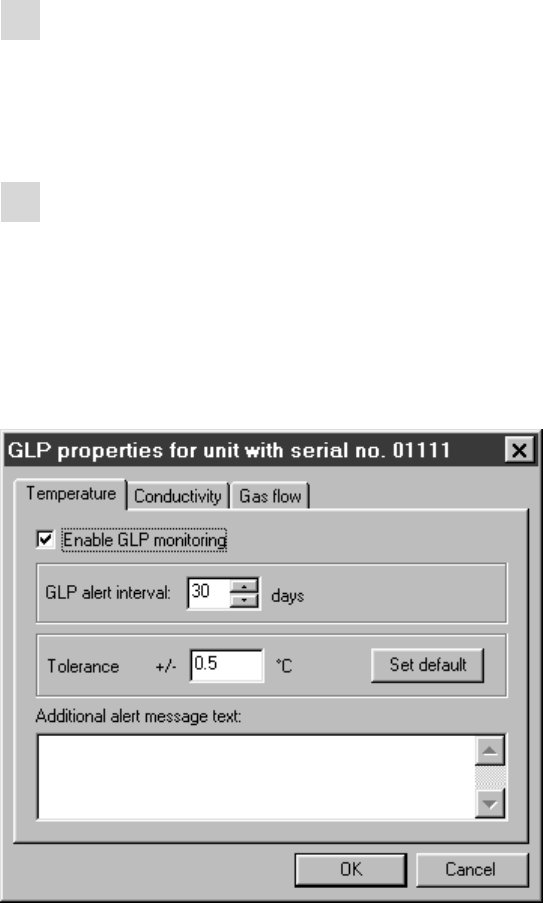
The dialog window GLP properties for unit with serial no. x
appears.
2
Activate monitoring
■ In the Temperature tab, activate the option Enable GLP moni-
toring.
■ Carry out the remaining settings (see "Parameter description",
page 143) and confirm with [OK].
3
Deactivate monitoring
■ Open the dialog window GLP properties for unit with serial
no. x (see step 1).
■ In the required tab (Temperature, Conductivity, Gas flow),
deactivate the option Enable GLP monitoring and confirm with
[OK].
Parameter description
Enable GLP monitoring
on | off (Default value: off)
Activate/Deactivate automatic GLP monitoring.
GLP alert interval
Number of days until the implementation of the next GLP test.