
Quick Start Guide


1.800.221.0932
|
MetraOnline.com
2
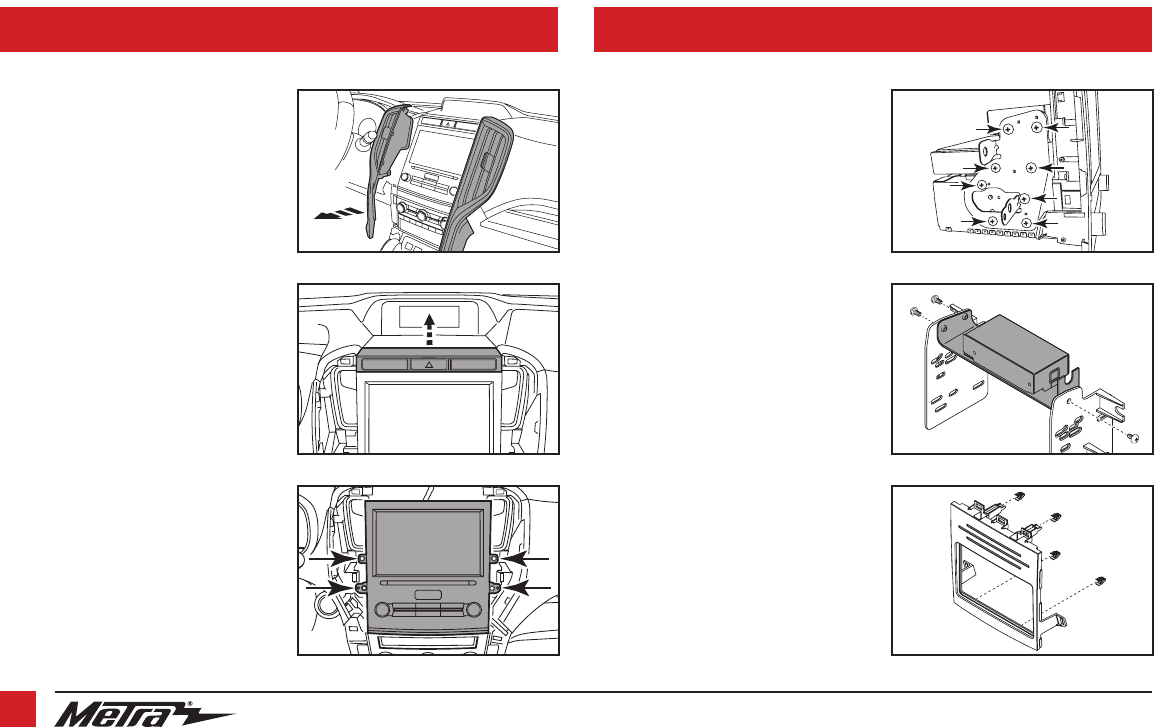
(Figure A) (Figure A)
(Figure B) (Figure B)
(Figure C) (Figure C)
DASH DISASSEMBLY KIT PREPARATION
1. Unclip and remove the a/c vent panels
to the left and right of the radio.
(Figure A)
2. Unclip the hazard switch panel, then set
it on top the dash. (Figure B)
3. Remove (4) 10mm screws securing the
radio. Slide the radio out, then unplug
and remove the radio. (Figure C)
Continue to Kit Preparation
From the factory radio brackets:
1. Loosen (8) Phillips screws securing the
radio. (Figure A)
2. Remove (4) Phillips screws securing the
lower electronic module then remove.
(Figure A)
3. Remove (3) screws securing the upper
electronic module then remove.
(Figure A)
4. Relocate the lower electronic module
in the radio cavity, down low. It should
fit snugly, but if not, secure with zip
ties. Connect the wiring harness in the
vehicle back to the module.
5. Secure the upper electronic module
to the radio brackets using the factory
screws. (Figure B)
6. Attach (4) panel clips to the radio trim
panel. (Figure C)
Continue to Kit Assembly
Step 1
Left side shown
Step 2
Step 3