
Owner manual
P/R60 & P/R65 Page 7
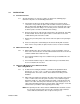
3.4 Submersion Mounting Series 6 Differential Probes
Refer to Dwg# N105-73
3.4.1 a) A submersion mounting kit, STC60-6 is available from AquaMetrix which
includes 4 ft. of 1” pipe, 1-1/2” x 1” reducer and a strain relief fitting. Proceed as
follows, either with the kit or with your own hardware:
b) Install the optional protective shroud, Part No. PROTECTOR-6 on the probe by
threading the probe cable through it. The shroud will contact the shoulder on
the probe.
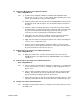
c) Install the compression fitting components on the probe in the order shown in
the drawing below so that the pipe thread is towards the cable end of the probe.
If you are concerned that the shroud may get pushed up and expose the
electrodes you can lock it down by the positioning of the fittings.
d) Snug up the nut of the compression fitting to locate it in the desired position.
Hand tighten as much as possible, then turn 1/2 turn with a wrench.
e) Apply a thread sealant to the pipe thread portion of the compression fitting and
screw a 1-1/4” x 1” NPT reducer to it.
f) Route the sensor cable through an appropriate length of 1” pipe and using
thread sealant, screw the pipe into the reducer on the probe. The cable end of
the probe should not be exposed to the process.
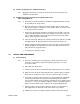
3.5 Flow-through tee mounting Series 8 Differential Probes
Refer to Dwg# N105-72
3.5.1 a) Apply pipe sealant to the electrode end of the probe and screw it into the
AquaMetrix union tee w/ adaptor (Part No. AM-MH538N9A) or any standard 1-
1/2” NPT tee.
3.6 Flow-through tee mounting Series 6 Differential Probes
Refer to Dwg# N105-73
3.6.1 a) Take the compression fitting apart. Apply pipe sealant to the 1-1/4” NPT thread
and screw this part into a 1-1/4” tee. A larger tee with an appropriate reducer
may be used.
b) Put the compression fitting components on the probe in the order shown in the
drawing. They should be in such a position that the electrodes will be in the
pipe stream but not touching the opposite side of the tee.
c) Remove the protective cap from the probe and place the probe in the tee. Now
tighten the nut by hand as much as possible, then turn 1/2 turn with a wrench.
3.7 Sanitary Probe P60S, P65S, R60S, R65S
3.7.1 The P60S is designed with a stainless steel flange to mate with a Tri-Clover ferrule
TL14AM7-2-1/2.