
User manual


49
Update
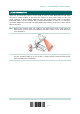
In order to establish a proper connection between your computer and the scanner, we
suggest that you follow these instructions –
1) Install the battery and pull the trigger for about 2 seconds to turn on the scanner.
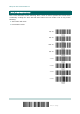
2) Have the scanner read the “Enter Setup” barcode to enter the configuration mode.
3) Have the scanner read the associated barcodes to activate the desired interface.
See the following sections for output interfaces supported.
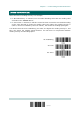
4) Have the scanner read the barcodes for related settings.
5) Have the scanner read the “Update” barcode to exit the configuration mode.
6) Turn on your computer or laptop and establish a WPAN connection with the scanner.
Refer to
Chapter 3 – Setting up a WPAN Connection.
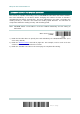
Note: By default, the output interface is set to “BT HID”.
IN THIS CHAPTER
2.1 BT HID..................................................................... 50
2.2 BT SPP Slave............................................................. 62
2.3 BT SPP Master........................................................... 64
2.4 Keyboard Wedge via the Cradle ................................... 68
2.5 RS-232 via the Cradle ................................................ 79
2.6 USB HID via the Cradle............................................... 84
2.7 USB Virtual COM via the Cradle.................................... 94
Chapter 2
SELECTING OUTPUT INTERFACE