
User manual


Table Of Contents
3.Web-basedInterface
NIC990lUserManual27
When nishing congurations, remember to click the Save button to have the congurations take
effect.
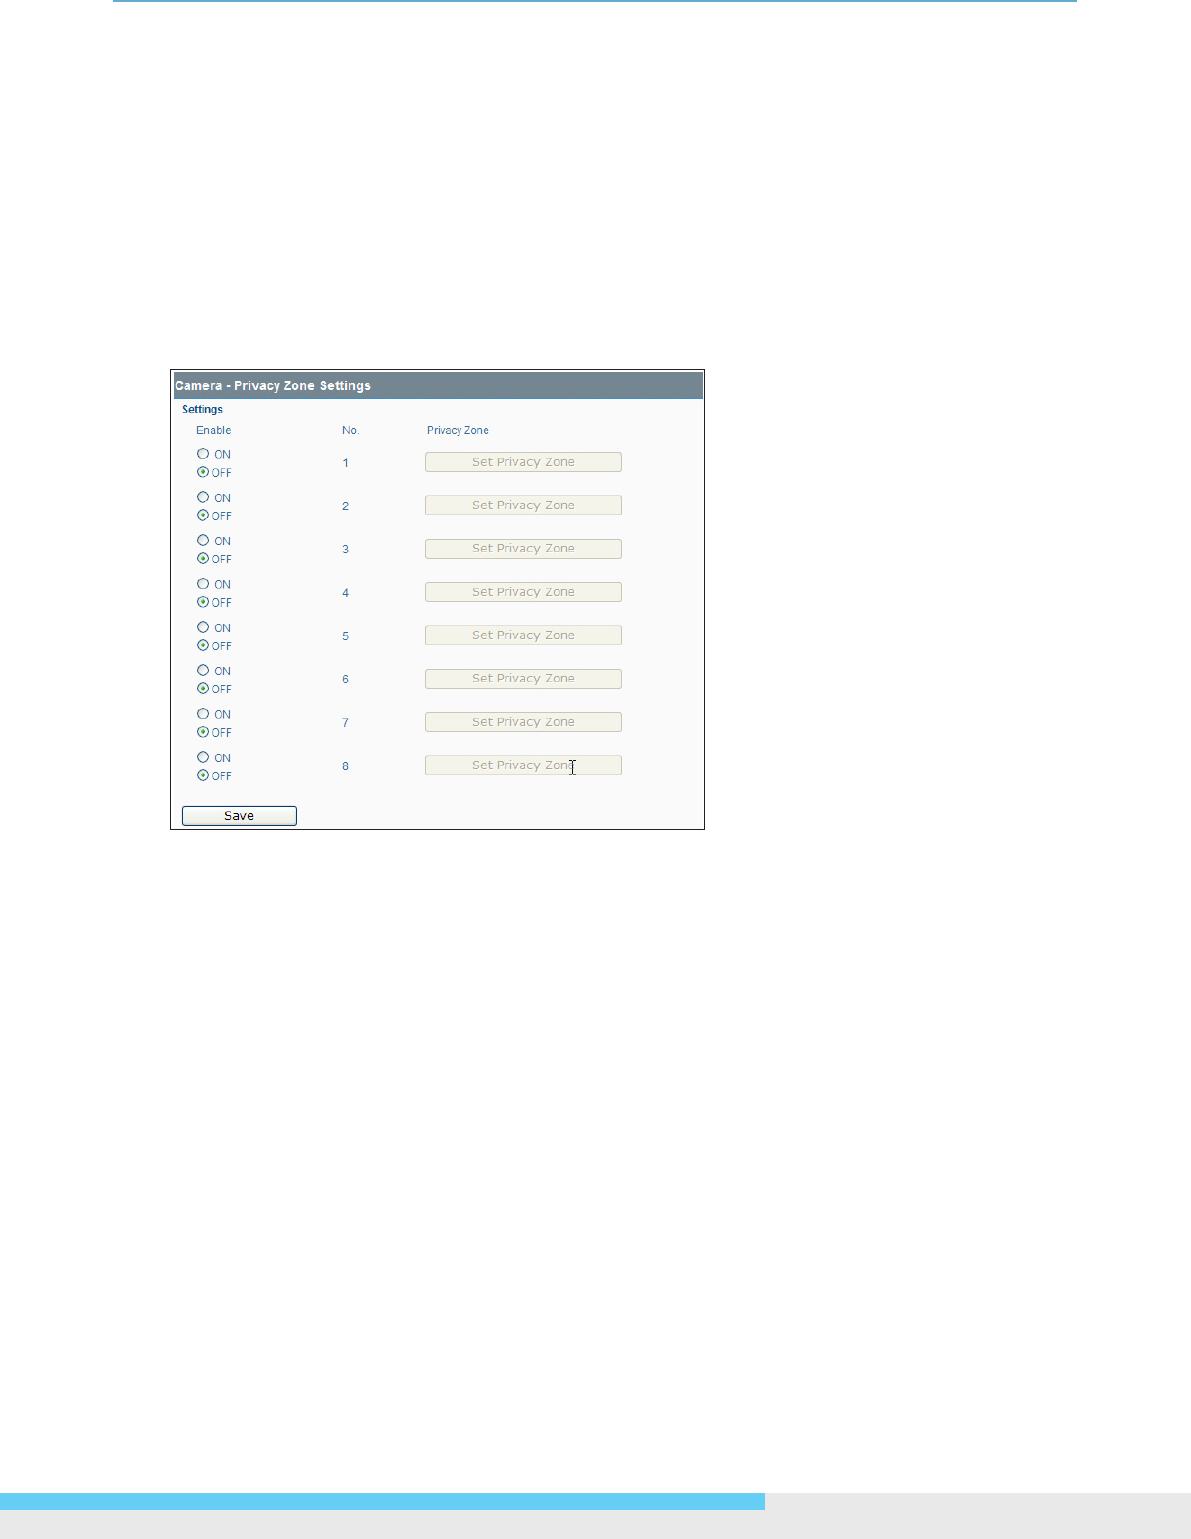
3.3.3 Privacy Zone
Users can dene up to eight privacy zone by dragging the mouse to form a rectangular mask on
the monitored view to protect necessary privacy. The size and position of these framed areas can be
adjusted according to the horizontal pan, vertical tilt, and lens zoom of the camera.
1. Click the ON radio button, and then the right-hand button captioned Set Privacy Zone will be
available.
2. Click the button to bring up the Privacy Zone Setting window.
3. You can directly dragging the mouse on the monitored view to create a rectangular mask and
then click Save.
4. Or click the bottom left-hand PTZ button to show the PTZ control panel
• Use buttons on the control panel to dene an appropriate position
• Drag the mouse on the monitored view to create a rectangular mask and then click Set.