
User's Manual
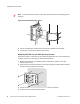
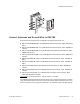
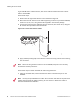

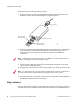
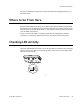
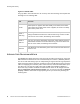
Table Of Contents
- About This Guide
- Meru Access Points and Radio Switch
- Installing the AP300
- Installing the AP200
- Installing the OAP180
- Installing the AP150
- Installing the RS4000
- Specifications
- AP Accessories
- Mounting Bracket Stencils
- Cautions and Warnings
- Regulatory Information

Where to Go From Here
© 2008 Meru Networks, Inc. Installing the OAP180 55
this point-to-multipoint configuration all OAP180 nodes must be aligned with the root
OAP180 antenna.
Where to Go From Here
Now that the OAP180 is installed, go to the Meru System Director Getting Started Guide
for instructions on initializing the controller and connecting the controller and APs to the
Ethernet switch to form the WLAN. Return to this chapter to check the status of the LEDs
once the WLAN is operational.
As well, check the AP chapter in the Meru System Director Configuration Guide for
instructions on configuring radio band, dual radio, and external antenna operation.
Checking LED Activity
Check the OAP180 LEDs for activity. Four of the eight LEDs on the bottom of the OAP180
indicate activity; four LEDs are not used at this time. Check the four active LEDs to deter-
mine if the AP is working.
00194
Console PoE
Ethernet link
LED
Power On
LED
Th
ese 4 LEDs
ar
e not used
Transmission LEDs
(radio packets transmitting)