
Installation Guide


Table Of Contents
- About This Guide
- Meru Access Points and Radio Switch
- Installing the RS4000
- Installing the AP200
- Installing the AP150
- Specifications
- Regulatory Information
- Channels
- Mounting Bracket Stencils
Installing the RS4000
© 2007 Meru Networks, Inc. Installing the RS4000 15
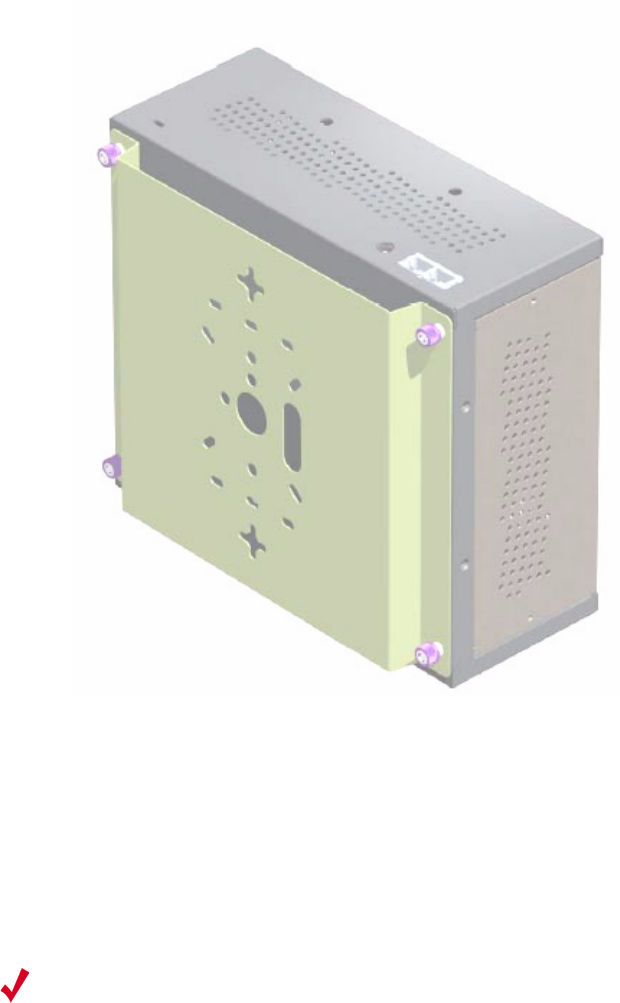
Figure 6: Bracket Attached to RS4000
2. Choose the location on the wall where the RS4000 will be mounted. The RS4000
can be oriented in any direction, but it is probably more convenient if the SMA
antenna mounts are at the top. This orientation is more convenient for reading
LED status.
3. Using the bracket holes as a template, mark the location on the wall for the two
RS4000 bracket mounting screws. They are placed 5 25/32" (147mm) apart,
center-to-center, one above the other. If you are not using plastic wall anchors,
you must center the mounting screws on a wall stud.
4. Drill holes at the locations you marked:
— 3/16-inch holes if you are using plastic anchors
— 1/8-inch holes if you are using only the screws
5. If you are using plastic anchors, install them in the holes.
Note:
The RS4000 mounting bracket provides holes to accommodate many types of
common installations such as over a junction box, etc. This procedure describes only
the standard wall mount.