Installation and operating instructions Mealstream 501 (MK) ION T A M FOR N I T TAN USE R E NS O R O P I O T F IM C U BE READ ESE INSTR E TH V A S E PLEAS Users are cautioned that maintenance and repairs should be performed by a Garland authorized service agent using genuine Garland replacement parts.
PRECAUTIONS TO AVOID POSSIBLE EXPOSURE TO EXCESSIVE MICROWAVE ENERGY a) Do not attempt to operate this oven with the door open since open-door operation can result in harmful exposure to microwave energy. It is important not to defeat or tamper with the safety interlocks. b) Do not place any object between the oven front face and the door or allow soil or cleaner residue to accumalate on sealing surfaces. c) Do not operate the oven if it is damaged.
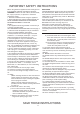
IMPORTANT SAFETY INSTRUCTIONS When using electrical appliances basic safety precautions should be followed, including the following: WARNING To reduce the risk of burns, electric shock, fire, injury to persons, or exposure to excessive microwave energy: 1. Read all instructions before using the appliance. 2. Read and follow the specific “PRECAUTIONS TO AVOID POSSIBLE EXPOSURE TO EXCESSIVE MICROWAVE ENERGY” FOUND ON PAGE 2. 3. This appliance must be grounded. Connect only to a properly grounded outlet.
ELECTRICAL INSTALLATION For all cord connected appliances: GROUNDING INSTRUCTIONS This appliance must be grounded. In the event of an electrical short circuit, grounding reduces the risk of electric shock by providing an escape wire for the electric current. This appliance is equipped with a cord having a grounding wire with a grounding plug. The plug must be plugged into an outlet that is properly installed and grounded. WARNING — Improper use of the grounding can result in the risk of electric shock.
PRECAUTIONS TO BE OBSERVED 1. 2. 3. 4. 5. 6. Read this manual before using your oven. As with all electrical appliances, it is wise to have the electrical connections inspected periodically. The oven interior and door seals should be cleaned frequently, following the instructions described in the CLEANING section. There is no need to switch off your oven after each function but remember to switch off at the end of the day or period of operation.
INSTALLATION Remove packing material and protective film from the oven. Check for obvious signs of transit damage. If necessary, inform the freight company IMMEDIATELY. LOCATION AND POSITIONING Choose a site away from major heat sources. DO NOT position so that hot air is drawn in from fryers, grills, griddles, etc. A heat barrier to the height of the oven must be installed if sited next to a burner, stove or range.
SUITABLE COOKING UTENSILS Manufacturer’s instructions should be checked to determine the suitability of individual containers or utensils using each of the cooking functions. co m bi na co t nv ion ec tio n on ly The following chart provides general guidelines: e av w ro ic m ly on Heat resistant containers Toughened glass Vitreous ceramics Earthenware (porcelain, crockery, china etc.) Do not use items with metallic decoration.
INTRODUCTION The Mealstream 501 oven offers operators the flexibility of three heating functions; microwave only, convection only, and combination cooking. Combination cooking enables high quality results to be achieved in a fraction of the time taken by conventional cooking, particularly when baking, browning, roasting, grilling or producing gratinee dishes.
MAIN FEATURES 8 7 6 1 2 11 12 3 13 9 4 10 5 7 ON/OFF SWITCH 1 AIR OUTLETS 2 3 4 5 6 These vents on the side and rear panels enable air which has been used to cool internal components to escape. It will not allow microwave energy to escape into the environment. They must be kept free from obstruction. OVEN CAVITY The cavity is constructed mainly from stainless steel and vitreous enamelled panel on the door. It must be kept clean (see CLEANING).
CONTROL PANEL MENU KEY SOCKET MULTI-STAGE INDICATOR PROGRAM PAD TIME/ERROR DISPLAY POWER PADS CANCEL PAD TEMPERATURE SETTING PADS CONVECTION PAD TIME/PROGRAM SELECT PADS COLON TIME/ERROR DISPLAY POWER PADS There are 4 Microwave Power Pads to select from: 25%, 50%, 75%, and 100%. A light will indicate the one in use. CONVECTION PAD This is used when foods only require browning ( no microwave ) Note: when cooking, the MICROWAVE and CONVECTION pads start the cycle and timer.
OPERATING INSTRUCTIONS: MANUAL MODE The oven can be operated in manual or programmed mode. It is important to understand manual mode prior to attempting program operation. WARNING: DO NOT APPLY MICROWAVE ENERGY WHEN OVEN IS EMPTY DO NOT USE THE OVEN WITHOUT CLEAN AIR FILTERS IN POSITION To familiarize yourself with the controls place a bowl containing approximately 2.5 pints of water in the oven.
AUDIBLE WARNING At the end of every timed cycle an audible warning will sound. The audible warning stops when the door is opened. On closing the door after interrupting the cycle the audible warning sounds as a reminder to start the timer (see PAUSE FACILITY). The audible warning can be stopped by touching the cancel pad but it is important to remember that food in the oven will continue to brown until removed. PAUSE FACILITY A cooking cycle may be interrupted by opening the door.
PROGRAMMING NUMBER PADS ( 01-99 ) Pre-programming allows repetitive cooking procedures to be stored for ease of use. Each program can comprise up to three stages, allowing at each, independent control of Convection temperature, Stage time and Microwave power level. However, programs must be used with caution, since if the food to cook varies in weight or density, adequately cooked food may not be achieved.
RUNNING A PROGRAM Using number pad keys to run a program Programs 01 to 99 can be recalled using the number pad keys. The following procedure should be used to activate these programs. 1 Pre-heat the oven to the required starting temperature by pressing a TEMPERATURE SETTING PAD. Wait until the selected temperature light stops flashing. You can check the oven temperature by pressing the Temperature pad again Programs can be halted and cancelled at any time by pressing the CANCEL key.
MENU KEY : CHANGING OVEN MENU PROGRAMS The MENU KEY System automatically changes all the cooking programs with the turn of a key. To change the menus on the oven: 1 Ensure the power switch is off. 2 Lift the MENU KEY cover in the front panel of the oven and put the key in the keyhole Turn the key clockwise to the stop ( ¼ turn ). Do not remove the Menu key at this stage. 3 Switch the power switch on. The oven will now go through the program download sequence by displaying the following: The Menu Key Code.
CLEANING For the oven to operate at peak efficiency, the cavity, door and air filters must be kept clean. A daily cleaning routine will ensure that you comply with the required hygiene standards and will help to maintain and prolong the efficiency of your oven. Follow the SAFETY INSTRUCTIONS at the beginning of this manual.