
Stability Barre User Manual

Stability Barre
™
Owner’s Manual
4
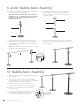
6' and 8' Stability Barre
™
Assembly
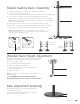
12' Stability Barre
™
Assembly
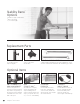
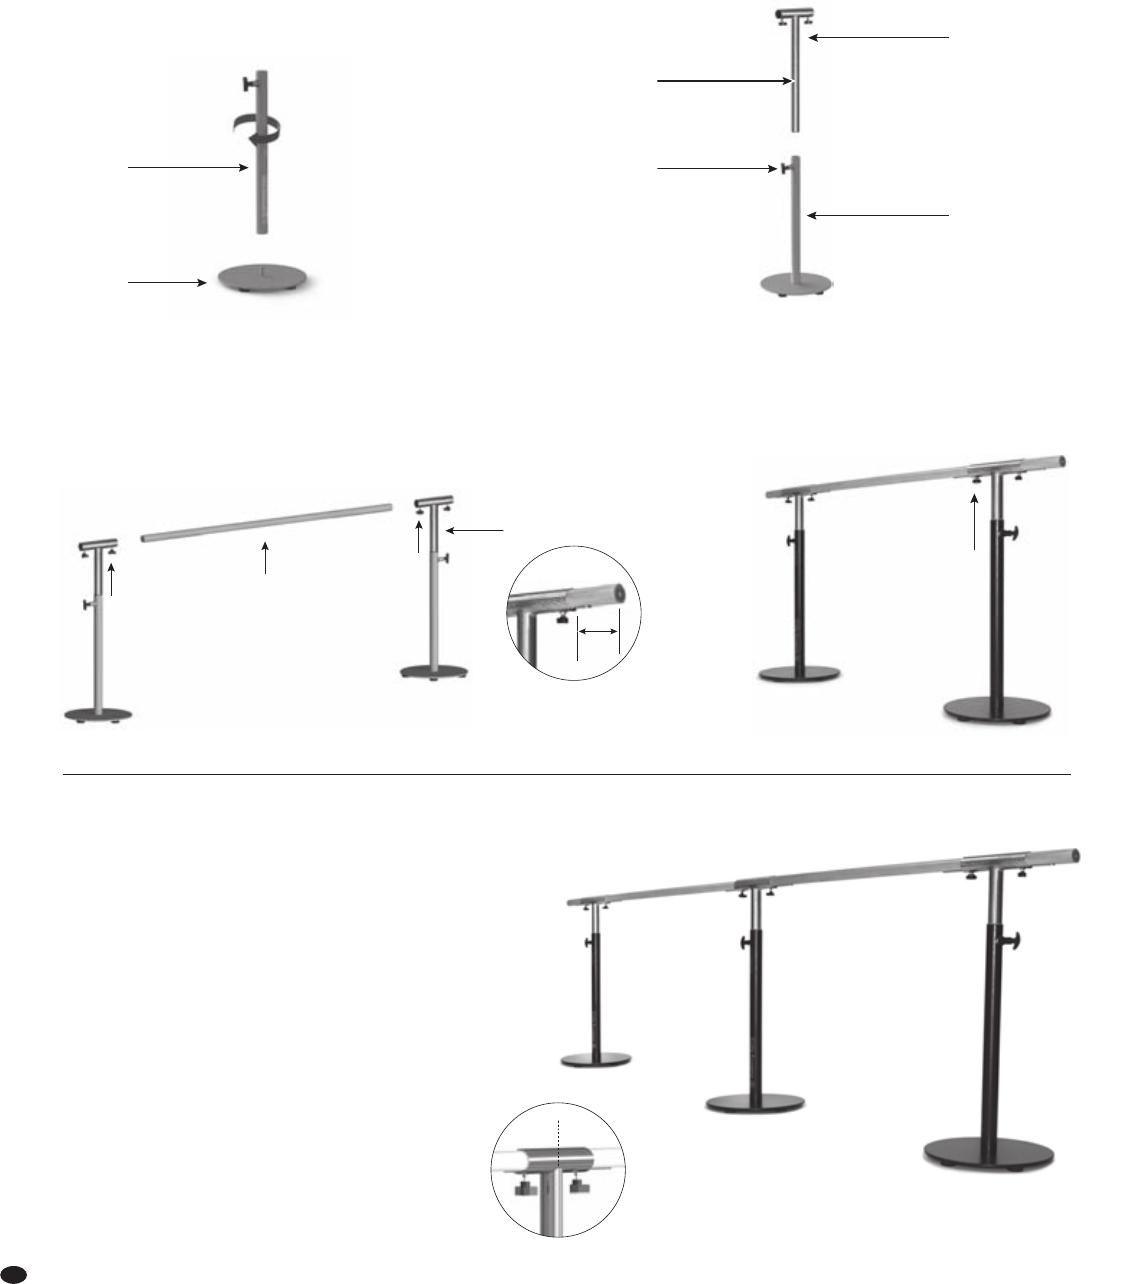
1 Repeat steps 1 and 2 from the Stability Barre Assembly (above) for
all three Uprights.
2 Insert one 6' Wooden Barre [1] into the first Guide Tube [2]
allowing a minimum 3" (7.5 cm) overhang. Ensure the Metal Plate
[10] of the Wooden Barre is always facing down.
3 Insert the other end of the Wooden Barre [1] half-way
(5"/ 12.7 cm) into the center of the next Guide Tube [2]
4 Insert the next 6' Wooden Barre into the Guide Tube [2]
from previous step
5 Finally, place the other end of the Wooden Barre through
theremaining Guide Tube [2] allowing a minimum 3"
(7.5 cm) overhang and tighten all 3-Prong Knobs.
2
4
6
7
2
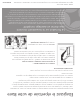
2 Insert Guide Tube [2] into Telescopic Support (Upright) [7].
Line up Pre-drilled Holes [4] withPop-up Pins [6].Tighten
off the Pop-up Pin [6] by securely screwing closed. Repeat
for the other Upright.
3 Insert the Wooden Barre [1] into the Guide Tubes [2] allowing
aminimum 3" (7.5 cm) to protrude. Ensure the MetalPlate [10]
of the Wooden Barre is facing down. Never extend the Metal Plate
pasttheGuide Tubes.
NOTE: The tips of the 3-Prong Knobs [3] must be in contact with
the Metal Plate [10] at all times when in use.
4 Tighten the 3-Prong Knobs [3] clockwise to secure the Wooden
Barre at both ends, ensuring theMetal Plate is in contact with
the 3-Prong Knobs.
3
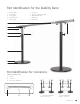
1 Attach the Telescopic Support (Upright) [7] to the Weighted Base
Plate [8] by turning clockwise until tightened.
NOTE: Make certain the Weighted Base Plate is aligned
perpendicular to the vertical hole in the Telescopic Support
(Upright) to ensure proper threading when attaching
the Weighted Base Plate.
7
8
min 3"
insert each Wooden
Barre halfway thru the
middle Guide Tube
3
1
3