
Stability Barre User Manual
merrithew.com
5
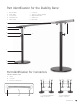
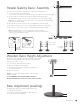
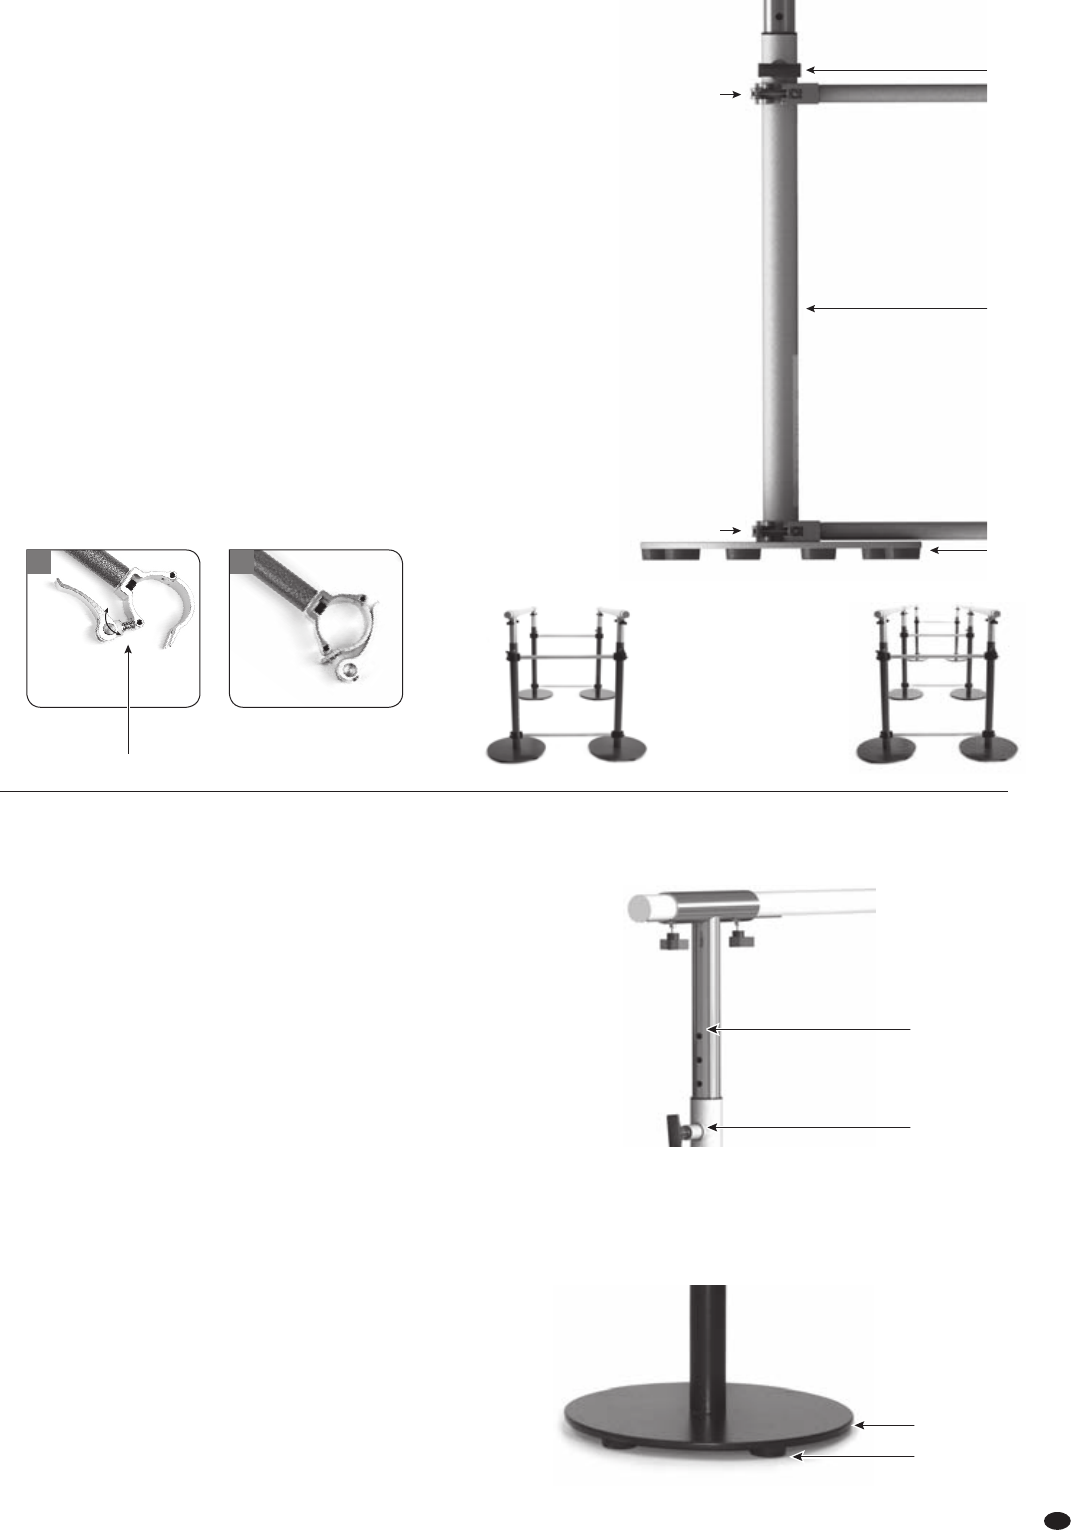
Wooden Barre Height Adjustment
The Telescopic Support (Upright) comes with Pre-drilled Holes [4] for height
adjustment to accommodate the users' needs, and can be adjusted from
36½" (92.7 cm) to 44" (111.8 cm).
1 Loosen (unscrew) and pull out the Pop-up Pin [6].
2 Adjust Wooden Barre to the desired height.
3 Release and insert Pop-up Pin to ensure it has engaged fully into
oneofthe Pre-drilled Holes.
4 Tighten the Pop-up Pin.
NOTE: Place your foot onto the Weighted Base to hold it down priorto
adjusting the height.
IT IS RECOMMENDED THAT ANY ADJUSTMENTS IN HEIGHT
BE MADE SIMULTANEOUSLY USING TWO PEOPLE, ONE AT EACH END.
Base Adjustment (Leveling)
The Weighted Base Plate [8] comes with adjustable Rubber Feet [9]
to accommodate most flooring.
Loosen (unscrew) or tighten (screw) Rubber Feet [8] as required to
assist in the leveling of your Stability Barre.
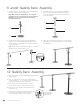
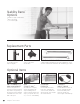
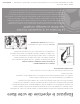
Parallel Stability Barre
™
Assembly
1 Assemble two Stability Barres as described in the Stability Barre Assembly [Page 4].
2 Use Connectors [12] to join two Stability Barres.
To open Clamp [11]: release the Fold-over Locking Lever [13] and fold it away from the Clamp [Fig A].
3 Place the Clamp [11] around the Telescopic Support (Upright) [7] positioning it against
theWeightedBase Plate [8]. Close and lock the Clamp using the Fold-over Locking Lever [Fig B].
NOTE: Fold-over Locking Lever may be rotated clockwise or counter-clockwise toadjust the length
ofthe lever’s threaded bolt [Fig A].
4 Attach the other end of the Connector to the second StabilityBarre atthesame height.
5 Attach the second Clamp to the Telescopic Support (Upright) [7] just below the Pop-up Pin [6].
6 Repeat steps 2-6 above until all Connectors are attached and theunit isfully assembled.
NOTE: Parallel Stability Barres are sold as a kit with all the Connectors included.
If you have purchased single 6', 8' or 12' Stability Barres and wish to join them together,
Connectorsare also sold separately in pairs.
4
8
9
6
6
11, 13
11, 13
A B
Adjustable
Threaded Bolt
w
Turn clockwise
to tighten
w
Counter-clockwise
to loosen
Shown with the
Fold-over Locking
Lever in place and
clamped shut
12' require
6 Connectors
6' or 8' require
4 Connectors
7
8