
User guide

9R143 Dated 3/2011
11
P2 – DAMP RATE
The Smart Gauge has a selectable damp rate, which is used to stabilize the display for applications with a pulsating
pressure source. The damp rate setting is roughly the length of time it will take for the gauge to ramp from one
stable pressure to another. The ramping is exponential, changing at a slower rate as the final value is approached.
The “time constant” of the exponential equation is roughly one-fifth of the damp rate setting. This means that the
damped value will be roughly 63% of final value after a time equal to one-fifth of the register setting. The value
will be roughly 86% of final value after a time equal to two-fifths of the register setting.
The damping function only affects the displayed value (LCD display and RS232 data); it does not
affect the action
of the SPDT relays, the 4 to 20 mA outputs, or the response to over-pressure (“OP” indication).
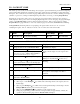
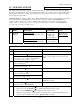
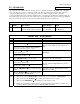
QUICK REFERENCE: P2, DAMP RATE
Px
Name Description Value Range Notes
P2 Damp Rate Exponential damping time in
seconds.
0.1, 0.2, 0.5, 1, 2,
5, 10, 15, 25, 50
0.1 = No
Damping.
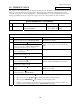
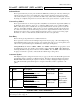
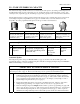
STEP BY STEP: P2, DAMP RATE
Step Action Display
1
Gauge should be in the normal Measure Mode. Normal Pressure Display.
Press the PRGM/Enter→ key.
2
If the lockout is active, the gauge will now prompt for entry of
the lockout code. Refer to “STEP BY STEP: ENTERING A
LOCKOUT CODE (When Prompted)” on page 21.
The PRGM annunciator shows at the top of the
display, and the display shows the register name
“P0”.
Press the Up↑ or Down↓ keys repeatedly to scroll
to the desired register.
3
The Zero function (Up↑ and Down↓) will reset the scroll to P0
and allow selection to continue.
Display shows “P2”.
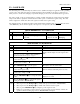
4
Press PRGM/Enter→ to open the register.
The display shows the current value.
Press the Up↑ or Down↓ keys repeatedly to scroll
to the desired register value.
5
The Zero function (Up↑ and Down↓) will reset the scroll to
default and allow editing to continue.
All available choices are scrolled.
(Choices indicate actual damp rate in seconds.)
6
Press the PRGM/Enter→ key to accept the desired
value.
The value is accepted, and the register is closed.
Display shows “P2”.
7
Press the Backspace← key to activate the register
setting and return to Measure Mode.
Normal Pressure Display.
Notes
1. After steps 2 and 3, the Backspace← key will abort the process and return to Measure Mode.
2. After steps 4 and 5, the Backspace← key will abort the edit and close the register.
3. After step 6, the PRGM/Enter→ key will again open the register for edit.
4. During any programming operation, if there is no keypad activity for approximately 1 minute, the
operation is aborted and the gauge returns to Measure Mode unchanged.
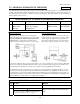
All Models