
User manual


www.merging.com/horus Page 40 - 54
Horus User Manual
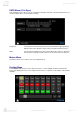
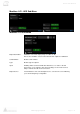
* All routing in the Horus is currently achieved using banks of 8 channels*
None: Sets the module so that it does not receive a signal from anywhere. Digital
Mute will be output.
Ravenna: Connects the module to the RAVENNA network and allows any other
RAVENNA device to send signal to it.
AES 1-3: Sets the module being configured to receive signal from any of the 3 banks of
4xAES-EBU input pairs.
MADI 1-2: Allows the module being configured to receive signal from any 8-channel
bank in either of the MADI streams (MADI 2 appears only if the MADI
Expansion Card is fitted.)
A/D N: Sends the signal coming in from the Mic or Line input modules to the output
module being configured
Loopback: Should only be used for test purposes.
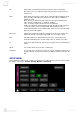
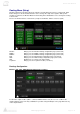
Network Menu (Setup)
Device Name: Name of the Horus unit. This name will be broadcasted across the network
and will be seen in applications such as the MT Discovery tool. The Horus
unit name can be changed from the Web control access Network page (see
section below for all details)
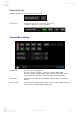
IP Settings: Manual: Type IP address using box selection and the - or + buttons
Auto: The IP address will automatically be generated by the operating system
for each network interface
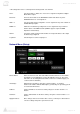
Address: Set the IP Address for the Horus unit by using box selection and the - or +
buttons
Netmask: Set the Subnet Mask for the Horus unit by using box selection and the < or >
buttons
Apply & Reboot: Once changes have been made to this section, you must press this button to
save the settings and power cycle the Horus unit