
User guide


OWC Mercury Elite-AL Pro Qx2 Chapter 1 - Introduction
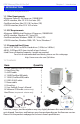
1.5 RAID Conguration
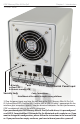
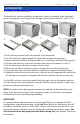
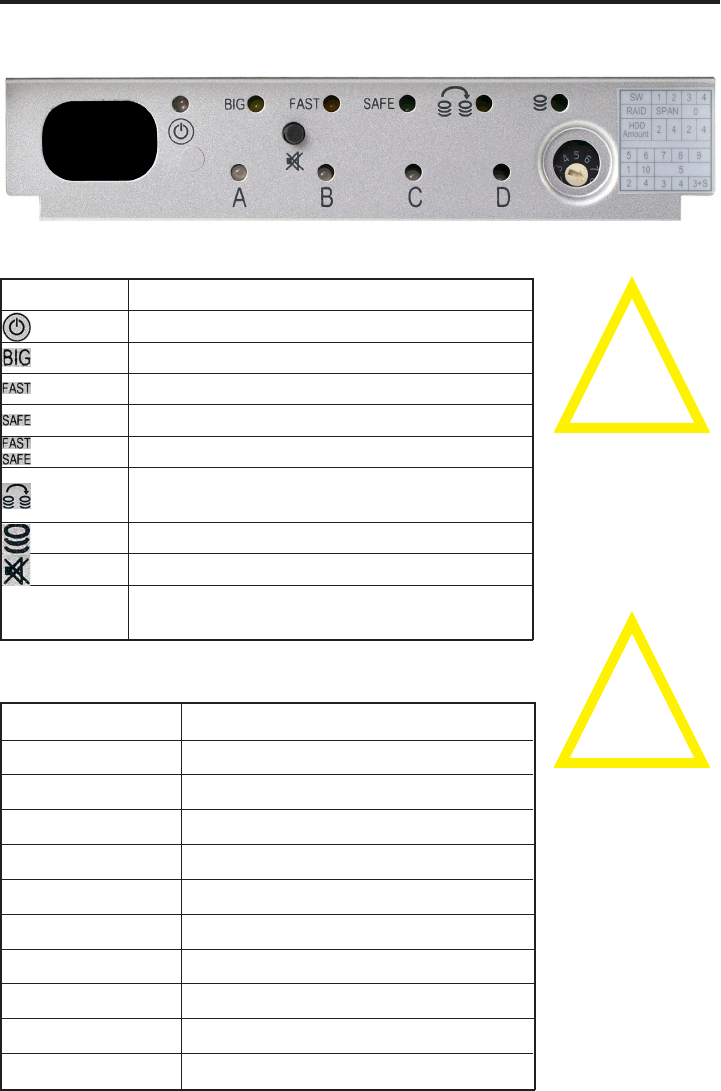
1.5.1 LED Indicators & Buttons
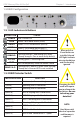
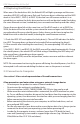
1.5.2 RAID Selector Switch
!
When only 2 or
3 hard drives are
installed, the red
LED lights indicate
missing hard drives
and can be safely
ignored.
!
Changing the RAID
mode will require
you to reformat the
hard drives. Be sure
to back up your
data first!
NOTE:
Hard drives with
identical capacities
and rmware is
required.
STATUS
Blue = Power ON
Yellow = BIG mode active (SPAN)
Amber = FAST mode active (RAID 0)
Green = SAFE mode active (RAID 1)
Green & Amber = RAID 5 or RAID 10
• Blinking orange = Rebuilding RAID array
• Steady orange = One or more faulty drive(s)
• Blinking red = Bad HDD (after initial start up)
• Steady red = Error or HDD is not installed
Blinking green = Accessing data
Press to temporarily mute the buzzer sound
SWITCH POSITION FUNCTION
0
1 (SPAN)
2 (SPAN)
3 (RAID 0)
4 (RAID 0)
5 (RAID 1)
6 (RAID 10)
7 (RAID 5)
8 (RAID 5)
9 (RAID 5)
Not in use (software setting)
Spanning with 2 hard drives
Spanning with 4 hard drives
RAID 0 Striping with 2 hard drives
RAID 0 Striping with 4 hard drives
RAID 1 Mirroring with 2 hard drives
Mirroring & Striping with 4 hard drives
RAID 5 with 3 hard drives
RAID 5 with 4 hard drives
RAID 5 with 3 hard drives + 1 spare
LED/BUTTON
POWER
SPAN
RAID 0
RAID 1
RAID 5 / 10
REBUILD
ACCESS
MUTE
DRIVES A-D