
User Manual


29
Operation and control
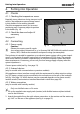
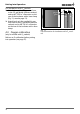
5.7 Basic operation
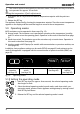
The desired parameters are entered on the operating panel of the controller on the front of
the appliance ( Fig. 18 ). Basic settings, as well as those for time and printing, can also be made
here. In addition, programmed and current parameters are displayed, as well as warning mes-
sages:
PRINT
SETUP
loop
t3
t4
t2
t1
on
off
Mo
Tu
We
Th
Fr
Sa Su
3
4
2
1
STERI DEFRO
°C
°C
rh
mb
%
CO
mb
2
IN 1
IN 2
OUT
IN 1
IN 2
OUT
MIN
AUTO
MAX
123465 7 8 109 11 12
13141516
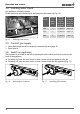
Fig. 18 Operating panel
1 Time display
2 Display appliance locked with user-ID
card (see page 52 )
3 Display appliance is heating up
4 Sterilisation mode (see page 51 )
5 Temperature display
6 Alarm display
7 Monitoring temperature display
(see page 47 )
8 Horn
9 Warning water supply tank empty
10 Humidity display
11 Gas bottle 1 active
12 Gas bottle 2 active
13 CO
2
display
14 Display appliance is humidifying
15 Operating mode display (see page 30 )
16 Text display/O
2
display (O
2
display only if
equipped with O
2
module)
All operating functions are selected by turning the push-turn control to the
left or right...
...and adjusted by turning this with the SET key held down.
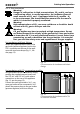
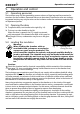
5.8 Setting parameters
In general, all setting actions on the operating panel described on the following pages are
made in the same way:
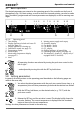
1. You select the desired parameter with the push-turn control (menu item, e. g.
temperature); then all other parameters go dark and the selected one flashes.
2. With the SET key held down, set the desired value (e. g. 37.0 °C) with the
push-turn control.
3. Release the SET key, and the set value is saved. The display briefly shows the
set value, flashing. The current temperature is displayed and the incubator
begins to heat up to the set temperature.
Settings for other parameters are made in the same way.
set
set
set
set
set