
User guide


C6010 Managing your C6010 printer
5 December 2012 – v1.0
Page 76 of 100
All cleaning operations consume ink. The more thorough the cleaning operation, the more ink is
consumed. It is recommended you always print one or more test pages at this point.
4. If the problem persists, repeat step 1 within 10 minutes to initiate a more thorough
printhead cleaning sequence, and then select Normal maintenance. Again, wait until the
power lamp stops blinking and the Ready message appears on the LCD screen.
5. Print a test page to determine whether the problem has been resolved.
6. If the problem is still not resolved, you may repeat step 1 a final time (within 10 minutes)
to initiate the most thorough cleaning operation available, and then select Full
maintenance. Before issuing a test print, again wait until the power lamp stops blinking
and the Ready message appears on the LCD screen.
If the problem persists, contact support personnel.
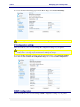
The Services tab in the printer driver Properties dialog box is furnished with a Clean
Printheads button which, when clicked brings up the Clean Printheads dialog box with three
buttons:
Quick Clean Printhead.
Normal Clean Printhead.
Full Clean Printhead.
Each of these buttons performs a printhead cleaning operation as explained in the
accompanying text in the Dialog box (see below).
These cleaning operations are analogous to those carried out by pressing the Menu button on
the printer, as explained in Printhead cleaning via the Menu button on page 75.
All cleaning operations consume ink. The more thorough the cleaning operation, the more ink is
consumed. When you need to clean the printhead, it is recommended that you:
Always start with a Quick clean and progress from there
Always print one or more test pages after each cleaning operation.
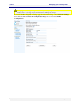
The Toolbox Maintenance page also provides three Clean Printhead buttons which are
analogous in their operation to those appearing in the printer driver Services tab.