
User Manual
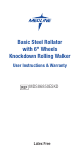


GPI171-IM27 MDS86850ESKD
Revised: 04/10/2014
9
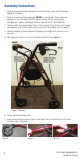
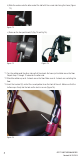
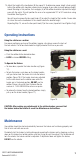
To Operate the Brakes:
• To slow down, squeeze the brake handles up (Figure
17).
• To lock the brakes, push down on the brake handles
until you feel or hear the brakes click into the locked
position (Figure 18). If the brakes have been adjusted
but the rear wheels on the rollator move while the
brakes are in the locked position, DO NOT use the
rollator. Please call our toll-free Customer Service
number at. 1-800-MEDLINE for returns or repairs.
• To release the brakes from the locked position, simply
pull up on the brake handles (Figure 17).
CAUTION: After making any adjustments to the rollator brakes, you must test
the brakes before the rollator is used. See Maintenance Instructions.
Maintenance
Your rollator should be checked periodically to ensure the brakes are functioning properly and
that all nuts and bolts are secure.
Periodically test the brakes by both walking and squeezing the brakes and by stopping, pushing
down on the brakes to a locked position, and then trying to push the walker. If the brakes do not
lock the wheels, the brakes need to be adjusted. If adjustment does not tighten the brakes,
DO NOT use the rollator.
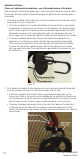
Operating Instructions
Using the rollator as a walker:
For proper positioning and use of the rollator, imagine a line drawn across the back of
the rear wheels. Part of one foot should be slightly ahead of that line as you walk.
Using the rollator as a seat:
• Push the rollator to the desired location.
• LOCK the brakes BEFORE sitting.
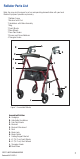
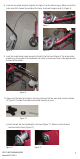
14. Adjust the height of the handlebars (B) for proper fit. To determine proper height, stand upright
behind the rollator with shoulders relaxed, arms hanging at your side and eyes looking straight
ahead. Standing in this position, the handgrips (A) of the rollator should be adjusted to a height
even with the wrists. This will position the arms at an approximate 20º to 30º bend when using
the rollator. See Figure 16.
You will have to remove the four point knob (C) to adjust the height of the handles. Do one side
at a time. Secure the handlebars at the closest hole to the desired height.
Repeating Step 10, secure the four point knob (C) to the screw. (Important: Hand Tighten Only!)
Figure 17
Figure 18