
User`s guide


24
Selecting the communication port
In order to communicate successfully with the device, the communication port to be used must be set.
Please connect the optical cable to a free serial port on the computer, then connect a device to the
optical cable. Start CardioVisions, then open the Options window by clicking on the Options
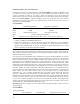
command of the Tools Menu. Select ABPM from the list on the left side of the Options window, then
select a communication port and the type of the connected device on the panel appearing on the right
side (see picture). Check the connection by clicking on the Test button. During communication, a
progress bar will be seen. The program will inform you of the success of communication in a message
window. If communication is not successful, select another communication port and repeat the test. If
communication cannot be achieved through any of the ports*, check the connection of the cable both
on the side of the device and that of the computer, as well as the charging status of the batteries of the
device (the device displays low battery voltage: periods will appear between the digits at the bottom of
the display).
Warning! In the case of a Network Edition installation, this setting must be completed on each client
computer.
* The serial port to be used may not be available in Windows Operating System due to a failure. This
can be checked by opening the System element of the Control Panel and clicking on the Device
Manager label (Windows 9X). Should this be the case, please turn to the system administrator.