INSTRUCTION MANUAL Meade #1697 Computer Drive System ® For LXD 650 and LXD 750 Equatorial Mounts Meade Instruments Corporation
MEADE LIMITED WARRANTY Every Meade telescope, spotting scope, and telescope accessory is warranted by Meade Instruments Corporation (“Meade”) to be free of defects in materials and workmanship for a period of ONE YEAR from the date of original purchase in the U.S.A. and Canada. Meade will repair or replace a product, or part thereof, found by Meade to be defective, provided the defective part is returned to Meade, freight-prepaid, with proof of purchase.
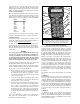
-3- Contents #1697 Computer Drive System Introduction . . . . . . . . . . . . . . . . . . . . . . . . . . . . . . . . . . . . . . . . 4 Installation. . . . . . . . . . . . . . . . . . . . . . . . . . . . . . . . . . . . . . . . . 4 Quick Start . . . . . . . . . . . . . . . . . . . . . . . . . . . . . . . . . . . . . . . . 5 Basic Telescope Setup . . . . . . . . . . . . . . . . . . . . . . . . . . . 5 Basic CDS Setup . . . . . . . . . . . . . . . . . . . . . . . . . . . . . . .
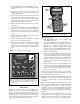
-4- #1697 COMPUTER DRIVE SYSTEM: INTRODUCTION The Meade #1697 Computer Drive System (CDS) is easily installed in the Meade LXD 650 and 750 Equatorial Mounts. With a properly polar aligned mount, (see the instruction manual which accompanies the telescope), the #1697 Computer Drive System's advanced electronics permit the location and observation of the major planets as well as hundreds of deep-sky objects the very first night of use.
-57. Replace the Declination slow-motion knob (2), Fig. 2. Lock in place by tightening the set screw, and replace the rubber knurling. 8. Remove the cover plate on the opposite side of the Declination housing, by removing the four Phillips-head screws holding it in place. 9. Route the 16-pin ribbon cable from the Driver PCB so that it exits the housing on the lower right-hand side.
-6system’s computer memory. It is also necessary to learn the menu structure of the Keypad Hand Controller, which is described beginning on page 8. →1) A A A 2) A A A Display 4 Basic CDS Setup: This section explains what keys to push to get the minimum data required into the computer system, without any detailed explanation. The detailed explanation can be found later in the manual. These steps will only take a few minutes and will allow immediate use of all of the CDS features.
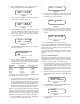
-72. Press the MODE key twice. The display will look like Display 8, but with random LOCAL and SIDE times. →LOCAL = 11:24:30 SIDE = 21:38:02 DATE = 11 / 2 8 / 9 7 Display 12 9. Display 8 3. Press and hold the ENTER key until the Keypad Hand Controller beeps. The display will look like Display 13, with the blinking cursor over the first number. Press and hold the ENTER key until the Keypad Hand Controller beeps (display like Display 9).
-8as a reference for the position and the catalog number of these prominent stars. The display will look like Display 20. 1) SITE →2) ALIGN Display 17 5. Move to 90 deg., dec. and 00 H.A. Display 18 6. Center your star choice then press ENTER Press the ENTER key to activate the ALIGN function. The display will look like Display 18. Display 20 10. Center the second alignment star in the telescope eyepiece using the "N", "E", "W", or "S" keys on the Keypad Hand Controller.
-9will show data on the object (name, rating, object type, brightness, and size). Now, press GO TO. The telescope will automatically slew to M42. If the desired object is not above the horizon, the Keypad Hand Controller will display the message “OBJECT BELOW HORIZON.” Other good objects to begin with (if above the horizon) are any of the M objects—from M1 to M 110, and the planets. To find a planet, press the STAR key, followed by the number of the planet you wish to view (see chart below).
- 10 3. GO TO Key 7. FOCUS Key The GO TO key (3), Fig. 8, causes the telescope to automatically slew to specific library entry coordinates. The GO TO key also produces a blinking cursor in the GO TO menu file of the COORDINATES/GO TO mode, to allow new Right Ascension and Declination coordinates to be entered. Pressing GO TO while the telescope is slewing to an object pauses the slewing process, pressing GO TO again resumes the slew. The FOCUS key (10), Fig.
- 11 information can be useful if you are trying to calculate how much battery life is available during an observing run. As an example, if the ammeter has four bars lit, (indicating 0.4 amps) and the system is using a 12 amp hour battery, determine the approximate battery life by dividing 12 amp hours by 0.4 amps, resulting in a battery life of 30 hours. 2. N/S (2), Fig.
- 12 pole star may be somewhat off-center in the eyepiece, showing that an alignment error was made during the initial setup. Using the Latitude adjustment knob and Azimuth control knob on the LXD Equatorial Mount, center the pole star during each interval exercise, then follow the rest of the routine.
- 13 To toggle between 12 and 24 hours displays, move the LCD arrow to 12/24HR and press ENTER. To return to the original setting, press ENTER again. 5) HELP: The HELP menu selection of the TELESCOPE file is an electronic mini-manual that briefly describes the function of each command key on the CDS Keypad. In addition, the High Precision Pointing feature requires the refined alignment procedure described in the "Align" section on page 11.
- 14 and press ENTER. The letters will revert to lower case, indicating the High Precision Pointing option is now "off". 10) SLEW RATE: Option #10 in the TELESCOPE menu is for changing the slew rate of the CDS telescope. Slowing down the slew rate will result in less noise as the telescope moves and will also use a little less power. To change the slew rate, follow these steps: 1. Press the MODE key on the Keypad until the TELESCOPE/OBJECT LIBRARY menu appears on the display.
- 15 using the M, STAR, or CNGC keys, and pressing the ENTER key. Press MODE to exit to the main menu file. RA = 12:27.2* DEC = +13'03 2) START FIND The START FIND option utilizes the CNGC objects within the Object Library and begins a logical search beginning where ever the telescope is positioned when activated. To cover the entire visible sky it will make 31 strip divisions about 12 degrees wide, moving from West to East, from the North Pole to the South Pole, then South to North.
- 16 selects all objects from very poor through super — what could be considered an “ALL” setting. The object quality symbols are: Quality Symbol SU EX VG G FR PR VP Symbol Description Super Excellent Very Good Good Fair Poor Very Poor For example: to define the visual object quality range to very good and better, press the ENTER key until the symbol VG is displayed. From the VP setting to VG requires three ENTER key presses. The CDS will now select objects that look Very Good through Super.
- 17 the CDS knows no bounds — any celestial object, including comets, asteroids, etc., are easily found, provided accurate coordinate data has been entered. To enter a new pointing position in Right Ascension and Declination, press and hold the GO TO key until a double beep is heard. A blinking cursor appears over the R.A. coordinate numbers. Using the numbers on the keypad, type in the new Right Ascension coordinate numbers. Then, press the ENTER key.
- 18 Note: The backlighting is done by edge lighting a plastic light bar underneath the Keypad. Four LED’s are used and do not give a perfectly even backlighting of the keys as keys closer to a LED will be a little brighter than those keys further away. OPTIONAL ACCESSORIES An assortment of professional Meade accessories is available to enhance the performance of the Meade LXD Equatorial Mount and #1697 Computer Drive System.
- 19 - APPENDIX A: PRECISE POLAR ALIGNMENT Precise polar alignment is essential for long-exposure astrophotography (typically defined as photo-exposures of 10 minutes or longer). Fewer tracking corrections are required during the duration of the exposure when the telescope is precisely polar aligned. Precise polar alignment requires the use of a crosshair eyepiece — such as the Meade Illuminated Reticle Eyepiece — and a 2x Barlow lens for increased magnification.