
Specifications


More about editing text boxes:
To edit the contents of a text box:
Select the text box by click on it once, or use the tab key to cycle through the text boxes. Then using the
mouse, double click again on the text box to select its text. You can then replace the text or use the
arrows, backspace and delete key to modify its contents.
To move a text box:
With the mouse: Click anywhere inside the box, and while holding down the left mouse button drag the text
box around the screen.
With the keyboard: Select a text box with the mouse, or use the Tab key to cycle through all the text boxes one at
a time. Then, use the four arrow keys (left, right, up, and down) to move the text box one pixel at a time. If you
hold down the ctrl key at the same time, movement will be in 5 pixel increments.
To resize a text box:
With the mouse: Select a text box so that it draws it outline with the 8 resizing handles. Press and click on one
of the resizing handles. Then while still holding down the left mouse button, drag the handle to expand or
contract the text box.
With the keyboard: Select a text box with the mouse, or use the Tab key to cycle through all the text boxes one at
a time. While holding down the shift key, use the four arrow keys to expand or contract the size of the text box
one pixel at a time. If you hold down the ctrl key at the same time, movement will be in 5 pixel increments.
To create multiple text boxes of the same size and text style:
1) Select a text box.
2) Click on Edit > Copy.
3) Click on Edit > Paste, repeat.
Aligning text boxes: This is generally best done with the keyboard. When a text box is selected, its
location and dimensions are displayed just underneath the template sample. You can then use they board
sizing commands to match vertical and horizontal positions and sizes.
Copying text styles between text boxes: Text styles can be easily copied from one text box to another.
1) Select a text box.
2) Click on Edit > Copy
3) To copy the text style to all text boxes, click on Edit > Paste Style All.
4) To copy to another text box, select the destination text box and click on Edit > Paste Style.
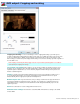
Mixing placeholders and static text: You can mix place holders with static text in a text box. For
example the following text boxes will number each title on the menu:
While the following text boxes will display a title without the preceding number:
For a list of valid place holders, please see the
Customize menu screen.
Saving and restoring templates: When you click on the "Edit template" button on the DVD Project page.
You are actually editing a working copy of the template which when you click OK on this screen will be used for
a single DVD. To save
File > Load Template: Select this menu option to load an existing template. You can change the location
of where templates are stored using the
DVD settings option page.
File > Save Template: You can save the customized template for future use by storing it in the default
custom templates folder.
File > Save bitmap: Click this option to copy the menu template to a .jpg fie.