Lasso Continuous Data Protection Lasso CDP Administration Tool Guide August 2005, Version 1.6.1 Lasso CDP – Administration Tool Guide @2005, All Rights Reserved.
Lasso Continuous Data Protection Copyright Copyright ©2005 Lasso Logic, LLC. All Rights Reserved. No part of this publication may be reproduced, stored or transmitted in any form or by any means, electronic, mechanical, photocopying, recording or otherwise, without the prior written consent of Lasso Logic, LLC. Contact information is available on the Lasso Logic website www.lassologic.com. Windows 2000 and Windows XP are trademarks of Microsoft Corporation.
Lasso Continuous Data Protection Table of Contents 1 INTRODUCTION TO LASSO CDP ......................................................................................................................................5 2 GETTING STARTED ............................................................................................................................................................8 2.1 INSTALLING THE LASSO CDP CLIENT SOFTWARE .......................................................................
Lasso Continuous Data Protection 4.4.9 Contacts....................................................................................................................................................................37 4.4.9.1 4.4.9.2 4.4.9.3 4.4.9.4 4.4.9.5 4.4.10 4.4.10.1 4.4.10.2 5 Share for Client ....................................................................................................................................................39 Save to Location ........................................
Lasso Continuous Data Protection 1 Introduction to Lasso CDP Product Benefits • Zero touch continuous data protection (CDP) • Eliminates need for notoriously unreliable tape systems • Reduces downtime after failure from days or hours to minutes • Provides hands free, hassle free local and offsite backup • One-click instant recovery • Plug-in-play installation • Simple to use • No maintenance / No manual intervention • Anywhere, anytime access for increased productivity • HIPAA Compliant
Lasso Continuous Data Protection Product Features Continuous Data Protection: Lasso CDP replicates data in real-time, capturing all new, changed and deleted information at any point in time. There are no backup windows to that leave data exposed to data loss – a serious risk that exists with most other backup solutions. Lasso CDP’s continuous data protection works even when users are on their laptops working remotely.
Lasso Continuous Data Protection Simple to Install, Simple to Administer Lasso CDP has three components: Lasso CDP Appliance, a client application, and a client agent • Lasso CDP Appliance Lasso CDP is the dedicated backup appliance will enabling all the features and functions included with the product • Client Application If the administrator wants to provide backup capability to a user on the network, the client application is installed on the users PC.
Lasso Continuous Data Protection 2 Getting Started 2.1 Installing the Lasso CDP Client Software Warning: Before installing the Lasso CDP Client Software, please save document changes and close all open applications. Lasso CDP Client software must be installed on each Server, PC, and Laptop in the network that will be backed up to the Lasso CDP Appliance. Note: You must have Administrator privileges on the computer to install the Lasso CDP Client software.
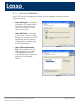
Lasso Continuous Data Protection 3. Select Complete and Click Next to start the installation process (Figure 3). Note: For Custom Installation, refer to Section 2.1.1. Figure 3 4. The Setup Status screen will show the progress of the installation (Figure 4). This may take a few minutes depending on the speed of the PC or if the .NET service is installed. Figure 4 5.
Lasso Continuous Data Protection 2.1.1 Custom Installation Lasso CDP can be configured to install only the needed software modules (Figures 6 and 7). • Lasso CDP Agent – Required installation. The agent takes less than 2 MB of memory and has no impact on the client or network. • Lasso CDP Client – Needed for end-user recovery of files backed up on the Lasso CDP Appliance and for backup configuration if enabled by the IT Administrator.
Lasso Continuous Data Protection 2.2 Registering the Lasso CDP Appliance The Lasso CDP Appliance must be registered using the software license key before backing up data from the Lasso Clients. Note: The Administration Tool only has to be installed on the computer that will be used for central administration. Refer to Custom Installation, Section 2.1. 1. Launch the Administration Tool from Start>All Programs>Lasso Logic>Lasso CDP Administration. 2.
Lasso Continuous Data Protection 2.3 Configuring Firewalls Most software firewalls detect Lasso CDP during installation and prompt for permission to open the appropriate ports. If you have a firewall installed you will need to configure it before using the Lasso CDP Client or Lasso CDP Appliance. 2.3.1 Windows XP SP2 Windows XP SP2 installs and activates a firewall by default. If you applied Service Pack 2 after installing the Lasso CDP Client software, you may need to add CDPAgent.exe and Lasso.Client.
Lasso Continuous Data Protection You can also manually add CDPAgent.exe and Lasso.Client.exe to the Allowed Applications list. Here's how: • Step 1: • Open McAfee Personal Firewall • Select Internet Applications List • Choose New Allowed Application • Navigate to Program Files > Lasso Logic > Continuous Data Protection> Lasso.Client.exe • Click Open to select the Lasso.Client.exe file. • Choose New Allowed Application.
Lasso Continuous Data Protection 2.3.3 Norton Internet Security and Norton Personal Firewall Note: If you are using Windows XP SP2, make sure you have opened ports or disabled XP's firewall first, using the instructions above. If you are using a Norton Internet Security and Norton Personal Firewall product you will likely see warnings when starting the client such as the following (Figures 12 and 13), In both cases select Permit Always.
Lasso Continuous Data Protection To manually configure Norton Internet Security and Norton Personal Firewall: • • Step 1: • Open Norton Internet Security (a new window will appear) • Double-click Personal Firewall, or click once to select Personal Firewall, then click the configure button to the right (Figure 14) • Click the Program Control tab • Click the Add button • Navigate to Program Files > Lasso Logic > Continuous Data Protection > Lasso.Client.
Lasso Continuous Data Protection 2.3.4 Zone Alarm If you have Zone Alarm installed you will likely see the following warnings immediately after installing the Lasso CDP Client and attempting to use the CDP service (Figure 16): Figure 16 Zone Alarm personal firewall must be configured to grant server rights to Lasso.Client.exe and CDPAgent.exe. By default, Zone Alarm will block applications from connecting to other computers and acting as servers.
Lasso Continuous Data Protection • In the Secure Programs window, set Lasso.Client.exe with both access and server rights, then click the Finish button Step 2: • Select Program Control again • Next, click the Program Wizard button to set the correct permissions for CDPAgent.exe • In the Program Wizard window, select the Advanced option to manually set server permissions for CDPAgent.
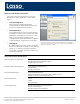
Lasso Continuous Data Protection 3 Lasso CDP Admin Tool Features 3.1 System Management The system profile screen gives the IT administrator a summary view of the Lasso CDP Appliance’s disk usage, settings, quota, etc (Figure 18). • Administrative Settings - The Administrative Settings identifies the person that has administrative privileges for Lasso CDP Appliance. These settings were established during the Admin Tool installation process.
Lasso Continuous Data Protection 3.2 Policy Management The IT Administrator can establish common back up policies that propagate across all clients connected to Lasso CDP Appliance or individual client PCs/Laptops (Figure 19). • • • General Settings - Set backup limits and restrict client functionality.
Lasso Continuous Data Protection 3.3 Reporting Provides key overview reports for the IT Administrator to help manage the Lasso CDP Appliance. • CDP Client Summary – Shows summary stats for Lasso Clients which include file count, storage space used, and assigned policy (Figure 20). Figure 20 • CDP Remote Sharing Overview Shows all contacts that have access to company data and which Lasso client shared to the contact (Figure 21).
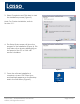
Lasso Continuous Data Protection 4 Lasso CDP Administration Tool Configuration 4.1 System Management 4.1.1 Edit Administrative Setting The Administrative Settings can be edited at anytime by the defined IT Administrator. Step 1: Select Edit Administrative Settings in the left window pane. Step 2: Edit the settings and Save Changes to complete (Figure 22). Figure 22 4.1.2 Change Lasso CDP Appliance The Admin Tool gives the Administrator the ability to manage all Lasso CDP clients on the network.
Lasso Continuous Data Protection 4.2 Policy Management The IT Administrator can establish common back up policies that propagate across all clients connected to Lasso CDP Appliance or individual client PCs/Laptops. Note: Lasso CDP has a default policy that initiates at installation. This policy has a filter set for .tmp files. Please refer to Section 4.2.2 – Edit Default Policy to change the setting. 4.2.1 Add New policy Step 1: In the left window pane, click Add New Policy.
Lasso Continuous Data Protection 4.2.3 Apply a Policy Once a policy has been created, it is easy to assign the policy to one or many clients (Figure 26). Step 1: Select Lasso Clients in the top Menu Bar. Step 2: Highlight the Lasso Client that you want to assign a policy to. Step 3: Select Update Client Policy in the left window pane and click the policy that you want to establish for the client. Figure 26 4.2.4 Edit Policy Step 1: Highlight the policy you wish to edit.
Lasso Continuous Data Protection 4.2.5 Remove Policy Step 1: Highlight the policy to be removed. Step 2: In the left window pane, click Remove Policy. Step 3: A Warning Screen will appear and select Yes at the warning to remove the policy (Figure 28). Figure 28 Lasso CDP – Administration Tool Guide @2005, All Rights Reserved.
Lasso Continuous Data Protection 4.3 Reports 4.3.1 CDP Client Summary Step 1: Highlight the report you wish to run. Step 2: Click Save HTML Report in the left window pane. Step 3: Select the location to save the report and click OK to run the report (Figure 29). Figure 29 4.3.2 CDP Remote Sharing Overview Step 1: Highlight the report you wish to run. Step 2: Click Save HTML Report in the left window pane. Step 3: Select the location to save the report and click OK to run the report (Figure 30).
Lasso Continuous Data Protection 4.4 Individual Client Management The Lasso Clients section gives the IT administrator a summary view of all Lasso Clients attached the Lasso CDP Appliance (Figure 31)and the ability to drill down and administer each individual Client (Figure 32). Note: Please refer to the Client User Guide for detailed instructions on how use the Client tool. Figure 31 Figure 32 Lasso CDP – Administration Tool Guide @2005, All Rights Reserved.
Lasso Continuous Data Protection 4.4.1 Add New Client Step 1: In the left window pane, select Add New Lasso Client. Step 2: Enter a Lasso Client Name, and click Add Client to complete (Figure 33). Figure 33 4.4.2 Edit Client Name Step 1: Highlight the client you wish to rename. Step 2: Select Edit Client Name in the left window pane. Step 3: Enter the new name and click Rename to complete (Figure 34). Figure 34 Lasso CDP – Administration Tool Guide @2005, All Rights Reserved.
Lasso Continuous Data Protection 4.4.3 Remove Client Step 1: Highlight the client you want to remove. Step 2: Select Remove Client in the left window pane. Step 3: A Warning Screen will appear and select Yes to Remove the individual Client from the Lasso CDP Appliance (Figure 35). Figure 35 4.4.4 Update Client Policy Step 1: Highlight the appropriate Client Step 2: Select Update Client Policy in the left window pane.
Lasso Continuous Data Protection 4.4.5 System The system status section provides a summary view of an individual Client (Figure 37). Figure 37 Lasso CDP – Administration Tool Guide @2005, All Rights Reserved.
Lasso Continuous Data Protection 4.4.6 Folders The IT Administrator can setup folders that will be continuously backed up to the Lasso CDP Appliance and restore files that have already been backed up to the Lasso CDP Appliance. 4.4.6.1 Add New Folder for Backup Step 1: Select Add New Folder from the left window pane. Step 2: Enter the absolute path of the Client folder you want to set for continuous data protection and click Save to complete (Figure 38). Figure 38 4.4.6.
Lasso Continuous Data Protection 4.4.6.3 Remove All Old File Versions This feature gives the IT Administrator the ability to clean up the Lasso CDP Appliance by removing all old file versions from any folder set for backup. Step 1: Highlight the folder for clean up. Step 2: Select Remove All Old File Versions for the left window pane. Step 3: Click Yes when prompted to complete (Figure 40). Figure 40 4.4.6.4 Share Folder Any folder set for backup can be shared with employees, customers, partners, etc.
Lasso Continuous Data Protection 4.4.6.5 Backup Folder Offsite To make sure a folder is backed up to a secure offsite location for disaster protection and recovery: Step 1: Select Backup Folder Offsite in the left window pane. Step 2: Check the box to enable the feature (Figure 42). Figure 42 4.4.6.6 Recover a Folder Recover a folder for any Lasso CDP Client. Step 1: Highlight the folder to be recovered. Step 2: Select Save To Location in the left window pane.
Lasso Continuous Data Protection 4.4.7 Application Backup 4.4.7.1 Add Application for Backup Step 1: Select Add Application in the left window pane. Step 2: Select the appropriate application in the Applications window. The applications can also be added for offsite backup if required. Step 3: Select Add to complete (Figure 44). Note: with the exception of Outlook and Outlook Express, only applications that are installed on your local PC will appear in Add Application Backup dialog box. Figure 44 4.4.7.
Lasso Continuous Data Protection 4.4.7.3 Microsoft Exchange Please note that Exchange cannot be added from the Administration Tool. Step 1: Open the Lasso client on the Exchange server Step 2: Go to Applications and add Microsoft Exchange. (Please see ‘1.3.5.2 - Microsoft Exchange’ section of the Client Guide for additional information.
Lasso Continuous Data Protection 4.4.7.4 Restore Application Step 1: Select the application that you want to restore. Step 2: In the left window pane, select Restore a File Version. Step 3: Select the file version for restore and then the directory that you want to restore to and click Save to Location (Figure 45). Note: Remote Folder Restore via Administration tool will be restored locally by default. For use by client restored folder must be sent to client machine.
Lasso Continuous Data Protection 4.4.8 Manage Offsite Data 4.4.8.1 Add Folder for Offsite Backup In the Lasso Client Offsite Data section: Step 1: Highlight Offsite Folders and select Add Offsite Folder from the left window pane. Step 2: Highlight the folder you want to set for offsite backup. Step 3: Click Add to complete (Figure 47). Figure 47 4.4.8.
Lasso Continuous Data Protection 4.4.9 Contacts Manage contacts for remote access and file sharing. 4.4.9.1 Add Contact In the Lasso Client Contacts section: Step 1: Select Add Contact from the left window pane. Step 2: Enter Contact Name and Email into the window Step 3: Click Save to complete (Figure 49). Figure 49 4.4.9.2 Add Folder Share In the Lasso Client Contacts section: Step 1: Highlight the contact you want to share a folder with. Step 2: Select Add Folder Share in the left window pane.
Lasso Continuous Data Protection 4.4.9.3 Remove Folder Share In the Lasso Client Contacts section: Step 1: Double click on the contact you want to remove a folder share from. Step 2: Highlight the appropriate folder and select Remove Folder Share in the left window pane. Step 3: Select Yes to complete (Figure 51). Figure 51 4.4.9.4 Edit Contact In the Lasso Client Contacts section: Step 1: Highlight the contact you want to edit. Step 2: Select Edit Contact in the left window pane.
Lasso Continuous Data Protection 4.4.9.5 Delete Contact In the Lasso Client Contacts section: Step 1: Highlight the contact you want to delete. Step 2: Select Delete Contact in the left window pane. This process will remove the Contact and all associated shares (Figure 53). Figure 53 4.4.10 Share for Client View all shared data from and accessible to an individual Client. 4.4.10.1 Save to Location In the Lasso Client Contacts section: Step 1: Highlight the folder.
Lasso Continuous Data Protection 4.4.10.2 Manage Shares Any folder set for backup can be shared with employees, customers, partners, etc. To share a folder: (Figure 55) Step 1: Highlight the folder and select Manage Shares from the left window pane. Manage Shares shows current shares for this folder. Step 2: Select Add New Share to find an existing contact or a local Lasso Client you want to share the folder with. Step 3: Select the contact or client and click Share to complete the process.
Lasso Continuous Data Protection 5 Disaster Recovery 5.1 Client If a PC/Laptop should experience an event that results in data loss, you will still be able to recover any data that you had defined for backup. Step 1: If your PC should become inoperable, please follow the prescribed restore procedures of the system which may include the re installation of the operating system, applications, or even a new PC.