
Installation guide


69
Adding a Master Engine Element
Adding a Master Engine Element
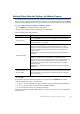
To introduce a new Master Engine to the SMC, you must define a Master Engine element that
stores the configuration information related to the Master Engine and Virtual Layer 2 Firewalls.
This section covers the basic configuration of a Master Engine element. For information on all
the options, see the McAfee SMC Administrator’s Guide or the Management Client Online Help.
To create a Master Engine element
1. Select Configuration→Configuration→Security Engine. The Security Engine Configuration
view opens.
2. Right-click Security Engines and select New→Other→Master Engine.
3. Select Layer 2 Firewall as the role for the Virtual Security Engines that this Master Engine
will host and click OK. The Master Engine Properties dialog opens.
4. Give the element a unique Name.
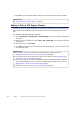
5. Select the Log Server to which the Master Engine sends its log data.
6. (Optional) Define one or more DNS IP Addresses. These are the IP addresses of the DNS
server(s) that the Master Engine uses to resolve domain names. There are two ways to
define IP addresses.
•To enter a single IP address manually, click Add and select IP Address. Enter the IP
address in the dialog that opens.
•To define an IP address using a network element, click Add and select Network Element.
Select an existing element, or go to Tools→New and define a new element.
7. Select the Location for this Master Engine if there is a NAT device between this Master
Engine and other SMC components. See Defining Locations (page 29) for more
information.
8. (Optional) If you do not need to use clustering on the Master Engine, select one of the
nodes and click Remove Node. You are prompted to confirm that you want to delete the
selected node. Click Yes.
What’s Next?
If you want to add more nodes to the Master Engine, continue by Adding Nodes to a
Master Engine (page 70).
Otherwise, continue by Adding a Virtual Resource Element
(page 70).