
User guide

53
VirusScan
®
8.6 for Mac User Guide Integrating with ePolicy Orchestrator 4.0
Systems
5
Creating a new eUpdate task
1 Using an administrative account, log on to the ePolicy Orchestrator server.
2 Click
Systems | System Tree and choose a desired group.
3 From the Client Tasks, select the desired group in the System Tree for which you want
to create the eUpdate task.
4 Click
Create Task. The Client Task Builder page appears.
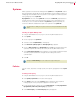
5 Under
Description, type a Name and Notes (if required) for the eUpdate task.
6 Choose eUpdate Task (VirusScan 8.6) as the Type of the task and click Next.
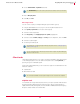
7 Schedule the task as desired and click Next to view the Summary of the eUpdate task,
which includes the
Name, Notes, Product, Type of the task, and the Schedule
information.
8 Click Save.
9 Send an agent wake-up call.
On-Demand scan task
You can create any number of on-demand scan schedules. The scan schedules can be
configured to run at set intervals or can be run at any time by the user.
Creating an on-demand scan task
1 Using an administrative account, log on to the ePolicy Orchestrator server.
2 Click
Systems | System Tree | Client Tasks.
3 Select the desired group in the
System Tree for which you want to create the
on-demand scan task.
4 Click
Create Task. The Client Task Builder page appears.
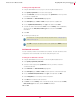
5 Under
Description, type a Name and Notes (if required) for the on-demand scan task.
6 Choose On Demand Scan (VirusScan 8.6) as the Type of the task and click Next.
7 Under
Configuration, choose a policy from the drop-down.
8 Click
Next and schedule the task as desired.
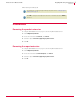
9 Click Next to view the Summary of the on-demand scan task, which includes the Name,
Notes, Product, Type of the task, and the Schedule information.
10 Click
Save.
Note
For instructions on sending an agent wake-up call, please refer to Sending an Agent
Wakeup Call on page 51.
Note
Click Edit to change the description/schedule of an eUpdate task or Delete to remove it.