User Guide Revision 1.0 ® VirusScan for Mac Version 8.
COPYRIGHT Copyright © 2007 McAfee, Inc. All Rights Reserved. No part of this publication may be reproduced, transmitted, transcribed, stored in a retrieval system, or translated into any language in any form or by any means without the written permission of McAfee, Inc., or its suppliers or affiliate companies.
Contents 1 Introducing VirusScan for Mac 5 What’s in this guide? . . . . . . . . . . . . . . . . . . . . . . . . . . . . . . . . . . . . . . . . . . . . . . . 5 What is VirusScan? . . . . . . . . . . . . . . . . . . . . . . . . . . . . . . . . . . . . . . . . . . . . . 5 What you can do with VirusScan . . . . . . . . . . . . . . . . . . . . . . . . . . . . . . . . . . . 5 What’s new in this release . . . . . . . . . . . . . . . . . . . . . . . . . . . . . . . . . . . . . . . . 6 VirusScan features . . .
® VirusScan 8.6 for Mac User Guide Contents Introducing ePolicy Orchestrator console . . . . . . . . . . . . . . . . . . . . . . . . . . . 32 Installation . . . . . . . . . . . . . . . . . . . . . . . . . . . . . . . . . . . . . . . . . . . . . . . . . . . . . . 33 Introduction . . . . . . . . . . . . . . . . . . . . . . . . . . . . . . . . . . . . . . . . . . . . . . . . . . 33 Checking in NAP files to manage VirusScan . . . . . . . . . . . . . . . . . . . . . . . . .
1 Introducing VirusScan for Mac What’s in this guide? This guide introduces VirusScan for Mac 8.6 and provides the following information on how to keep your computer free of viruses: Overview of the product. Descriptions of product features. Descriptions of all new features in this release of the software. Detailed instructions for installing the software. Detailed instructions for configuring and deploying the software. Procedures for performing tasks.
VirusScan® 8.6 for Mac User Guide Introducing VirusScan for Mac VirusScan features With VirusScan, you can scan a single file, a file directory, your whole drive, or mounted volumes such as CDs, .DMG files, network mounted files, Apple Mail messages, and USB devices such as pen drives, iPods and cameras. Advanced heuristic scanning detects previously unknown macro and program viruses. What’s new in this release Support for Mac OS X Leopard (10.
VirusScan® 8.6 for Mac User Guide Introducing VirusScan for Mac VirusScan features To access the On-Demand scanner, drag the file(s) you want to scan and drop them into the VirusScan icon or into the drop-zone in the console. On-Access scanner The On-Access scanner provides continuous monitoring of all files in use to determine if a virus or other potentially unwanted code is present.
VirusScan® 8.6 for Mac User Guide Introducing VirusScan for Mac Audience ePolicy Orchestrator Manageability VirusScan integrates with McAfee ePolicy Orchestrator versions 3.6 (patch 2), 3.6.1, and 4.0 allowing you to use this software in a managed environment. The ePolicy Orchestrator software provides a central hub of McAfee System Protection Solutions.
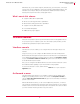
VirusScan® 8.6 for Mac User Guide Introducing VirusScan for Mac Getting product information Note: Supplemental information; for example, another method of executing the same command. Note Tip: Suggestions for best practices and recommendations from McAfee for threat prevention, performance and efficiency. Tip Caution: Important advice to protect your computer system, enterprise, software installation, or data.
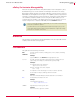
VirusScan® 8.6 for Mac User Guide Introducing VirusScan for Mac Getting product information Links from within the product The Help menu in the product provides links to some useful resources: VirusScan Help Submit a Sample Technical Support Virus Information Library VirusScan Help Use this link to access the online Help topics for the product. Submit a sample Use this link to submit potentially infected files to McAfee for analysis.
VirusScan® 8.6 for Mac User Guide Introducing VirusScan for Mac Contact information Contact information Threat Center: McAfee Avert® Labs http://www.mcafee.com/us/threat_center/default.asp Avert Labs Threat Library http://vil.nai.com Avert Labs WebImmune & Submit a Sample (Logon credentials required) https://www.webimmune.net/default.asp Avert Labs DAT Notification Service http://vil.nai.com/vil/signup_DAT_notification.aspx Download Site http://www.mcafee.
VirusScan® 8.
2 Installing VirusScan for Mac This section gives information on installing the VirusScan software and includes details on: System requirements Installing VirusScan Upgrade installation Testing your installation Uninstalling VirusScan System requirements To install VirusScan for Mac software, you require PowerPC or Intel based Mac computer, Mac OS X Tiger (10.4.6 or later) or Mac OS X Leopard (10.5) operating system, 512 MB (or higher) RAM, minimum 45 MB of free disk space.
VirusScan® 8.6 for Mac User Guide Installing VirusScan for Mac Upgrade installation With VirusScan you use the eUpdate feature to connect to a Web location and download new DAT files. To find out more about eUpdate and other VirusScan features, see Getting Started on page 17. You must have administrative privileges to install this product. Note Standard installation You can install VirusScan using the VirusScan install file, either on the product CD or in the installation .
VirusScan® 8.6 for Mac User Guide Installing VirusScan for Mac Testing your installation Testing your installation You can test VirusScan by using the European Institute of Computer Anti-Virus Research (EICAR) standard anti-virus test file. This file is a combined effort by anti-virus vendors throughout the world to implement one standard by which customers can verify their anti-virus software. To test your installation: 1 Go to the EICAR.ORG website http://www.eicar.
VirusScan® 8.
3 Getting Started This chapter describes VirusScan, and how it helps keep your computer free of viruses. It includes the following topics: Using the VirusScan console Configuring the scanners Using the On-Demand scanner Using the On-Access scanner Updating DAT files Using the VirusScan Schedule Editor Using the VirusScan console The VirusScan console allows you to use and configure On-Demand scanning and On-Access scanning.
VirusScan® 8.6 for Mac User Guide Getting Started Using the VirusScan console Close, minimize, maximize, and hide tool bar buttons to resize or hide the interface. Figure 3-1 VirusScan console Toolbar The toolbar displays these buttons: Saves the virus scan report as a Rich Text File (.RTF). Clears the current report showing on the status panel. Prints the current report. Allows you to schedule a scan task and an eUpdate task.
VirusScan® 8.6 for Mac User Guide Getting Started Configuring the scanners Configuring the scanners You can configure the settings for both the On-Demand scanner and the On-Access scanner using the Preferences dialog box. Two versions of this dialog box are available; one for configuring the On-Demand scanner, the other for the On-Access scanner. Both scanners have the same general preferences, while advanced scanning options are scanner-specific.
VirusScan® 8.6 for Mac User Guide Getting Started Configuring the scanners Figure 3-2 General preferences 2 Select your general scanning preferences for the On-Demand and On-Access scanners; Table 3-1 shows the available general preferences. Table 3-1 General preferences for On-Demand and On-Access scanners Automatically check for virus definition updates Enables/disables automatic eUpdates. On-Access Scanning Enables/disables On-Access scanning.
VirusScan® 8.6 for Mac User Guide Getting Started Configuring the scanners Table 3-1 General preferences for On-Demand and On-Access scanners Customize eUpdate Server Settings Manages your update server with user name and password. Click Customize to modify the FTP settings for eUpdate. Exclude specific disks, files and folders Configures your scanning exclusions. If this is not selected, you will not have any exclusions set. To add an exclusion: Click Add in the Exclude File or Folder list.
VirusScan® 8.6 for Mac User Guide Getting Started Configuring the scanners . Figure 3-3 On-Demand preferences 4 Select your advanced scanning preferences for the On-Demand scanner, Table 3-2 shows the available preferences. Table 3-2 Advanced Preferences for On-Demand scanner Scan contents of archives and compressed files Sets the selected scanner to scan into archives and other compressed files. On by default for On-Demand scanner.
VirusScan® 8.6 for Mac User Guide Getting Started Configuring the scanners Table 3-2 Advanced Preferences for On-Demand scanner Selects the primary action for the On-Demand scanner. When a virus is found: Clean Delete Notify Delete when Clean fails or is not available Selects the secondary action for the On-Demand scanner. This is available only when the primary action is Clean. 5 Click Lock to prevent changes to the preferences.
VirusScan® 8.6 for Mac User Guide Getting Started Configuring the scanners . Figure 3-4 On-Access preferences 4 Select your scanning preferences for the On-Access scanner; Table 3-3 shows the available preferences. Table 3-3 Advanced Preferences for On-Access scanning Scan contents of archives and compressed files Sets the selected scanner to scan into archives and other compressed files. On by default for the On-Access scanner. Note that the On-Access scanner will not scan inside stuffit archives.
VirusScan® 8.6 for Mac User Guide Getting Started Using the On-Demand scanner Table 3-3 Advanced Preferences for On-Access scanning Scan files on network volumes Sets the scanner to scan files accessed from network volumes. Scan files: Determines if the On-Access scanner is to scan files that are read from the disk, written to the disk, or both. Always Read Write Maximum scan time The maximum length of time, in seconds, that a scan can last per file.
VirusScan® 8.6 for Mac User Guide Getting Started Using the On-Access scanner A scan report appears in the Reporting window. The report notes the time of the scan, the total files scanned, and the actions taken. The console shows the status of the scan in a line between the drag-and-drop pane and the report panel. The status panel shows Idle when it is not scanning.
VirusScan® 8.6 for Mac User Guide Getting Started Updating DAT files McAfee FTP server By default, VirusScan is configured to access the McAfee FTP server to download the latest DAT files. After you install VirusScan, it automatically connects to the FTP server to download and update your DAT files while you are connected to the Internet.
VirusScan® 8.6 for Mac User Guide Getting Started Using the VirusScan Schedule Editor Example: 1 Create a directory named "commonupdater" under your ftp server's top level directory. 2 Open ftp://ftp.mcafee.com/commonupdater. 3 Download the following files from ftp://ftp.mcafee.com/commonupdater/ to /commonupdater/ location: oem.ini all .gem files gdeltaavv.ini 4 Download ftp://ftp.mcafee.com/commonupdater/current/VSCANDAT1000/DAT/0000/avvd at-xxxx.
VirusScan® 8.6 for Mac User Guide Getting Started Using the VirusScan Schedule Editor 2 Click New Scan Task . An Untitled dialog box appears. Figure 3-5 New Scan dialog box 3 Name the task. Use a name that describes the scan you are scheduling. 4 Click Set to specify the Date & Time of the scheduled scan. 5 Choose the items you want scanned. You can do this by: Dragging and dropping items into the Scan Items pane. Clicking on the Scan Items pane. A Choose Item dialog box appears.
VirusScan® 8.6 for Mac User Guide Getting Started Using the VirusScan Schedule Editor eUpdate is programmed to check for new updates on its own. However, you can schedule additional eUpdates or modify the existing schedule. To schedule an eUpdate: 1 From the View menu, select Scheduled Tasks. The VirusScan Schedule Editor dialog box appears. 2 Click New eUpdate Task. An Untitled window appears. Figure 3-6 New eUpdate dialog box 3 Type a name for the task.
4 Integrating with ePolicy Orchestrator 3.6 Introduction This section describes how to configure VirusScan for Mac using McAfee ePolicy Orchestrator® management software versions 3.6 and 3.6.1. To use this guide effectively, you need to be familiar with ePolicy Orchestrator. For more information, see the ePolicy Orchestrator Product Guides.
VirusScan® 8.6 for Mac User Guide Integrating with ePolicy Orchestrator 3.6 Introduction Prerequisites for using ePolicy Orchestrator to manage VirusScan for Mac Before you can use the ePolicy Orchestrator software to manage VirusScan for Mac: Check in the appropriate Network Associate Package (.NAP) files for VirusScan for Mac in the ePolicy Orchestrator software repository. Check in the Non-Windows Agent (NWA) file to the ePolicy Orchestrator repository.
VirusScan® 8.6 for Mac User Guide Integrating with ePolicy Orchestrator 3.6 Installation The console’s appearance changes to reflect the items you have selected in the console tree or in the details pane. For detailed information about using ePolicy Orchestrator, refer to the ePolicy Orchestrator Product Guides. Note Installation Introduction The Non-Windows agent is the distributed component of ePolicy Orchestrator that must be installed on each Macintosh computer on the network.
VirusScan® 8.6 for Mac User Guide Integrating with ePolicy Orchestrator 3.6 Installation Adding Macintosh Non-Windows Agent NAP file (NWA-MAC300.NAP) To check in a Macintosh Non-Windows Agent .NAP file to the ePolicy Orchestrator server: 1 Locate the NWA-MAC300.NAP file, either on the product CD or in the installation .ZIP file that you downloaded from the McAfee web site, and save it to a temporary folder accessible from the ePolicy Orchestrator server.
VirusScan® 8.6 for Mac User Guide Integrating with ePolicy Orchestrator 3.6 Installation 5 In the Select a Software Package dialog box, browse to and select the virexExt.nap file you saved to a temporary folder in Step 1 of Adding VirusScan for Mac Report NAP file (virexExt.nap) section, and click Open to enable ePolicy Orchestrator to load the report .NAP file into the repository. Once ePolicy Orchestrator completes loading all the .NAP files, the agent will appear in the policy list in the details pane.
VirusScan® 8.6 for Mac User Guide Integrating with ePolicy Orchestrator 3.6 Installation 8 Click Install/Upgrade to continue. 9 You are required to authenticate your credentials. Type your password and click OK. The Install Software window appears. During this process, the installer will require you to authenticate the ePO Agent Configurator. Type your password and click OK. The ePO Agent Configurator dialog box appears. 10 Type the ePO Server IP address and the ePO Server Port number. Click Apply.
VirusScan® 8.6 for Mac User Guide Integrating with ePolicy Orchestrator 3.6 Uninstallation 5 When the silent installation completes, the Terminal window shows: Figure 4-2 Terminal window - Install/Upgrade complete You have successfully installed/upgraded your ePolicy Orchestrator Agent for Mac OS X. Installing VirusScan for Mac Refer to the section Installing VirusScan for Mac on page 13 for details on installing the software on Macintosh computers.
VirusScan® 8.6 for Mac User Guide Integrating with ePolicy Orchestrator 3.6 Setting policies within ePolicy Orchestrator Removing ePolicy Orchestrator Agent from VirusScan for Mac You can uninstall the ePolicy Orchestrator Agent from a Macintosh computer. To uninstall ePolicy Orchestrator agent using the command line: 1 Log in with administrative rights. 2 Go to the /Library/NETAepoagt directory. 3 Run cmduninst.
VirusScan® 8.6 for Mac User Guide Integrating with ePolicy Orchestrator 3.6 Setting policies within ePolicy Orchestrator To modify policies for VirusScan for Mac in ePolicy Orchestrator: 1 Log on to the ePolicy Orchestrator server. 2 In the console tree under ePolicy Orchestrator | | Directory, select the site, group, single computer, or the entire directory to which these policies are to apply. The Policies, Properties, and Tasks tabs appear in the details pane.
VirusScan® 8.6 for Mac User Guide Integrating with ePolicy Orchestrator 3.6 General tab General tab The General tab allows you to enforce general policies controlling overall functioning of VirusScan for Mac, such as automatically checking for virus definitions updates, performing On-Access scans, logging scan results, and creating exclusion lists for specific disks, files and folders.
VirusScan® 8.6 for Mac User Guide Integrating with ePolicy Orchestrator 3.6 On-Access scanner tab On-Access scanner tab The On-Access scanner tab allows all files that are currently in use to be scanned automatically to determine if a virus or other malware is present. A scan takes place whenever a file is read from the disk, and/or written to the disk, either by the user or by system processes.
VirusScan® 8.6 for Mac User Guide Integrating with ePolicy Orchestrator 3.6 On-Demand scanner tab On-Demand scanner tab The On-Demand scanner tab allows you to initiate a scan at any time by dragging and dropping selected files into the console or through a File Open dialog box. With the On-Demand scanner, you can select multiple files, directories, or volumes. Scan results are summarized in a report that can be saved or printed.
VirusScan® 8.6 for Mac User Guide Integrating with ePolicy Orchestrator 3.6 Scheduling scans and eUpdates Scheduling scans and eUpdates When VirusScan for Mac scans for viruses, it uses information in the DAT files to find and remove viruses. Many new viruses are discovered daily, and McAfee regularly creates new DAT files to provide protection from these viruses.
VirusScan® 8.6 for Mac User Guide Integrating with ePolicy Orchestrator 3.6 Scheduling scans and eUpdates 2 Click Settings. The Where page appears where you can include files and directories in the scheduled scan. Include these files and directories in the scan. Configures your scanning inclusions. Add inclusion: Click Add, you will see the Add Scan Item -- Web Page dialog . Type the full path of the file, directory or disk you want to include and click OK.
VirusScan® 8.6 for Mac User Guide Integrating with ePolicy Orchestrator 3.6 Scheduling scans and eUpdates Delay missed task by Click Advanced on the Advanced Schedule Options dialog box. When running missed tasks, selecting this option sets a delay after the Macintosh computer becomes available before the missed tasks run. Start Date / End Date Click Advanced on the Advanced Schedule Options dialog box.
VirusScan® 8.6 for Mac User Guide Integrating with ePolicy Orchestrator 3.6 Viewing ePolicy Orchestrator properties 3 Deselect Inherit. 4 Select Run eUpdate and then select Inherit. 5 Click OK to return to ePolicy Orchestrator Scheduler dialog box. Viewing ePolicy Orchestrator properties From ePolicy Orchestrator server, you can view various system properties. To view the properties: 1 In the console tree, select the server for which you want to view settings.
VirusScan® 8.6 for Mac User Guide Integrating with ePolicy Orchestrator 3.6 Reports ePolicy Orchestrator reports allow you to: Set a directory filter to gather only the information that you want to view. When setting this filter you can choose which part of the ePolicy Orchestrator console tree is included in the report. Set a data filter, by using logical operators, to define precise filters on the data returned by the report.
VirusScan® 8.6 for Mac User Guide Integrating with ePolicy Orchestrator 3.6 Reports 4 A report for Agent Versions is generated. Figure 4-4 Sample report - Agent Versions Configuring reports There are several ways in which you can control what data appears on reports.
5 Integrating with ePolicy Orchestrator 4.0 Introduction This chapter describes how to configure VirusScan using McAfee ePolicy Orchestrator management software version 4.0. To use this chapter effectively, you need to be familiar with ePolicy Orchestrator 4.0. ePolicy Orchestrator 4.0 provides a scalable platform for centralized policy management and enforcement on your security products and systems on which they reside.
VirusScan® 8.6 for Mac User Guide Integrating with ePolicy Orchestrator 4.0 Introducing ePolicy Orchestrator 4.0 Dashboard 2 Click Configuration | Extensions | Install Extension. The Install Extension dialog box appears. 3 Click Browse, select the extension file VIREXREPORTS.ZIP and click OK. Introducing ePolicy Orchestrator 4.0 Dashboard Dashboards are a collection of pre-configured and/or user-selected monitors that provide current data about your detections.
VirusScan® 8.6 for Mac User Guide Integrating with ePolicy Orchestrator 4.0 Systems Systems All the systems in the network are managed in the Systems tab. The System Tree contains all systems that are managed by the ePolicy Orchestrator. It is the primary interface for managing policies and tasks on these systems. You can organize or sort these systems into logical groups in the System Tree. My Organization is the root of the System Tree.
VirusScan® 8.6 for Mac User Guide Integrating with ePolicy Orchestrator 4.0 Systems 6 Choose McAfee Default or My Default as desired. The McAfee Default policies are read-only and cannot be edited, renamed, or deleted. Note 7 Enter a New policy name. 8 Click OK, then Save. Enforcing Policies You can enforce a policy to multiple managed systems within a group. 1 Using an administrative account, log on to the ePolicy Orchestrator server. 2 Click Systems | System Tree and choose a desired group.
VirusScan® 8.6 for Mac User Guide Integrating with ePolicy Orchestrator 4.0 Systems Creating a new eUpdate task 1 Using an administrative account, log on to the ePolicy Orchestrator server. 2 Click Systems | System Tree and choose a desired group. 3 From the Client Tasks, select the desired group in the System Tree for which you want to create the eUpdate task. 4 Click Create Task. The Client Task Builder page appears. 5 Under Description, type a Name and Notes (if required) for the eUpdate task.
VirusScan® 8.6 for Mac User Guide Integrating with ePolicy Orchestrator 4.0 Uninstallation 11 Send an agent wakeup call. Note Note For instructions on sending an agent wake-up call, please refer to Sending an Agent Wakeup Call on page 51. Click Edit to change the description/schedule of an on-demand scan task or Delete to remove it. Uninstallation Removing the product extension 1 Using an administrative account, log on to the ePolicy Orchestrator server. 2 Click Configuration | Extensions.
6 Troubleshooting This chapter provides solutions to situations that you might encounter when installing or using VirusScan software. The following topics are included: Frequently asked questions Error messages Frequently asked questions Installation Why is the installer not working? Check the platform you are trying to install VirusScan onto: it must be Mac OS X version 10.4.6 (or later) or Mac OS X Leopard version 10.5, PowerPC or Intel-based Mac computer.
VirusScan® 8.6 for Mac User Guide Troubleshooting Frequently asked questions When VirusScan was scanning a file, I dragged-and-dropped another file to be scanned. What happened to the file? During a scan, you cannot add files to the scanning queue. Dragging multiple items simultaneously queues the scan; that is, dragging-and-dropping three folders or files would cause the scanner to perform three scans. Dragging one folder containing multiple files causes the scanner to perform one scan.
VirusScan® 8.6 for Mac User Guide Troubleshooting Error messages Why can’t I connect to the eUpdate Server to perform an unscheduled eUpdate? Check to see if you are connected to the Internet. The eUpdate server may also be busy. Advanced troubleshooting After installing VirusScan, can I view the processes running? The processes that are running are VShieldScanManager and VShieldScanner.
VirusScan® 8.6 for Mac User Guide Troubleshooting Error messages Table 6-2 Error messages - VirusScan application Serial No. Message Possible Reason 3 The URL for the Virus Information Library could not be opened. Your browser may not be correctly installed. Please ensure that your browser is installed correctly. 4 An error occurred while installing the update. The eUpdate was not completed. There was an error when attempting to install the update. Please restart the eUpdate process and try again.
Glossary agent AutoUpgrade The act of automatically upgrading the agent whenever a newer version is available on the ePolicy Orchestrator server. agent installation package The Setup program and all other files needed to install the agent. agent language packages The set of files that need to be distributed to client computers to view the agent user interface in languages other than English. Agent Monitor The agent user interface that appears optionally on managed computers.
® VirusScan 8.6 for Mac User Guide Glossary Daemon A program that runs constantly and exists to handle service requests the computer system receives. The daemon program then forwards these requests to other programs or processes. DAT files Virus definition files that allow the anti-virus software to recognize viruses and related potentially unwanted code embedded in files. EICAR European Institute of Computer Anti-Virus Research.
® VirusScan 8.6 for Mac User Guide Glossary Extra DAT files Supplemental virus definition file that is created in response to an outbreak of a new virus or a new variant of an existing virus. Firewall A program that acts as a filter between your computer and the network or Internet. It can scan all traffic arriving at your computer (incoming traffic) and all traffic sent by your computer (outgoing traffic).
® VirusScan 8.6 for Mac User Guide Glossary On-Demand scanner The On-Demand scanner allows you to initiate a scan at any time by dragging and dropping selected files into the console or through a file open dialog box. You can scan multiple files, directories, and volumes. On-access scanning A continuous examination of files in use to determine if a virus or other malware is present. It can take place whenever a file is read from the disk, and/or written to the disk.
® VirusScan 8.6 for Mac User Guide Glossary VirusScan Console The most common user interface for VirusScan. This console allows you to configure the On-Demand scanner and the On-Access scanner, run On-Demand scans, and start eUpdates. VirusScan Schedule Editor Allows you to schedule additional virus definition and software updates.
® VirusScan 8.
Index A creating 45 agent On-Demand scanner eUpdates installing standard installation 35 system requirement 33 audience 8 on-demand scanner unscheduled 30 command line 36 silent installation 36 configuring 21 scheduling 29 introduction 6 evaluating McAfee products, download website 11 on-demand scanning 42 G P General preferences Avert Labs Threat Center 11 using 25 preferences configuring 19 Avert Labs Threat Library 11 general troubleshooting information B glossary 59–63 automat
® VirusScan 8.
Copyright © 2007 McAfee, Inc. All Rights Reserved. mcafee.