
Product Manual
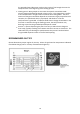


ASSEMBLY
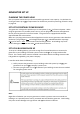
)1 giF( tekcarb gnippihs evomeR
Remove and discard the RED shipping bracket and moun ng hardware before star ng
the generator.
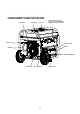
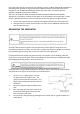
)2 giF( sleehw gnihcattA
Parts needed – 2 wheels, 2 axles, 2 locking pins, 4 washers, 2 hub caps and 2 self-
tapping screws.
Raise or
t generator so you can slide the wheel axle pin into the wheel, the washer,
the wheel moun
ng hole located on the site of the frame and the other washer.
Secure the wheel assembly by reinser
ng a pin through the hole at the end of the wheel
axle and pressing un
it locks into place.
Install the hub cap on the wheel un
“click”. Install self-tapping screw un the screw is
snug.
Repeat process on the other side of the generator to install the second wheel.
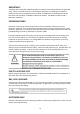
)3 giF( teef gnitroppus gnillatsnI
Parts needed – 2 rubber feet & 2 MB screws.
Raise the front end of the generator high enough
to gain access to the bo
om of the frame. Securely
posi
on props underneath to support.
Line up holes on the support leg bracket to the
holes on the front of the generator frame.
A
ach the support leg using M8 screws.
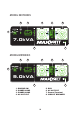
yrettaB gnihcattA
Parts needed – black and red ba
ery cable.
First, connect the red cable to the posi
e (+)
ba
ery terminal first.
Remove the screw from the ba
ery terminal.
Place the screw through the eyelet and
hten the screw and make sure the terminal
will not touch any part of the frame.
Install the red protec
on boot
Repeat these steps for the black (-) terminal.
support
rubber pad
flange bolt