
User manual


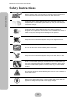
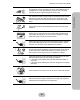
Table Of Contents
- Maxtronic_Orion410PT_UGTOC.pdf
- preface.pdf
- Preface
- About this Manual
- Copyright Notice
- Conventions
- This symbol is used to remind users to pay attention to important descriptions regarding usage and maintenance (repair) or additional important information related to this Orion 410ST NAS System.
- This symbol is used to provide users with useful information that can make procedures such as configuration easier to accomplish.
- Safety Instructions
- Limited Warranty
- EMC Certificate
- Chapter1.pdf
- Chapter2.pdf
- 2 Getting Started
- Hardware Installation
- Power Connection
- Network Connection
- Hard Disk Drive Installation
- 1. Connect the power cord and LAN cable.
- 2. Unlock the HDD caddy with the key provided.
- 3. Pull out the handle of the HDD caddy.
- 4. Pull out the HDD caddy and remove from the tray (four caddies).
- 5. Power on the system, and the Orion 410ST NAS System will perform startup self-configurations.
- 6. Wait until the self-configuration is complete, and the system information shows on the LCD screen, hot plug the HDD caddies with disks into the tray.
- 7. Push back the handle of the HDD caddy.
- 8. Lock the HDD caddy with the key. Keep the key safe for future use.
- 9. Start configuration either with the front control panel or the browser interface.
- 1. The HDD(s) have been initialized by the same Orion 410ST and have been performing daily routine tasks.
- 2. Performing “Disk Roaming” procedure to reduce system down time.
- a. Power off the old NAS system.
- b. Execute Factory Default on the new NAS system and then power it off.
- c. Remove the HDD(s) from the old NAS system.
- d. Insert the HDD(s) into the new NAS system. Please be sure the model and firmware of the new system are the same as the old one.
- e. Power on the new NAS system and Disk roaming is complete.
- Disk and Caddy Assembly
- Using the Front Control Panel
- Chapter3.pdf
- 3 Orion 410ST System Setup
- System Boot-up
- System Setup
- System Login
- Main Menu
- 1 Network Menus
- Since the Orion 410ST provides only one LAN connector, only ‘Channel 0’ will be shown.
- 1. Press ENT to view detailed CH0 status information.
- 2. If the LAN cable is connected, an ‘ON CONNECTED’ message will be displayed.
- 3. If the LAN cable is disconnected, an ‘ON DISCONNECTED’ message will be displayed
- 1. Use the up or down button under the 11 Channel 0 submenu to enter the ‘112CH0 IP ADDR’ and press ENT to confirm.
- 2. Press ENT again to enter the ‘Set CH0 IP’ screen. The current IP address will be displayed.
- 3. To set the IP address, press ENT again.
- 4. A flashing gray square appears. Use the up and down buttons to adjust the value of each digit. Before entering the next digit, press ENT to confirm the input.
- 5. After the IP address setup is complete, press ENT to confirm.
- 6. The system will automatically reboot after the new IP address is set.
- 1. Use the up or down button under the 11 Channel 0 submenu to enter the ‘113CH0 Netmask’ and press ENT to confirm.
- 2. Press ENT again to enter the ‘Set CH0 Netmask’ screen. The present netmask IP address will be displayed.
- 3. To set a netmask IP address, press ENT again.
- 4. A flashing gray square appears. Use the up and down buttons to adjust the value of each digit. Before entering the next digit, press ENT to confirm the input.
- 5. After the netmask IP address setup is complete, press ENT to confirm.
- 6. Press ESC to exit the netmask IP setup screen.
- 1. Use the up or down button under the 11 Channel 0 submenu to enter the ‘114Gateway’ and press ENT to confirm.
- 2. Press ENT again to enter the ‘Set CH0 Getway’ screen. The current gateway address will be displayedn.
- 3. To set a gateway address, press ENT again.
- 4. A flashing gray square appears. Use the up and down buttons to adjust the value of each digit. Before entering the next digit, press ENT to confirm the input.
- 5. After the gateway address setup is complete, press ENT to confirm.
- 6. Press ESC to exit the gateway setup screen.
- 1. Use the up or down button under the 11 Channel 0 submenu to enter the ‘116DHCP Status’ and press ENT to confirm.
- 2. The DHCP status will be displayed.
- 3. To set the DHCP status, press ENT again.
- 4. A query message appears. Use the up and down buttons to move the arrow to ‘NO’, and press ENT to confirm the selection.
- 2 System
- 1. Use the up or down button under the 21Clock submenu to enter the ‘211Date’ and press ENT to confirm.
- 2. Current date information will be displayed.
- 3. To change the date, press ENT again.
- 4. A flashing gray square appears. Use the up and down buttons to adjust the value of each digit. Before entering the next digit, press ENT to confirm the input.
- 5. Press ESC to exit the date setup screen.
- 1. Use the up or down button under the 21Clock submenu to enter the ‘212Time’ and press ENT to confirm.
- 2. Current time information will be displayed.
- 3. To change the time, press ENT again.
- 4. A flashing gray square appears. Use the up and down buttons to adjust the value of each digit. Before entering the next digit, press ENT to confirm the input.
- 5. Press ESC to exit the time setup screen.
- 1. Use the up or down button under the 22Shutdown submenu to enter the ‘221Reboot System’ and press ENT to confirm.
- 2. A query message shows on the LCD screen. Use the up or down button to select ‘Yes’ or ‘No’.
- 3. If ‘Yes’ is selected, the Orion 410ST will start rebooting automatically.
- 1. Use the up or down button under the 22Shutdown submenu to enter ‘222Halt System’ and press ENT to confirm.
- 2. A query message shows on the LCD screen. Use the up or down button to select ‘Yes’ or ‘No’.
- 3. If ‘Yes’ is selected, ‘Halt System’ will appear on the LCD screen, and the Orion 410ST will shutdown automatically.
- Use this function to shutdown the Orion 410ST NAS System properly.
- 3 Misc
- 1. Press ENT to access the ‘31Setup Passwd’ submenu under the ‘3Misc’ menu.
- 2. The current administrator password shows on the LCD screen. Press ENT again to change the password.
- 3. A flashing gray square appears. Use the up or down button to adjust the value of each digit. Before entering the next digit, press ENT to confirm the input.
- 4. After you have entered the new password, the system will ask you to confirm this password.
- 5. Enter the exact value of each digit to confirm the password.
- 3 Misc
- Resetting the Administrator Password
- Resetting to Factory Default Settings
- 1. Use the up or down button to enter the ‘Factory Default Restore Settings’ menu.
- 2. Press ENT to confirm.
- 3. A warning message shows on the LCD screen with a beep sound.
- 4. A query message shows on the LCD screen. Use the up or down button to select.
- 5. Press ENT to confirm the selection.
- 6. If ‘Yes’ is selected, you must enter the administrator password. After the administrator password is accepted, the Orion 410ST will automatically reboot.
- Chapter4.pdf
- 4 Configuring the User Interface
- Using User Interface
- 1. Open your Internet browser.
- 2. Type the IP address of the Orion 410ST into the browser address bar to access the user interface.
- 3. Log in using the administrator user name and password.
- System Status
- Quick Configuration
- Setting the Server Name
- Setting Date and Time
- 1. Select the correct date, time, area and city from the drop down boxes.
- 2. NTP server setting: To configure the Orion 410ST to connect to a NTP server to update the date and time settings, follow these steps:
- 3. After all the values are set, click ‘Update and Next’.
- 4. The Orion 410ST will update the system information.
- 5. A confirmation message will appear. Click ‘Next’ to proceed to the next step
- Setting the Network
- 1. If the IP address or subnet mask address are changed, modify the fields, entering the new IP and subnet mask addresses.
- 2. After all fields are modified, click ‘Update and next’.
- 3. The system will update all network setup information.
- 4. A confirmation message will appear. Reboot the system to apply all changes.
- 5. If ‘Reboot’ is selected, a reboot warning message appears.
- 6. The system will reboot.
- 7. Once rebooted, click ‘Login’ to log into the Orion 410ST browser interface again.
- Adding Volume
- 1. Click ‘Add’.
- 2. In the next window, there are five types to choose from: Single disk, RAID 0, RAID 1, RAID 3, and RAID 5.
- 3. Select the disks on which you want to create the new volume. Click ‘OK’ to proceed.
- 4. The system will create the volume.
- 5. The new volume is complete. Click ‘Add’ to create another new volume, or click ‘Next’ to proceed to the next step.
- Setting User Level
- Chapter5.pdf
- Appendix.pdf