
User manual


9
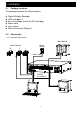
3. Configuration
3.1 Install HDD
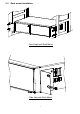
3.1.1 Installing Hard Drive into Cartridge
3.1.1.1. Pull the handle outwards to remove the carrier body away from the cartridge
frame.
3.1.1.2. Push the open button to slide the top cover backwards and remove.
3.1.1.3. Inside can be found the keys and fixing screws.
3.1.1.4. Insert the DC power cable and IDE cable on the HDD.
3.1.1.5. Position the HDD into carrier body and secure the HDD with the four 6#-32
screws provided.
3.1.1.6. Slide the top cover back to the carrier body by sliding it forward to secure.
3.1.1.7. Slide the carrier body back into the cartridge frame.
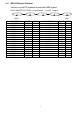
3.1.2 Function Settings and Operation
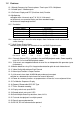
3.1.2.1 Power Indicator and HDD Access indicator
When power is on, the indicator will display the following message:
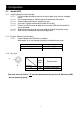
3.1.3 Key lock
Status
Segment
Power
status
Security status
A ON Locked (Irremovable)
B OFF Unlocked (Removable)
You must turn key lock to “ A ” position before powering on the unit. Otherwise HDD
will not operate properly.
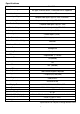
Item Indicator
Power Indicator Green LED
HDD Access Indicator Yellow LED
A
B