
Use and Care Manual

customerservice@focus-ontools.com
2
1-800-348-5004
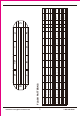
- Aluminum alloy housing
- 10FT Cable length
- 16 Selectable patterns
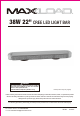
DESCRIPTION
- 38 Watt
- 2 Magnetic mounts
- Input voltage: DC12V
- 38pcs High intensity LEDS
- 12V Accessory power plug and cable included
- Product dimension: 22" L x 4-1/2" W x 1-1/2" H
FEATURE
• The vehicle should never be driven at high speeds if the light bar is magnetically mounted.
• Clean the mounting surface and dry it thoroughly before installation. Use only soap and
water to clean the outer lens. Do not use a pressure washer to clean this product.
• Inspect and operate this product regularly to confirm its proper operation and mounting
condition.
• Always check damaged or worn out parts before using the light bar. Broken parts will
affect the light bar operation. Replace or repair damaged or worn parts immediately.
WARNING:
1. The magnetic light bar should be positioned on the vehicle’s roof where the magnets
will safely secure the light bar. Before mount the light bar to the roof, be sure the
surface is clean and clear of dirt, grease and debris.
2. Locate the desired location where you wish to mount the light bar. For best results,
you should make sure the lens is unobstructed, so that the light can be seen 360°.
3. If you need to move the light bar, hold one side securely, then lift the other side of
the light bar from the room and move; repeat procedure to move the other side.
INSTALL THE LIGHT BAR
1. To turn on the light bar, insert the 12V plug into the vehicles power outlet. Press the
on/off button on the back on the 12V plug. When the light bar is operating, the LED
on the plug’s switch will illuminate.
2. To change the pattern, press the button beside to the on/off button. Memory function
keeps same pattern selected, even when the light bar is turned off.
3. To turn off the light bar, remove the 12V plug from the vehicle’s power socket or position
the on/off switch to off.
OPERATION