
Installation Guide

23
MOTOR WILL NOT RUN
POSSIBLE CAUSE
LIFT LOWERS SLOWLY OR NOT AT ALL
POSSIBLE CAUSE
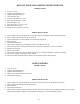
REMEDY INSTRUCTIONS
REMEDY INSTRUCTIONS
1. Panel circuit breaker ipped, (5,2,1,3,4)
2. Motor burned out, (1,2,3,6,4)
3. Voltage to motor incorrect, (2,1)
4. CE USERS ONLY: Internal motor circuit breaker ipped (7)
5. CE USERS ONLY: Fuse protecting contractor has blown (8)
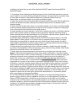
1. Check for correct voltage. Compare supply voltage with voltage on motor name tag. Check that the wire is sized
correctly. N.E.C. table 310-12 requires AWG 10 for 20 Amps. Check wall outlet voltage and wiring. Make sure unit
and wall outlet is wired properly. Motor must run at: US - 110v. CE - 230v. Check regional requirements.
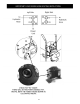
2. Check motor is wired correctly. Compare wiring of motor to electrical diagram on drawing.
3. Don’t use extension cords. According to N.E.C. : “ The size of the conductors should be such that the voltage drop
would not exceed 3% to the farthest outlet for power”. Check regional requirements.
4. Replace with new part.
5. Reset circuit breaker / fuse at panel.
6. Return unit for repair.
7. Reset circuit breaker inside motor junction box. Do not open junction box with power unit plugged in/energized.
8. Replace fuse accessible from outside motor junction box with a 1A or less rated equivalent. Do not replace with
power unit plugged in/energized.
1. Flow divider is installed upside down, (1)
2. Cylinders / lift head binding, (2)
3. Lowering valve clogged, (6,5,3,4)
4. Safety mechanism engaged or binding, (7,2,4,3)
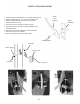
1. Ensure the ow divider in installed correctly. Refer to page 13.
2. Consult lift manufacturer.
3. Replace with new part.
4. Return for repair.
5. Check oil. Use clean hydraulic oil (AW-32 or Dexron III or VI automatic transmission uid only). If uid is contam-
inated, replace with clean uid and clean entire system.
6. Clean lowering valve. Wash lowering valve in solvent and blow out with air.
7. Verify that the safety mechanism is disengaged prior to lowering the lift.