
User manual

57
If You’re on a Mac
The high contrast scanning, bed movement control, laser exposure and Color
exposure settings are available in Mac but there is no viewer window to aid in
setting the values. Please note that these features will be completely changed in
the upcoming UX overhaul with more user friendly controls added.
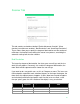
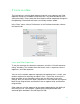
In the “Scan” menu, click on Preferences. In the Preferences window, choose
the General tab.
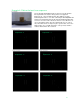
Laser and Color Exposures
To set your own laser line detection exposures, check the “Override exposure
tuning” checkbox. This enables three text boxes, Laser 1 exposures, Laser 2
exposures, and Color exposure.
You can set the camera exposure separately for capturing lasers 1 and 2, and
another exposure for capturing the object’s color. If you have an item that is
black and white or has contrasting colors and you don’t want to use auto-
settings, then you can set one laser’s exposure to a value that will best capture
black or one range of color and the other laser to capture white and the other
range of color.
Color exposure sets the exposure for the camera depending on the lighting in
the room you’re in. For example, a typical office setting with fluorescent
overhead lights would be in the mid-rage (50-150).