
User manual

49
Laser Detection
The exposure of the camera has major ramifications on the quality of the final
scan. The basic rule is that the dark-colored areas of the object will need a
bright camera exposure and the light-colored areas of the object will need a dark
camera exposure in order to best detect laser lines firing at the surface of the
object.
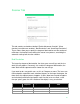
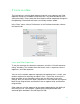
The Laser Detection tab has two sliders, and one checkbox. The top slider
(called Laser Detection Exposure) is used to set the primary laser exposure.
This is the exposure the camera will be set to when the lasers are fired, the goal
being to allow the laser to be detected in the software as accurately and
completely as possible. You want as long a laser line as possible, without gaps.
An important thing to note is clicking on the Laser Detection tab actually starts
the laser detection process (the lasers will begin firing) and the software will
start detecting the lasers. Laser Detection stops when you close the advanced
settings screen or when you click off the Laser Detection tab.
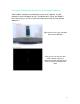
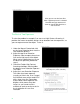
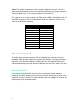
The Laser Line Detection tab (p. 49) shows a visualization of the detected laser
line. To meet the goal of “as accurately and completely as possible”, watch this
screen while adjusting the Laser Detection Exposure slider. On the next pages,
we have examples that show the progression from a dark exposure to a bright
exposure.