
User manual


45
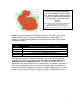
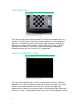
static rather than a straight solid or nearly solid line), you’ve found the exposure
that will give you the best scan results for the object.
Manual Control Tab
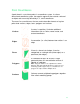
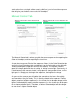
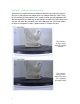
Manual Control tab w/ Color Detection tab
selected
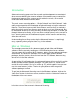
Manual Control tab w/ Laser Detection tab
selected
The Manual Control tab is where you pick the camera exposure for capturing the
Color of the object, and for capturing the laser lines.
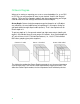
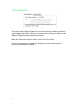
A note about exposure: Each of the exposure sliders (in the Color Detection tab
and in the Laser Detection tab) are labelled -9 on the left and 0 on the right with
-9 being the brightest exposure and 0 as the darkest. The camera shutter is
open for a longer period of time at setting -9, letting in more light. Conversely, 0
is dark because the camera shutter is only open for short period of time, so less
light gets in. Simply put, the longer the exposure, the brighter the image.
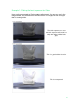
As you use the scanner you will notice that sometimes the lasers fire quickly,
and sometimes they fire slowly. This is directly related to the exposure. Darker
objects require a brighter exposure (i.e. the shutter has to be open longer) while
lighter Colored objects require a darker exposure (i.e. the shutter has to be open
for a shorter period of time). Therefore, a darker-Colored object will take longer
to scan than a lighter-Colored object.