
User manual


43
Introduction
Advanced scanning grew out of the research and development we conducted
when we were building the scanner software. We needed a way to control the
fundamental aspects of the scanner and visualize the results, so we could
understand what worked and what didn’t.
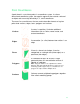
The main screen scanning options - “Single-Colored” and “Multi-Colored” - both
codify and encapsulate the knowledge we gained through using the advanced
features. These have improved with each release, and now they’ve reached a
point where their results are often as good as those you’d get in Advanced. But
to understand what they’re doing and why, the best way to explain is to take you
through Advanced scanning, so you can have a similar journey to the one we’ve
had – learning what are the fundamental aspects of the scanner and how they
affect the end result.
Understanding these things and using the Advanced features is surprisingly
easy, especially when you give them a try in the software.
Mac vs. Windows
The concepts presented in this document apply to both Mac and Windows
software. We are currently working on a UX unification plan for our software.
You can expect this by winter 2015. However, today, the two software packages
are different. As stated, the concepts in this article apply to both software
packages, but the screens discussed are from the PC software, because they
do not exist in the Mac software.
As part of the UX unification plan, the advanced features discussed in this article
will be available to both software packages. For now, there is a section at the
end of this article called If You’re on a Mac (p. 57), which explains how you can
use the same features in Mac. Thanks for your patience while we get the
software packages unified.
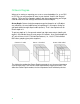
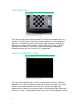
To get into the Advanced Scanning area in the Windows software, click on the
“New Scan” button in the home screen, and then click the “Advanced” button at
the bottom of the next screen.
Let’s take a tour of the screens in Advanced Scanning.